

If you’ve ever found yourself sneaking an Almond Joy from the Halloween stash or daydreaming about the rich combo of chocolate, coconut, and almonds, then ohhh, friend—you are in for a treat. This Almond Joy Cake takes all those crave-worthy flavors from the classic candy bar and transforms them into a moist, dreamy poke cake that’s just as easy to make as it is to devour.
I first made this for a potluck, thinking it would be just another fun, nostalgic dessert. But wow—it disappeared in minutes. I’m talking people going back for seconds and asking for the recipe on napkins. That’s when I knew this one had to be shared. It’s the kind of cake that hits all the right notes: gooey, crunchy, chocolatey, and just sweet enough without going overboard.
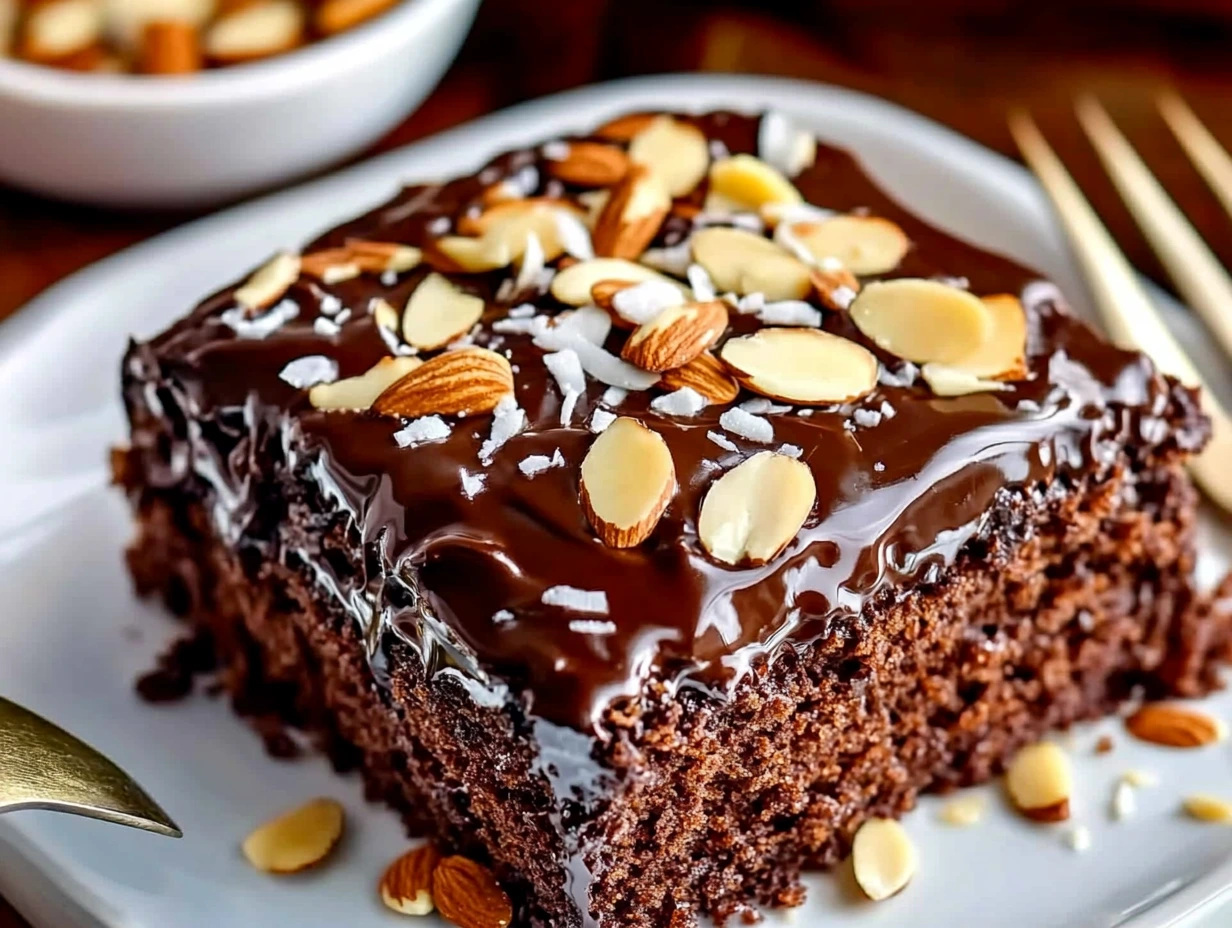
It starts with a humble boxed cake mix (yep, we’re keeping things easy here), but gets a serious flavor upgrade thanks to layers of sweetened condensed milk, coconut, a luscious chocolate glaze, and a generous sprinkle of toasty almonds on top. Every bite is a mix of soft, gooey cake and a little bit of crunch. It’s the ultimate comfort dessert—and honestly, I wouldn’t blame you if you didn’t want to share.
Let’s get baking!

Ingredients You’ll Need
1 box chocolate cake mix (devil’s food or chocolate fudge both work great)
Eggs, oil, and water (as listed on the cake mix box)
1 (14 oz) can sweetened condensed milk
1 (7 oz) bag sweetened coconut flakes
½ cup (1 stick) salted butter
1 (12 oz) bag chocolate chips (milk or semi-sweet)
⅓ cup milk (2% or higher recommended)
1 (2 oz) bag sliced or slivered almonds
STEP 1: BAKE THE CAKE
You’re starting off with your favorite boxed chocolate cake mix. I typically go for devil’s food because it has a deep, rich chocolate flavor that pairs so perfectly with the coconut and almonds. Prepare the mix exactly as the box instructs—eggs, oil, water, and all. Then pour it into a greased 9×13-inch baking dish and bake according to the package time (usually around 30-35 minutes).
Once the cake is done baking, pull it out of the oven, but don’t let it cool completely. This cake loves to soak in all the goodness while it’s still warm.
STEP 2: POKE AND POUR
Now comes the fun part: poking holes! Grab a fork and gently poke holes all over the top of your warm cake. Try to space them about an inch apart—you want enough holes so the filling can really get in there, but not so many that the whole thing falls apart.
In a medium bowl, mix together the sweetened condensed milk and the coconut flakes. Once combined, slowly pour this mixture over the warm cake. Use a spoon or spatula to help spread it out, making sure it fills in all those little holes. Some of it will sit on top, and that’s okay—that coconut topping is going to add the most amazing texture and sweetness.

STEP 3: MELT THE GLAZE
Next, let’s make that smooth, silky chocolate glaze. In a saucepan over medium heat, melt together the butter, chocolate chips, and milk. Keep stirring the entire time to avoid burning the chocolate. It should come together in a glossy, pourable consistency. Just don’t let it boil—we’re going for smooth, not scorched.
Once the glaze is ready, take it off the heat and get ready to pour it over your coconut layer.
STEP 4: SPREAD AND SPRINKLE
Pour the warm chocolate glaze over the top of the coconut-covered cake. Use the back of a spoon or an offset spatula to gently spread it out until the surface is evenly coated. While the glaze is still warm, immediately sprinkle the slivered or sliced almonds across the top. They’ll stick beautifully and add that nutty crunch we all love.
Tip: Toasting the almonds beforehand in a dry skillet or in the oven at 350°F for about 3–4 minutes really kicks their flavor up a notch. Totally optional, but highly recommended if you have a few extra minutes.
Finish, Chill & Customize
Alright, now that we’ve got our chocolate cake baked, poked, layered with coconut and soaked in that dreamy chocolate glaze, it’s time to finish things off the right way. The next steps are all about letting those flavors come together and giving the cake its signature texture—moist, rich, and layered with all that nostalgic Almond Joy magic.
Whether you’re prepping this for a party, holiday dinner, or just a cozy weekend treat, this is the part that really seals the deal.
STEP 5: LET IT COOL AND CHILL
Once you’ve added the glaze and topped everything with almonds, you’ll want to give your cake a little time to rest. Let it cool at room temperature until the top is set and the glaze has firmed up a bit. This will make it easier to slice and serve without a mess.
After that, cover the cake loosely (plastic wrap or foil is fine) and pop it into the fridge for at least 1 hour—longer if you can. Chilling allows the flavors to meld and the texture to become that perfect blend of soft cake and gooey topping. You’ll find that the sweetened condensed milk soaks further into the cake as it rests, making every bite irresistibly moist.
If you’re prepping it the night before an event, that works beautifully—just store it covered in the fridge overnight.
STEP 6: SLICE AND SERVE
Once chilled, it’s time to slice it up into neat squares and serve. A sharp knife works best here, and I like to run mine under hot water and wipe it dry between cuts. It keeps the pieces looking clean, especially if you’re serving this at a gathering or bringing it to a potluck.
This cake is rich, so smaller pieces are totally satisfying. You’ll get the gooey condensed milk and coconut layer, that silky chocolate glaze, and the crunch from those almonds all in one bite.
TIPS & VARIATIONS TO TRY
While the base recipe is truly delicious on its own, you know I can’t help but offer a few ideas to tweak or elevate things if you’re in the mood to experiment. Here are a few ways to make this Almond Joy Cake your own:
Extra Coconut Flavor: Stir a few tablespoons of sweetened coconut flakes into the cake batter before baking. It adds a subtle chew and extra coconut punch throughout the cake—not just on top.
Toasted Almonds: Lightly toast the slivered almonds in a dry skillet or in the oven for a few minutes before adding them. It brings out a deeper, nuttier flavor and adds extra crunch.
Use Different Chocolate Chips: I usually stick with semi-sweet chocolate chips for a balanced glaze, but milk chocolate chips will make it extra sweet and smooth. Dark chocolate chips are great if you prefer something less sugary.
Add a Coconut Cream Drizzle: For a pretty finish, warm a little coconut cream (or even coconut milk thickened with a touch of powdered sugar) and drizzle it over the chilled cake just before serving. It looks beautiful and really drives home the coconut vibe.
Powdered Sugar Finish: A dusting of powdered sugar over the top just before serving gives it a soft, snowy look—especially nice for winter holidays.
Turn it Into Cupcakes: Want a more portable version? Try baking the chocolate cake mix as cupcakes, then follow the same process of poking, layering, and chilling—just in miniature form!
STORAGE TIPS
This Almond Joy Cake stores really well, making it perfect for make-ahead desserts. Here’s how to keep it fresh:
Refrigerator: Cover the cake tightly with plastic wrap or foil and store in the fridge for up to 3 days. Because of the condensed milk and glaze, it stays moist and flavorful.
Serving After Chilling: Let it sit at room temperature for about 15–20 minutes before serving so the glaze softens slightly. You don’t want it too firm from the fridge—it tastes best when the layers are just a little soft and melty.
Freezing: Technically, yes, you can freeze this cake—just wrap it tightly in plastic wrap and foil. But be aware that the texture of the coconut and condensed milk layer can change slightly after thawing. I recommend enjoying it fresh when possible.
FAQ & Final Thoughts
You’ve made it through the chocolate, coconut, and almond goodness—and hopefully, your kitchen smells like a dream right now. This cake is seriously one of my favorite easy desserts because it brings the best of both worlds: all the richness of a layered treat, with none of the complicated steps or fancy equipment.
Before we wrap up, let’s go over some frequently asked questions I’ve gotten about this Almond Joy Cake. Whether it’s your first time making it or your fifth, these tips and tricks can help guarantee sweet success every time.
FAQ – Your Almond Joy Cake Questions Answered
1. Can I make this cake in advance?
Absolutely. This is actually one of those cakes that tastes even better the next day. The chill time allows the flavors to soak in and develop, and the texture just gets better. Just keep it covered and chilled until you’re ready to serve.
2. Can I use unsweetened coconut flakes instead of sweetened?
You can, but keep in mind that the overall flavor will be less sweet and more subtle. Since the original Almond Joy candy bar is quite sweet, sweetened coconut flakes are the best match for this recipe’s flavor profile.
3. What kind of chocolate chips should I use for the glaze?
It depends on your preference! Semi-sweet chocolate chips give you a balanced chocolate flavor, while milk chocolate chips will make it sweeter and more like the original candy bar. You can also go dark for a more grown-up version.
4. Do I need to toast the almonds?
You don’t have to, but it’s worth the extra 3–4 minutes. Toasting brings out a deeper flavor and gives the almonds that golden edge and satisfying crunch. Just toss them in a dry skillet over medium heat until lightly golden and fragrant.
5. Can I make this cake gluten-free?
Yes! Simply use your favorite gluten-free chocolate cake mix. Everything else in the recipe should be naturally gluten-free, but double-check the labels to be sure, especially on chocolate chips and condensed milk.
6. My glaze turned out too thick—what happened?
It may have cooked a little too long or at too high of a temperature. Be sure to melt the butter, milk, and chocolate chips gently over medium heat and stir constantly. If it’s too thick, you can add a splash more milk (1 tablespoon at a time) to loosen it.
7. Can I leave out the almonds for a nut-free version?
Definitely. If you’re serving someone with a nut allergy or simply prefer it without, just skip the almonds. The cake will still be rich and delicious with the coconut and chocolate layers alone.
Final Thoughts – Your New Go-To Crowd Pleaser
If you’re anything like me, you’re always looking for dessert recipes that deliver on flavor and simplicity. This Almond Joy Cake checks all the boxes. It’s easy to throw together with pantry staples, yet it feels totally special with its layers of gooey coconut, rich chocolate glaze, and crunchy almonds.
It’s also one of those desserts that people genuinely get excited about when they see it on the table. Whether you’re baking it for a potluck, a birthday, or just a random Tuesday when you need something sweet—it’s the kind of treat that earns you recipe requests every time.
Print
Almond Joy Cake
- Author: David
Description
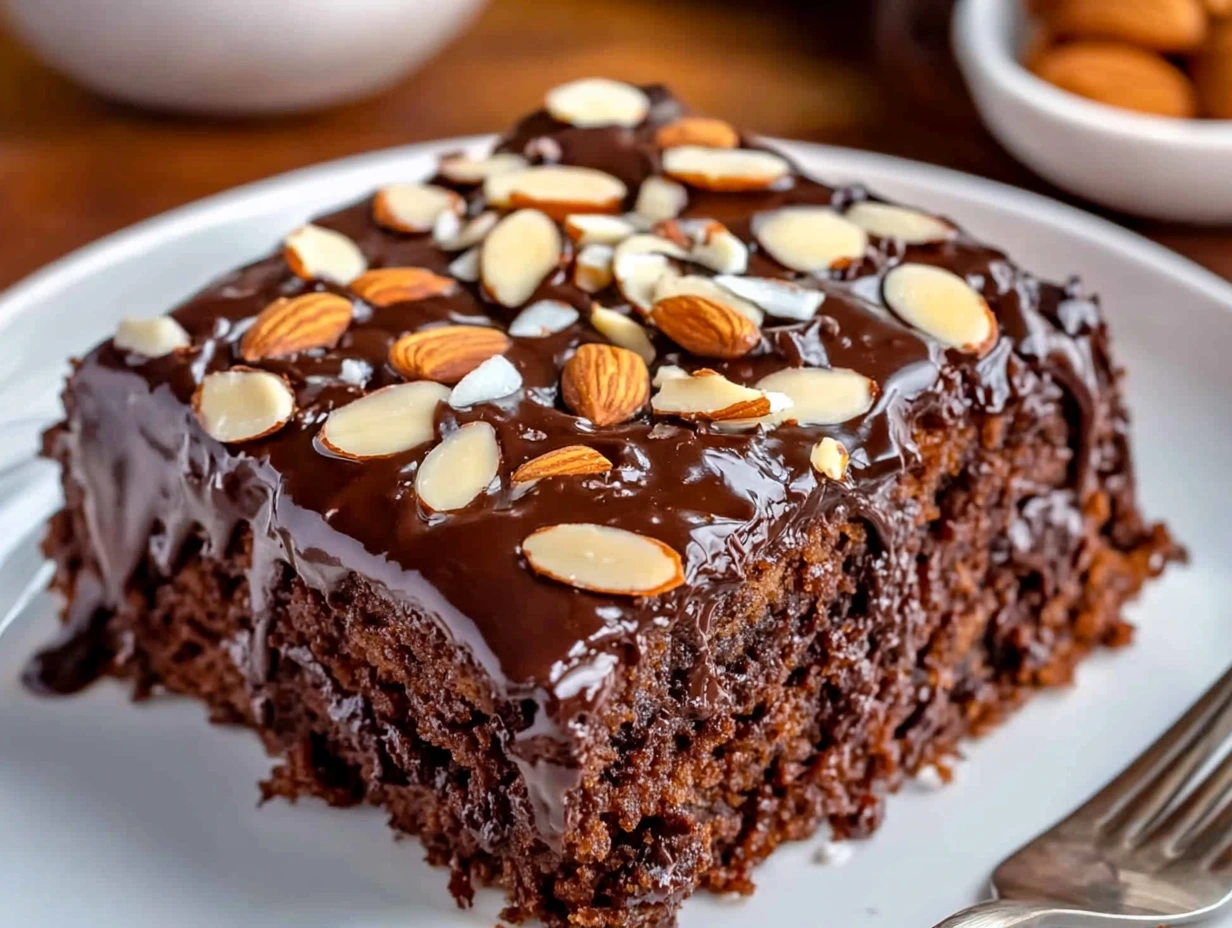
A decadent chocolate poke cake inspired by the classic candy bar, combining moist devil’s food cake with sweetened condensed milk, coconut, rich chocolate glaze and toasted almonds for irresistible layers of flavor and texture.
Ingredients
1 box chocolate cake mix (chocolate fudge or devil’s food)
Eggs, oil and water as called for on the cake mix box
14 oz can sweetened condensed milk
7 oz bag sweetened coconut flakes
½ cup (1 stick) salted butter
12 oz bag chocolate chips (milk or semi-sweet)
⅓ cup milk (2% or higher)
2 oz bag sliced or slivered almonds
Instructions
Prepare and bake the cake according to the package directions, using a 9×13-inch baking dish. Remove it from the oven while still warm.
Gently poke holes all over the top of the warm cake with the tines of a fork, spacing them about one inch apart.
In a medium bowl, stir together the sweetened condensed milk and coconut flakes until evenly combined. Pour this mixture over the cake, allowing some to seep into the holes.
In a saucepan over medium heat, melt the butter, chocolate chips and milk together, stirring constantly until smooth––do not allow the mixture to boil. Remove from the heat.
Pour the warm chocolate glaze over the coconut-topped cake, spreading it evenly with a spatula or the back of a spoon. Immediately sprinkle the slivered almonds over the surface.
Let the cake cool to room temperature so the glaze sets, then chill for at least one hour before slicing into squares.
Notes
For extra coconut flavor, fold a few tablespoons of coconut flakes into the batter before baking.
Toasting the almonds lightly in a dry skillet or in the oven for 3–4 minutes deepens their flavor and adds crunch.
Leftover cake can be covered and refrigerated for up to three days; bring to room temperature before serving for the best texture.
A drizzle of warmed coconut cream or a dusting of powdered sugar makes a pretty finishing touch.


")

")


")
