

If you’re anything like me, you love a good banana split—but let’s be honest, it’s not exactly the most convenient dessert to whip up when you’ve got a house full of guests or just want something sweet without all the scooping and topping prep. That’s exactly why this Banana Split Dump Cake is a game-changer. It takes everything you love about the classic ice cream parlor favorite—bananas, cherries, pineapple, chocolate—and turns it into a warm, bubbly, gooey cake that practically makes itself.
I first made this recipe on a whim for a family gathering, and it disappeared before I could even get a second helping. Since then, it’s become one of my favorite go-to desserts for potlucks, casual parties, or even just when we’re craving something sweet on the weekend. It’s incredibly easy to throw together, and best of all, it uses pantry staples and a box of cake mix—so you can skip the fuss and still get all the flavor.
Let’s dive into what makes this dump cake so special and walk through the first few steps to get you started on this delightful treat.
Why You’ll Love This Banana Split Dump Cake
This dessert is the perfect balance of sweet, fruity, and chocolatey. The bananas give it that familiar banana split flavor, the cherry pie filling adds a tart burst of color and taste, and the crushed pineapple ties it all together with a tropical note. Then there’s the buttery cake mix topping that turns golden and slightly crispy on the edges—truly irresistible. Oh, and let’s not forget the chocolate chips and chopped nuts that give it that signature sundae finish.
The beauty of this dump cake is that there’s no mixing bowls required. Everything gets layered right into the baking dish, and the oven takes care of the rest. It’s the ultimate fuss-free recipe for busy home bakers or anyone who loves a shortcut that still tastes homemade.
Ingredients You’ll Need
Here’s a quick look at what you’ll need to make this dessert:
2 ripe bananas, sliced
1 can (20 oz) crushed pineapple, undrained
1 can (21 oz) cherry pie filling
1 box yellow or white cake mix
½ cup mini chocolate chips
½ cup chopped walnuts or pecans (optional, but highly recommended)
1 cup unsalted butter, melted
Whipped cream (for serving)
Chocolate syrup (for drizzling)
Make sure your bananas are ripe but not overripe—they should hold their shape during baking without turning mushy.
Step 1: Preheat and Prepare
Start by preheating your oven to 350°F (175°C). Lightly grease a 9×13-inch baking dish. This step is key for ensuring that the fruit doesn’t stick to the bottom once everything starts bubbling in the oven.
Step 2: Layer the Bananas
Slice up your ripe bananas and lay them out evenly across the bottom of the dish. This creates a soft, sweet base that will caramelize beautifully as it bakes.

Step 3: Add the Crushed Pineapple
Next, pour the undrained can of crushed pineapple over the bananas. Don’t worry about the extra liquid—it helps keep the cake moist and adds to that gooey texture we’re going for.
Step 4: Spoon on the Cherry Pie Filling
Grab a can of cherry pie filling and spread it evenly over the pineapple layer. The cherries not only add a bold pop of color, but they also bring a sweet-tart flavor that cuts through the richness of the cake.
Quick Tip: If you’re not a huge fan of cherries, you can swap this out for strawberry or raspberry pie filling for a twist—but the cherries really give it that nostalgic banana split vibe.
How to Make Banana Split Dump Cake
Alright, now that we’ve got the fruity foundation of our Banana Split Dump Cake all layered and ready, it’s time for the best part—the cake topping and those indulgent finishing touches that turn this dish into a full-on dessert masterpiece.
The next few steps are where the magic really happens. If you’ve ever made a dump cake before, you know how simple this part is. But if this is your first time, get ready to be amazed at how easy and delicious this recipe is. There’s no need for fancy techniques or special equipment—just pour, sprinkle, and bake.
Let’s keep going!
Step 5: Add the Dry Cake Mix
Once your fruit layers are in place, it’s time to bring in the dry cake mix. Grab your box of yellow or white cake mix—either one works great here, depending on your flavor preference. Yellow cake mix tends to be a bit richer, while white cake mix keeps things a touch lighter.
Sprinkle the entire box of cake mix evenly over the top of the fruit layer. Don’t mix it in—just let it sit right on top. The moisture from the fruit and the butter we’re about to add will do all the work of transforming this into a golden, crisp-topped cake.
Helpful Tip: Use a spoon or your hand to gently pat the dry mix down if it’s mounded in spots. You want a relatively even layer so that it bakes uniformly.
Step 6: Drizzle the Melted Butter
Next up: butter. Melt 1 cup of unsalted butter (that’s two sticks) and drizzle it slowly over the entire surface of the cake mix. Try to cover as much of the dry mix as possible, but don’t stress if a few dry patches remain—those spots will still bake up beautifully.
If you notice large dry areas after baking, you can always drizzle a bit of extra melted butter or spray those spots with a little baking spray next time.
Pro Tip: If you want a slightly crispier top, cut the butter into thin slices and lay them across the top instead of melting it. Both methods work—the melted butter just ensures a more even result.
Step 7: Sprinkle on Chocolate Chips and Nuts
Now it’s time for those delicious toppings that make this feel like a real banana split sundae.
Sprinkle ½ cup of mini chocolate chips over the top of the buttery cake mix. These will melt into little pockets of chocolatey goodness as the cake bakes. If you’re a big chocolate lover, feel free to bump it up to ¾ cup.
Then, if you like a little crunch, add ½ cup of chopped walnuts or pecans. This part is totally optional, but the nuts bring a really nice texture and a touch of nuttiness that pairs perfectly with the fruit and chocolate.
Step 8: Bake Until Golden and Bubbly
Now that everything is layered and topped, it’s time to bake.
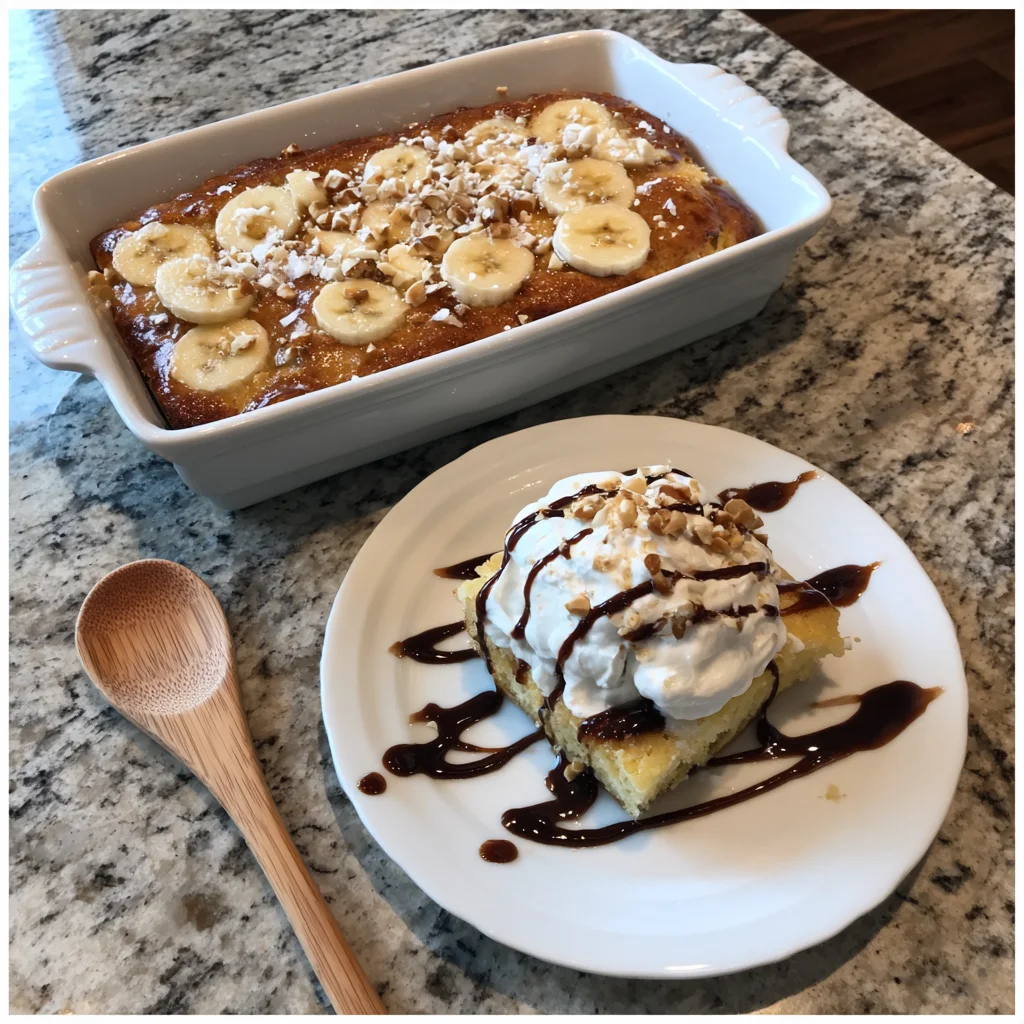
Place your baking dish in the preheated oven (350°F) and bake for 45 to 50 minutes, or until the top is golden brown and the edges are bubbling. The smell in your kitchen will be absolutely irresistible by the time this is done.
You’ll know it’s ready when the top is crisp and slightly golden and the fruit is bubbling around the edges. If your oven runs hot, start checking at the 40-minute mark.
Baking Tip: Let the dump cake cool for at least 10-15 minutes before serving. This gives the layers time to set a bit, so you’re not scooping out hot, runny filling.
Serving Suggestions for the Full Banana Split Experience
Now here comes the fun part—serving it up!
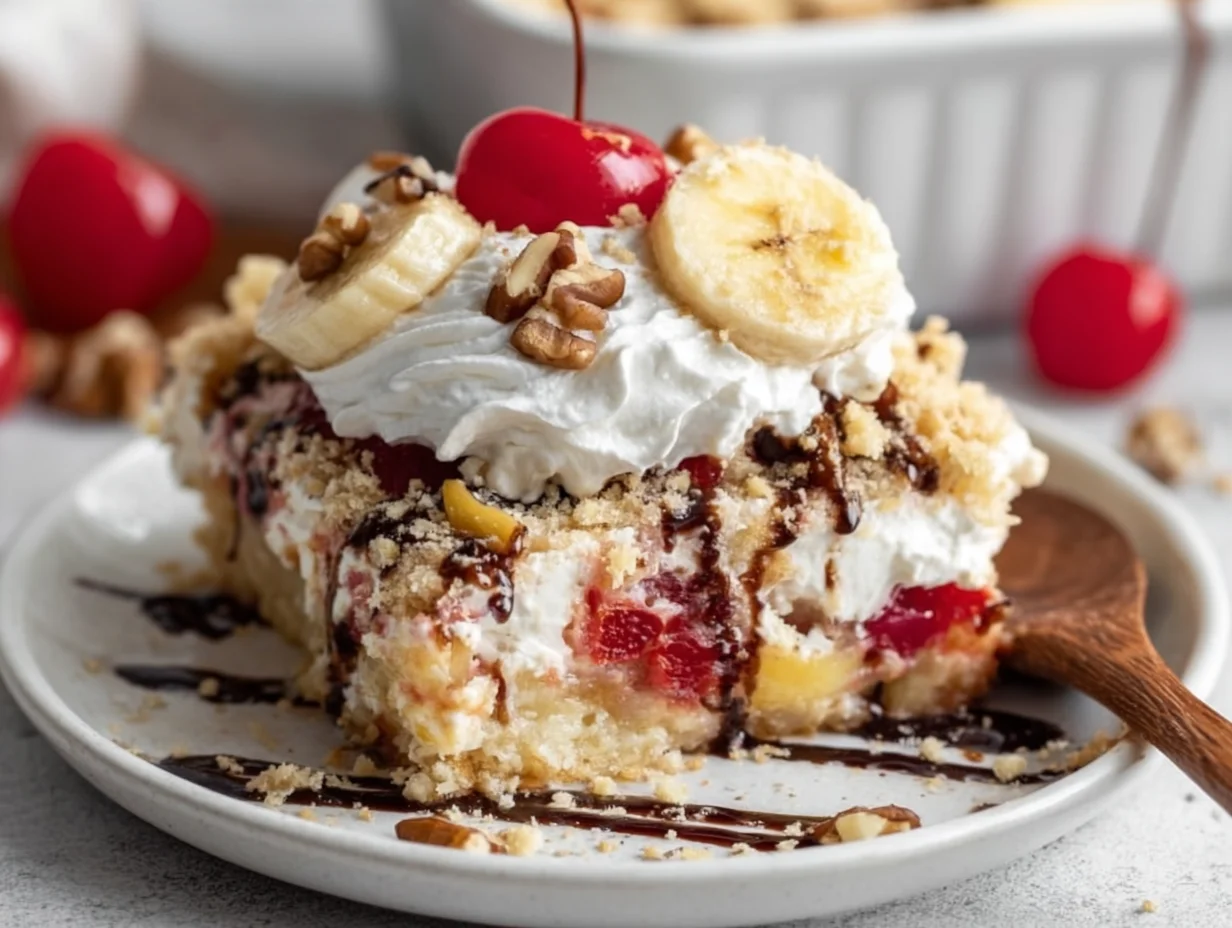
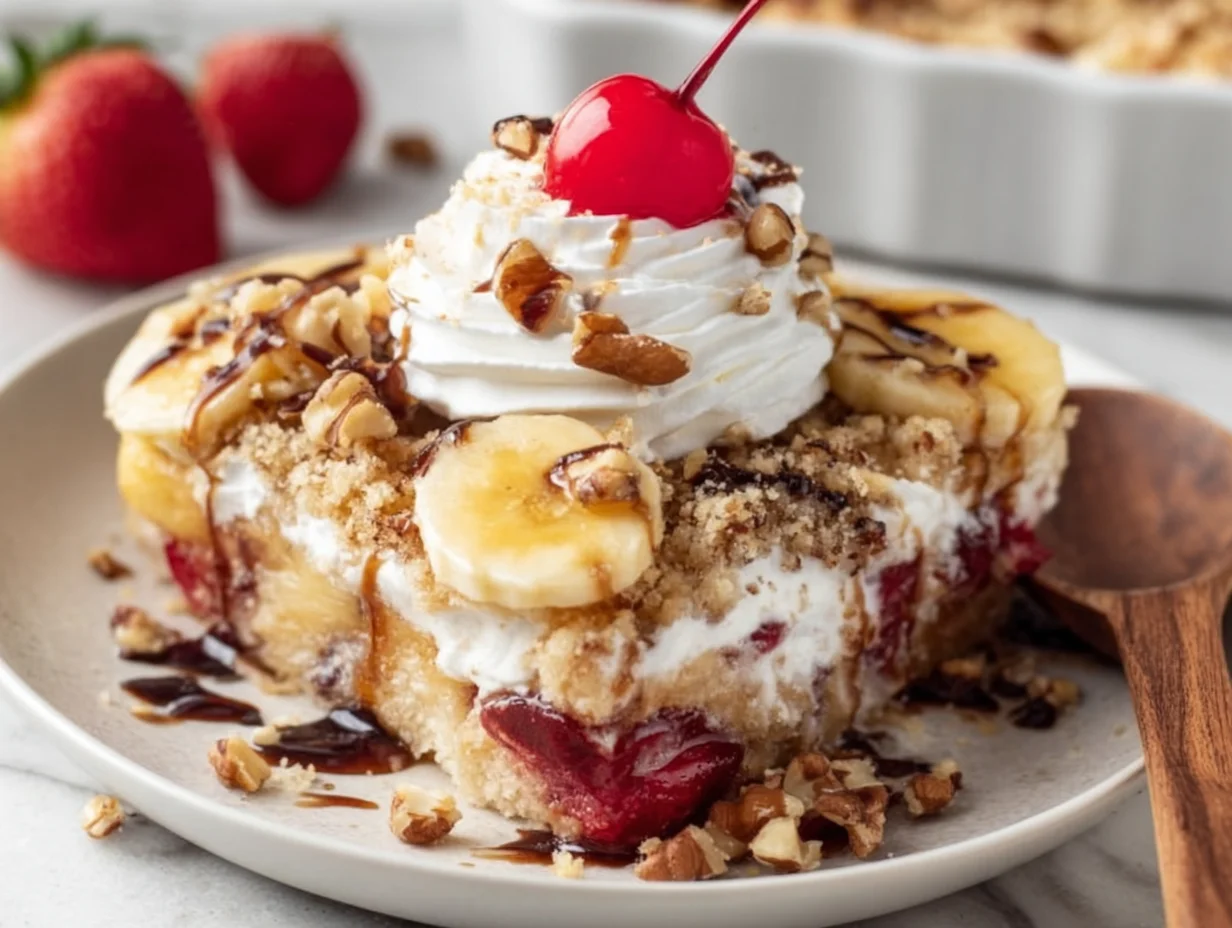
For the ultimate banana split flavor, serve your dump cake warm, topped with a generous swirl of whipped cream and a drizzle of chocolate syrup. It’s comforting, nostalgic, and incredibly indulgent.
If you really want to go all out, add a scoop of vanilla ice cream and a maraschino cherry on top. It’s everything you love about a banana split, just in warm, spoonable cake form.
Leftovers? Just cover and refrigerate them. This cake reheats beautifully in the microwave. The topping stays crisp and the fruit stays juicy.
Banana Split Dump Cake: FAQs and Final Thoughts
We’ve layered, baked, and topped our way to one of the easiest, most delicious desserts you’ll ever make—but if you’re planning to try this recipe for the first time, you might still have a few questions. That’s totally normal!
Whether you’re wondering about ingredient swaps or how to store leftovers, I’ve got you covered. Below are some of the most frequently asked questions about making this Banana Split Dump Cake, along with simple, straightforward answers to help you get the best results every time.
Frequently Asked Questions
1. Can I use a different kind of fruit instead of cherries?
Yes! While cherry pie filling gives you that classic banana split flavor, you can absolutely swap it out for strawberry, raspberry, or even blueberry pie filling if you prefer. Just make sure to use the same amount and keep the layering process the same.
2. What kind of cake mix works best?
Either yellow or white cake mix works great for this recipe. Yellow cake mix will give you a richer, slightly buttery flavor, while white cake mix is a bit lighter and lets the fruit flavors shine more. You could also try a chocolate cake mix for a more decadent version.
3. Do I have to use nuts?
Not at all. The nuts are optional and can be left out entirely, especially if you’re serving someone with allergies or just don’t love the added crunch. If you still want a little texture, you could try adding toasted coconut flakes or an extra handful of chocolate chips.
4. How do I store leftovers?
Let the dump cake cool completely, then cover it with foil or transfer to an airtight container and store in the refrigerator for up to 3 days. You can reheat individual servings in the microwave for about 30–45 seconds.
5. Can I make this ahead of time?
Yes, you can! You can prepare all the layers in the baking dish up to a day in advance, cover it tightly, and refrigerate. Just wait to add the melted butter until right before baking. When ready to bake, let it sit at room temperature for 10–15 minutes before putting it in the oven.
6. What kind of bananas should I use?
Look for ripe but firm bananas—you want them sweet, but not so soft that they turn to mush when baked. Bananas with a few brown spots on the peel are perfect. Avoid overripe bananas, like the kind you’d use for banana bread.
7. Can I serve it with ice cream?
Absolutely! This dessert is amazing on its own, but add a scoop of vanilla or chocolate ice cream and you’ve got a show-stopping treat. It’s like a banana split meets a fruit cobbler, and it’s always a hit.
Final Thoughts: Why You’ll Want to Make This Again and Again
There’s something so satisfying about a dessert that comes together with minimal effort but delivers maximum comfort—and this Banana Split Dump Cake checks every box. It’s sweet, warm, gooey, and nostalgic all at once. The kind of dessert that doesn’t just taste good—it feels good.
Whether you’re pulling it together for a last-minute gathering, treating yourself on a quiet Sunday night, or just making use of those extra bananas on your counter, this recipe is a keeper. It’s the kind of dish that gets talked about at the potluck and requested again and again.
Print
Banana Split Dump Cake
- Author: David
Description
Banana Split Dump Cake is a fun, fuss-free dessert that captures all the flavors of a classic banana split in a warm, gooey cake form. Layers of bananas, crushed pineapple, cherry pie filling, and chocolate are topped with cake mix and melted butter, then baked until golden and bubbly. It’s a rich, fruity, and chocolatey treat that comes together with minimal effort and maximum flavor. Perfect for potlucks, parties, or an easy weekend indulgence.
Ingredients
2 ripe bananas, sliced
1 can (20 ounces) crushed pineapple, undrained
1 can (21 ounces) cherry pie filling
1 box yellow or white cake mix
½ cup mini chocolate chips
½ cup chopped walnuts or pecans (optional)
1 cup unsalted butter, melted
Whipped cream, for serving
Chocolate syrup, for drizzling
Instructions
1 Preheat the oven to 350°F (175°C). Lightly grease a 9×13 inch baking dish.
2 Layer the sliced bananas evenly on the bottom of the dish. Spread the crushed pineapple with its juice over the bananas, followed by the cherry pie filling.
3 Sprinkle the dry cake mix evenly over the fruit layers, covering them completely. Do not stir.
4 Drizzle the melted butter evenly over the top of the cake mix, trying to moisten as much of the surface as possible.
5 Top with chocolate chips and chopped nuts if using.
6 Bake for 45 to 50 minutes, or until the top is golden brown and the edges are bubbling.
7 Allow the cake to cool slightly before serving. Serve warm with whipped cream and a drizzle of chocolate syrup for the full banana split experience.
Notes
Use ripe but firm bananas to prevent them from becoming too mushy during baking. For added texture and flavor, toast the nuts before sprinkling them over the cake. This dessert is best served warm but can be reheated easily. Leftovers can be stored covered in the refrigerator for up to three days. Serve with a scoop of vanilla ice cream for an extra decadent twist.


")

")


")
