

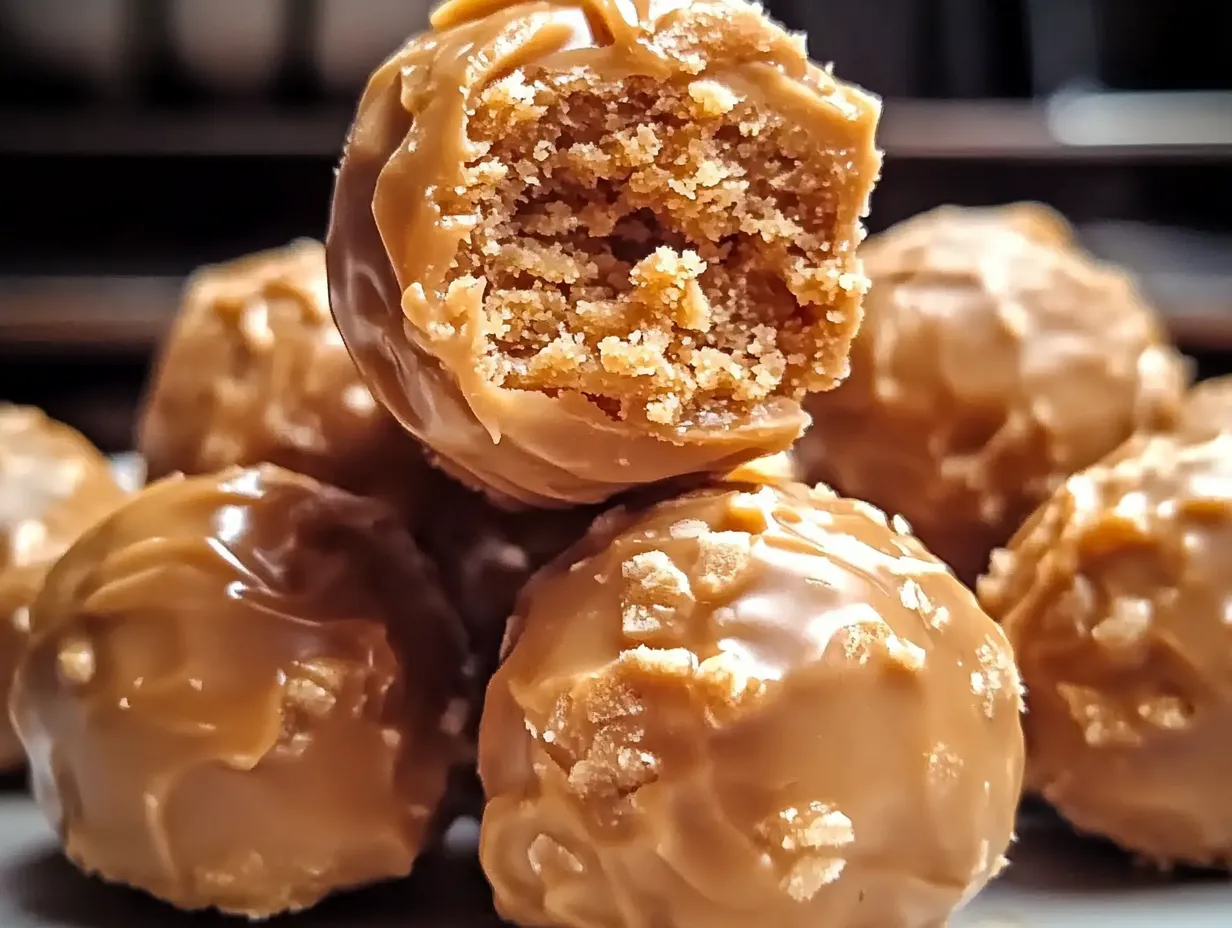
Butterfinger Balls are an irresistible no-bake dessert that combines creamy, crunchy, and chocolatey goodness into one perfect bite-sized treat. This recipe is a fantastic choice for anyone looking to make a delicious, crowd-pleasing dessert without the hassle of baking. With just a few simple ingredients—like crushed Butterfinger candy bars, smooth cream cheese, and rich semi-sweet chocolate—these treats come together quickly, making them ideal for busy days when you want something sweet but don’t have hours to spend in the kitchen.
Butterfinger Balls are perfect for any occasion, from casual family get-togethers to festive gatherings, parties, and holiday celebrations. Not only are they easy to make, but they’re also versatile enough for customization, allowing you to add sprinkles or even extra candy toppings to match the theme of any event. With minimal ingredients and effort, you’ll have a batch of these decadent treats that will impress everyone and satisfy any sweet tooth!

Ingredients Overview and Tips
Essential Ingredients
This Butterfinger Balls recipe centers around three main ingredients, each bringing its own unique texture and flavor to the final product. The crushed Butterfinger candy bars are the star of the recipe, providing the signature crunch and sweet, nutty flavor that makes these treats irresistible. Butterfinger bars are made with a flaky, peanut-buttery filling coated in chocolate, which melts slightly in the mixture and creates a wonderfully textured treat.
The cream cheese serves as the binding agent, adding a creamy, slightly tangy contrast to the sweetness of the candy bars. It provides a smooth consistency, allowing the Butterfinger flavor to come through while keeping the balls soft and easy to bite into. Lastly, semi-sweet chocolate chips are melted for coating, giving each Butterfinger Ball a rich, chocolatey shell that complements the creamy center perfectly. Semi-sweet chocolate offers just the right amount of sweetness to balance the other ingredients without overpowering them.
Optional Ingredients and Substitutions
To take these treats up a notch, consider adding chocolate or Butterfinger sprinkles to the exterior for added texture and visual appeal. These add-ins not only enhance the flavor but also give a fun, decorative touch to each ball. For a smoother and more glossy chocolate coating, a small amount of vegetable shortening can be added to the melted chocolate. This ingredient helps achieve a silkier finish by thinning the chocolate slightly, making it easier to coat the balls evenly. If you prefer a different flavor or texture, you can substitute dark chocolate or even white chocolate chips for a twist on the original recipe.
Ingredient Prep Tips
Preparing the ingredients properly makes a big difference in the texture and consistency of your Butterfinger Balls. Start by crushing the Butterfinger candy bars: placing them in a resealable plastic bag and using a rolling pin to break them into small, crumbly pieces works well. Be careful not to crush them too finely, as some chunks add a delightful texture. Alternatively, a food processor can make quick work of this step.
For softening the cream cheese, leave it out at room temperature for about 30 minutes before starting. If you’re short on time, you can microwave it in 10-second intervals, but be careful not to melt it. Softened cream cheese blends more easily with the crushed candy bars, resulting in a smoother, creamier mixture that’s easy to shape into balls. Taking a few minutes to prep each ingredient properly will ensure your Butterfinger Balls turn out perfectly every time!
Step-by-Step Instructions for Making Butterfinger Balls
Step 1: Mixing the Ingredients
Begin by placing the softened cream cheese in a large mixing bowl. It’s crucial that the cream cheese is at room temperature, as this ensures a smooth consistency when combined with the candy pieces. Add the crushed Butterfinger candy bars to the bowl with the cream cheese. Using a spatula or wooden spoon, start mixing the two ingredients together, pressing down as needed to fully incorporate the candy bits with the cream cheese. For an extra-smooth mixture, you can use a hand mixer on low speed.
Make sure to mix thoroughly until no lumps of cream cheese are visible, and the Butterfinger pieces are evenly dispersed throughout. If there are lumps, they can create uneven textures in the balls, making them harder to shape. Take your time with this step, as a well-blended mixture results in a consistent flavor and texture for each Butterfinger Ball.
Step 2: Shaping and Chilling the Balls
Once the mixture is ready, it’s time to shape it into balls. Scoop out portions of the mixture using a tablespoon or small cookie scoop to ensure even sizing, and then roll each portion into a smooth, 1-inch ball with your hands. Place each ball onto a parchment-lined baking sheet to prevent sticking.
After forming all the balls, transfer the baking sheet to the refrigerator. Chill the balls for at least 30 minutes to allow them to firm up, which makes them easier to dip in chocolate later. Chilling is an essential step for maintaining their shape and ensuring they don’t fall apart during dipping. If you’re short on time, you can place them in the freezer for 10-15 minutes as an alternative. Just ensure they don’t freeze completely, as this can make dipping difficult.
Step 3: Melting Chocolate and Using Shortening
For the chocolate coating, place the semi-sweet chocolate chips in a microwave-safe bowl. If you’d like a smoother, shinier finish, add 1 tablespoon of vegetable shortening to the bowl, which helps thin the chocolate and makes it easier to coat the balls evenly. Microwave the chocolate in 20-30 second intervals, stirring well between each interval. This prevents the chocolate from overheating and seizing. Continue until the chocolate is melted and smooth.
Alternatively, you can use a double boiler to melt the chocolate. To do this, fill a small saucepan with about an inch of water and bring it to a simmer. Place a heatproof bowl containing the chocolate (and shortening, if using) over the saucepan, making sure the bowl doesn’t touch the water. Stir continuously until the chocolate is fully melted.
Whether you’re using a microwave or double boiler, be patient and stir frequently to avoid lumps and ensure a glossy, smooth finish. Properly melted chocolate will coat the balls more evenly, giving each one a professional look.
Step 4: Dipping and Coating Butterfinger Balls
With the melted chocolate ready, remove the chilled Butterfinger Balls from the refrigerator. Using a fork or dipping tool, lower each ball into the melted chocolate, turning it to ensure all sides are coated. Once fully covered, lift the ball out of the chocolate and gently tap the fork against the bowl’s edge to allow any excess chocolate to drip off. This step is essential to prevent pooling and ensures a thin, even coating.
After tapping off excess chocolate, carefully place each coated ball back onto the parchment-lined baking sheet. If chocolate begins to harden as you work, you can reheat it in the microwave or on the double boiler for a few seconds to keep it smooth.
A helpful tip: place a toothpick in each ball before dipping to make handling easier, or use a small spoon for transferring if they’re too delicate. Keep the balls spaced apart on the baking sheet to avoid sticking together.
Step 5: Decorating and Setting the Butterfinger Balls
While the chocolate coating is still wet, you can add decorative toppings to make each Butterfinger Ball visually appealing. Sprinkle crushed Butterfinger pieces or chocolate sprinkles on top for added texture and color. Be creative here, as other toppings like crushed nuts, colorful sprinkles, or even edible glitter can add a festive touch for special occasions.
Once decorated, let the balls set on the baking sheet. For faster setting, place the sheet in the refrigerator for 15-20 minutes. If you have more time, allowing them to set at room temperature will keep the chocolate looking glossy. Once the coating is firm, the Butterfinger Balls are ready to serve.
Customizing the decoration gives you the opportunity to tailor these treats to various themes or holidays, making them not only delicious but also visually exciting for any occasion.
Serving Suggestions and Presentation Tips
Serving Ideas
Butterfinger Balls are as visually appealing as they are delicious, making them a hit for parties, events, and holiday gatherings. For a beautiful presentation, arrange them on a decorative tray lined with parchment paper or colorful doilies to add a pop of color. You can also place each Butterfinger Ball in a mini cupcake liner for a more polished look, making them easy to pick up and perfect for individual servings.
For added flair, consider grouping them by topping type. Create separate rows for Butterfinger-topped, sprinkle-coated, or nut-covered balls to add variety and visual appeal. If you’re hosting a themed event or holiday celebration, opt for seasonal liners or holiday-themed trays. This small touch makes these bite-sized treats stand out and adds a festive vibe to any table setting.
Perfect Pairings
Butterfinger Balls pair beautifully with a variety of drinks and other treats, enhancing their sweet, creamy flavor. For a cozy, comforting combination, serve them with a warm beverage like coffee, hot chocolate, or a latte, which complements the chocolate coating and creaminess of the center. For a family-friendly pairing, offer cold milk or chocolate milk on the side. If you’re hosting a dessert spread, arrange them alongside other no-bake treats, like truffles or fudge, to create an irresistible assortment that will satisfy every guest’s sweet cravings.
Storage and Make-Ahead Tips
Proper Storage
To keep Butterfinger Balls fresh and delicious, store them in an airtight container. Line the bottom of the container with parchment paper, and if you need to stack layers, place another sheet of parchment between each layer to prevent sticking. Store the container in the refrigerator, where they will stay fresh for up to 1 week. Refrigeration helps maintain the texture and flavor, especially for the cream cheese-based center, while keeping the chocolate coating intact.
If serving them at an event, take them out about 10-15 minutes beforehand so they reach a slightly softer texture, but return any leftovers to the refrigerator to keep them at their best quality.
Freezing and Shelf Life
For extended storage, Butterfinger Balls can be frozen for up to 3 months. Arrange them in a single layer on a parchment-lined baking sheet and place in the freezer until firm. Once frozen, transfer them to a freezer-safe airtight container or bag, separating layers with parchment paper if necessary to prevent them from sticking.
To thaw, simply place them in the refrigerator for a few hours or overnight before serving. This gradual thawing helps preserve the texture and prevents condensation from forming on the chocolate coating. Thawed Butterfinger Balls taste just as delicious as fresh, making freezing a convenient option for make-ahead treats.
Make-Ahead Tips
To save time when preparing for events, you can make the Butterfinger and cream cheese mixture in advance. Shape the mixture into balls and refrigerate them on a baking sheet for up to 24 hours before dipping in chocolate. When ready to coat, just melt the chocolate and dip. For larger batches, prepare the balls and freeze them undipped; simply thaw in the refrigerator and dip in chocolate when needed. This approach not only saves time but also ensures each batch is fresh, delicious, and ready for any occasion.
Variations and Customizations
Flavor Variations
Butterfinger Balls are incredibly versatile, allowing you to explore a variety of flavors to suit different tastes and occasions. For a nutty twist, consider adding a tablespoon of peanut butter to the cream cheese mixture, which pairs wonderfully with the Butterfinger candy’s flavor. Alternatively, for a caramel touch, mix in a few spoonfuls of caramel sauce to bring out a rich, sweet contrast. If you’d like to experiment with other candy flavors, substitute some or all of the Butterfinger pieces with crushed Snickers, Twix, or Reese’s Peanut Butter Cups for unique combinations that still deliver that same decadent crunch.
You can also add a pinch of sea salt to the mixture, enhancing the sweet and savory flavor profile, or a dash of vanilla extract for extra depth. Each variation lets you transform this simple recipe into a completely new dessert experience.
Creative Toppings and Decoration Ideas
Elevate your Butterfinger Balls with creative toppings and decorations that make each piece unique. In addition to Butterfinger and chocolate sprinkles, consider using crushed cookies like Oreos or chocolate wafers for a crunchy, visually appealing coating. For a nutty finish, roll the chocolate-coated balls in finely chopped nuts like almonds, pecans, or hazelnuts, which add both texture and a sophisticated flavor.
For seasonal or holiday-themed treats, use colored sprinkles that match the occasion—such as red and green for Christmas or pastel sprinkles for Easter. Edible glitter or gold dust can add a touch of elegance to each piece, making them perfect for weddings or fancy gatherings. Additionally, drizzling melted white chocolate or caramel over the finished balls gives them an extra layer of flavor and a decorative flair that’s sure to impress.
Frequently Asked Questions
Can I make Butterfinger Balls without cream cheese?
Yes, you can substitute cream cheese if desired! Peanut butter or Nutella are excellent alternatives that work well as binding agents and bring their own unique flavors to the mix. Keep in mind, however, that these alternatives will make the mixture slightly softer, so you may need to chill the balls longer to ensure they hold their shape.
How long do Butterfinger Balls stay fresh?
Stored in an airtight container in the refrigerator, Butterfinger Balls stay fresh for about one week. If you want to keep them longer, they can be frozen for up to three months. To serve, simply thaw them in the refrigerator overnight or a few hours before your event.
Do I have to use shortening for the chocolate coating?
No, shortening is optional. Adding vegetable shortening to the melted chocolate helps create a smoother, shinier finish, making the coating easier to work with. If you’d prefer, you can skip the shortening or use a small amount of coconut oil instead, which also creates a silky chocolate consistency.
What other candy bars work well with this recipe?
If you want to switch things up, Butterfinger Balls are versatile enough for other candy bars. Snickers, Twix, Reese’s Peanut Butter Cups, or Kit Kats all make great alternatives. Each brings its own unique flavor and texture, allowing you to experiment with different combinations.
Can I make these in advance for parties or holidays?
Absolutely! Butterfinger Balls are perfect make-ahead treats because they store well and taste just as delicious even after a few days. Prepare them in advance and store in the refrigerator or freezer for a no-stress dessert option that’s ready to serve whenever needed.
Conclusion
Butterfinger Balls are the perfect example of a simple yet irresistible dessert that combines creamy, crunchy, and chocolatey flavors into a single bite-sized treat. With just a few ingredients and no baking required, this recipe is both accessible and quick, making it ideal for any skill level. Whether you’re preparing for a party, a holiday gathering, or just a special treat at home, Butterfinger Balls deliver big on flavor with minimal effort.
Their versatility makes them even more appealing—you can easily customize them with different candy bars, flavors, and decorative toppings to suit any occasion or personal preference. This recipe invites creativity, allowing you to explore new combinations and add your own twist. So go ahead, give Butterfinger Balls a try, and enjoy the fun of making (and tasting) these deliciously addictive treats. Once you’ve tried them, they’ll surely become a go-to favorite!
Print
Butterfinger Balls
- Author: Christophe
- Total Time: 50 minutes
Description
These Butterfinger Balls are a delicious, no-bake treat that combines creamy, peanut butter-filled centers with a crunchy Butterfinger coating, all covered in smooth chocolate. Perfect for parties or holiday trays, they’re easy to make and packed with flavor!
Ingredients
- 2 cups crushed Butterfinger candy bars (about 16 fun-sized bars)
- 8 oz. cream cheese, softened
- 2 cups semi-sweet chocolate chips
- 1 tbsp vegetable shortening (optional, for smoother chocolate)
- Optional: Butterfinger or chocolate sprinkles for decoration
Instructions
1️⃣ Mix Ingredients: In a large mixing bowl, combine the softened cream cheese and crushed Butterfinger candy bars. Stir until well mixed and creamy.
2️⃣ Form Balls: Shape the mixture into 1-inch balls, placing them on a lined baking sheet. Chill in the refrigerator for 30 minutes to firm up.
3️⃣ Melt Chocolate: In a microwave-safe bowl, melt the chocolate chips along with the vegetable shortening (if using) in 20-30 second intervals, stirring between each, until smooth.
4️⃣ Dip Balls: Remove the chilled balls from the refrigerator. Using a fork or dipping tool, dip each ball into the melted chocolate, coating evenly. Let any excess chocolate drip off, then place back on the parchment-lined baking sheet.
5️⃣ Decorate and Set: While the chocolate is still wet, sprinkle the balls with extra crushed Butterfinger pieces or chocolate sprinkles, if desired. Allow them to set at room temperature or refrigerate for faster setting.
Notes
- Crushing the Candy: For a smoother texture, crush Butterfinger bars finely.
- Easier Dipping: Chilling the balls for at least 30 minutes before dipping helps them hold their shape.
- Optional Decorations: Customize with sprinkles or drizzle melted white chocolate for added flair.
- Prep Time: 20 minutes
- Cook Time: 30 minutes
Nutrition
- Serving Size: About 24 Butterfinger Balls


")

")


")
