

Cheesy Garlic Chicken Wraps are a delicious, quick-to-make meal that combines the comforting flavors of creamy cheese, tender chicken, and aromatic garlic. Perfect for anyone who loves savory, satisfying wraps, this recipe offers a balance of flavors and textures that’s sure to please. With just a handful of ingredients and easy-to-follow steps, these wraps bring together shredded chicken, a blend of cheeses, and a touch of garlic for a warm, melty filling that’s both comforting and rich in flavor.
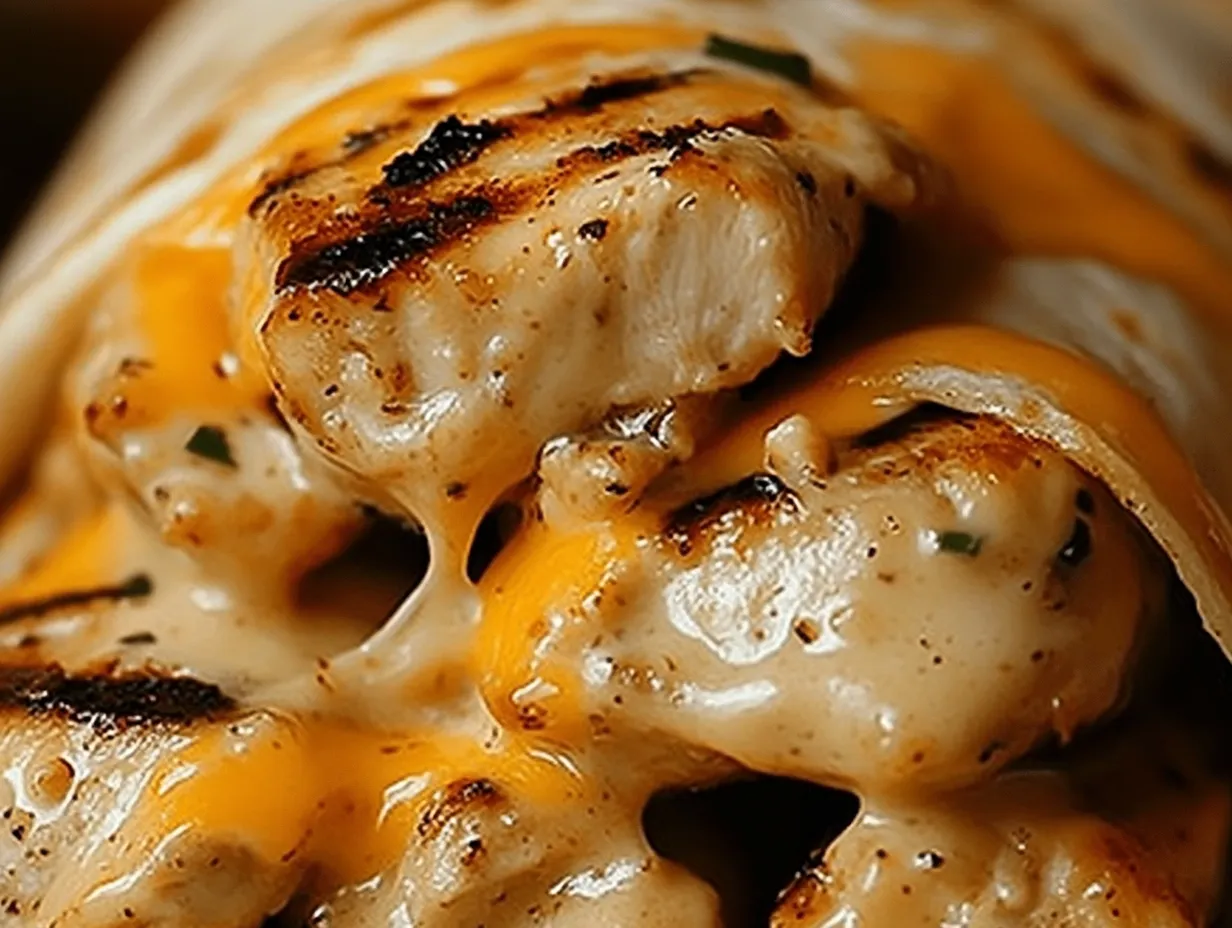
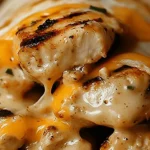
One of the most appealing aspects of these wraps is the melted cheese. Combining mozzarella for its stretchy, gooey texture with cheddar for a hint of sharpness, the wraps deliver a creamy, cheesy bite in every mouthful. The sautéed garlic further enhances the flavor, adding a subtle depth and aroma that makes each wrap feel just a bit gourmet.
These Cheesy Garlic Chicken Wraps are incredibly versatile, making them a great choice for almost any occasion. Whether you need a quick lunch, a satisfying dinner, or an easy-to-carry snack, these wraps are a perfect fit. Pair them with a side salad, chips, or your favorite dipping sauce, and you have a delicious meal that’s ready in minutes.

Ingredients Breakdown
Creating Cheesy Garlic Chicken Wraps requires just a few simple ingredients, each contributing to the dish’s flavor and texture. Here’s a closer look at each component and how they enhance the recipe.
- Cooked Chicken: Using shredded, cooked chicken as the main protein is not only convenient but also ideal for achieving a tender, juicy filling. This recipe is perfect for utilizing leftover chicken or even rotisserie chicken, saving time while still delivering delicious results. Shredded chicken easily absorbs the other flavors, making it an excellent base for this cheesy garlic filling.
- Cheeses: The recipe calls for a combination of shredded mozzarella and cheddar cheese. Mozzarella provides that satisfying, gooey melt, while cheddar adds a hint of sharpness that deepens the flavor. Together, these cheeses create a creamy, rich filling with the perfect melt-in-your-mouth texture. If desired, you can substitute other cheeses, like gouda for a smokier flavor or pepper jack for a spicy kick.
- Garlic and Butter: Sautéed garlic in melted butter forms the flavorful base for the wrap filling. Garlic’s aroma and slight sweetness pair perfectly with butter’s richness, creating a savory note that complements the cheese and chicken.
- Sour Cream and Mayonnaise: Adding a mix of sour cream and mayonnaise to the filling creates a creamy, tangy texture that enhances the flavors without overpowering them. Sour cream’s tanginess balances the richness of the cheese, while mayonnaise adds a smooth, cohesive texture. For a lighter option, you can substitute Greek yogurt for sour cream.
- Tortillas: Large tortillas serve as the perfect handheld wrap, holding the filling neatly. Flour tortillas are typically best for their flexibility and ability to toast to a golden brown.
- Seasonings: A touch of salt and pepper brings out the flavors in the wrap, while fresh parsley adds a hint of color and freshness as a garnish. For a spicier twist, you can add a sprinkle of paprika or red pepper flakes to the filling.
Step-by-Step Instructions
1. Sauté the Garlic
To bring out the full flavor of garlic in these wraps, sautéing it gently is key. Start by melting the butter in a skillet over medium heat, allowing it to fully melt and bubble lightly before adding the minced garlic. Once added, keep stirring the garlic continuously to prevent it from sticking or burning, which can cause a bitter taste. Aim for about 1 minute of sautéing until the garlic becomes fragrant and turns a light golden color. This quick step intensifies the garlic’s aroma, giving the filling a deliciously savory base.
2. Prepare the Filling
In a large mixing bowl, combine the shredded cooked chicken, mozzarella, and cheddar cheeses. Add the sautéed garlic along with the butter it was cooked in, which will help blend the flavors seamlessly. Then, incorporate the sour cream and mayonnaise to create a creamy, cohesive filling that binds all the ingredients together.
Mix thoroughly to ensure that the cheeses are evenly distributed throughout the chicken mixture. The combination of mozzarella and cheddar melts nicely, providing the perfect balance between stretchiness and flavor. Season the filling with salt and pepper to taste. Remember, a little goes a long way, so start with a small pinch, taste, and adjust as needed. Adding extra seasoning at this stage, such as paprika for warmth or Italian seasoning for an herbal note, can give the wraps a unique twist.
Allow the filling to rest for a few minutes to let the ingredients come together. This slight pause helps the flavors meld, ensuring that each bite of the wrap is rich and delicious.
3. Assemble the Wraps
Lay out each tortilla on a clean surface, placing a generous portion of the chicken filling in the center. Distribute the filling evenly across each tortilla, keeping the edges clear to make wrapping easier. To wrap, fold in the sides of the tortilla first, then roll it up tightly from the bottom, similar to rolling a burrito. This method keeps the filling secure, preventing any spillage while toasting. Ensuring the wraps are snugly assembled helps them hold their shape, making it easier to achieve an even, golden-brown crust.
4. Toast the Wraps
Heat a clean skillet over medium heat, then place each wrap seam-side down in the pan. Toasting the seam side first helps seal the wrap, preventing it from unrolling. Allow each side to cook for 2–3 minutes or until golden brown. As it toasts, the cheese melts, creating a gooey interior, while the tortilla develops a crisp exterior. Use a spatula to press the wraps gently for even browning. Avoid high heat, as it can scorch the tortilla before the cheese melts fully. Toasting gives the wraps a deliciously crisp texture that contrasts nicely with the creamy filling.
5. Garnish and Serve
Once toasted, place the wraps on a serving plate and garnish with freshly chopped parsley. The parsley adds a pop of color and a hint of freshness that balances the rich, cheesy filling. For an extra touch, pair these wraps with dipping sauces like garlic aioli, marinara, or a spicy sriracha mayo. Serving with a fresh side salad or crunchy veggie sticks also complements the wraps’ creamy texture. Enjoy these cheesy garlic chicken wraps warm to savor the melted cheese and rich flavors in each bite.
Tips and Variations
These Cheesy Garlic Chicken Wraps are wonderfully adaptable to different tastes and dietary preferences. Here are some creative ways to make this recipe your own:
Alternative Fillings
For convenience, rotisserie chicken is an excellent option in place of freshly cooked chicken, providing extra flavor with less prep time. You can also add sautéed vegetables like bell peppers, onions, or spinach to increase the nutrient content and add texture. If you’re craving a heartier wrap, consider adding black beans or roasted corn, which pair well with the cheesy filling.
Cheese Varieties
While mozzarella and cheddar create a great base, experimenting with other cheeses can add unique flavors. Gouda offers a creamy, slightly smoky note, while pepper jack brings a touch of spice, perfect for those who like a kick. Provolone or Swiss can add a rich, nutty element, blending well with the garlic and chicken.
Flavor Boosters
For added depth, consider incorporating extra spices into the filling. A sprinkle of paprika or smoked paprika provides warmth and color, while cayenne pepper can elevate the heat level. Italian seasoning or dried herbs like oregano and basil work well, especially if you’re going for a Mediterranean-inspired wrap. Fresh herbs like chives or cilantro can also bring a burst of fresh flavor.
Gluten-Free or Low-Carb Options
If you prefer gluten-free or low-carb wraps, opt for gluten-free tortillas available at most stores. For an even lighter, carb-free version, use large lettuce leaves as wraps. Romaine or butter lettuce holds up well and provides a fresh, crisp alternative.
Make-Ahead Tips
These wraps are great for meal prep! Prepare and assemble the wraps, then wrap each one tightly in foil or plastic wrap before freezing. When ready to eat, simply reheat them in a skillet or microwave until the cheese is melted and the wrap is warm. Freezing ahead not only preserves the wraps but also makes for a quick, delicious meal option on busy days.
Nutritional Information and Health Considerations
Each Cheesy Garlic Chicken Wrap offers a balanced mix of macronutrients and essential vitamins. On average, one wrap provides around 350–400 calories, with a healthy serving of protein from the chicken (approximately 20–25 grams), making it a filling meal option. The wrap also includes around 15–20 grams of fat, mostly from the cheeses and mayonnaise, with about 30 grams of carbohydrates from the tortilla.
To make a lighter version, consider using lower-fat cheese or reducing the amount of cheese altogether. Swapping sour cream with Greek yogurt can cut back on fat and add a boost of protein, giving a similar creamy texture. Using light mayonnaise is another way to reduce calories without sacrificing flavor. Opting for whole-grain or low-carb tortillas can also increase fiber and reduce carbohydrate content.
These wraps have several nutritional benefits. Chicken is a lean protein that supports muscle health and keeps you feeling full. Cheese provides calcium, essential for bone health and muscle function, while garlic is rich in antioxidants, which help combat inflammation and support the immune system. By making simple substitutions and portion adjustments, these wraps can fit into various dietary goals, whether you’re aiming for a protein boost, a balanced meal, or a lighter option.
Serving Suggestions
These Cheesy Garlic Chicken Wraps pair perfectly with a variety of sides and dips, making them a versatile choice for different occasions. For a balanced meal, consider serving them with a fresh side salad, such as a simple mixed greens salad or a tangy coleslaw that adds a refreshing contrast to the cheesy wraps. Crispy veggie sticks like carrots, celery, and bell peppers also complement the wraps well, adding crunch and color. For a heartier option, serve with a side of seasoned tortilla chips or sweet potato fries.
Dipping sauces elevate the wraps’ flavor and are easy to customize. Ranch dressing, garlic aioli, marinara sauce, or a spicy sriracha mayo all pair well with the cheesy, garlicky flavors. These wraps are ideal for gatherings, whether it’s a picnic, game day, or casual get-together, and they also make a great on-the-go lunch. Just wrap them in foil, and they’re ready to enjoy anytime, anywhere.
Common Mistakes and Troubleshooting
When making Cheesy Garlic Chicken Wraps, a few simple tips can help avoid common pitfalls:
- Avoid Overfilling: Overloading the tortilla with filling can make it difficult to wrap securely and may cause the wrap to burst open while cooking. To prevent this, distribute the filling evenly, keeping it about an inch from the edges, and wrap tightly for a secure hold.
- Sautéing Garlic Properly: Garlic can burn quickly, resulting in a bitter taste. To avoid this, keep the heat at medium and stir constantly, cooking just until the garlic is fragrant and slightly golden. Lowering the heat, if necessary, will ensure the garlic infuses its flavor without overcooking.
- Melting Cheese Without Burning the Tortilla: Toasting the wraps on medium heat helps the cheese melt fully while achieving a golden-brown crust on the tortilla. Avoid high heat, as it can scorch the outside before the cheese melts. Press the wrap lightly with a spatula to encourage even browning for a perfect, melty finish.
FAQs Section
Can I use uncooked chicken for this recipe?
No, it’s best to use pre-cooked chicken for this recipe. If using uncooked chicken, cook it fully before adding it to the filling.
How can I make these wraps gluten-free?
Use gluten-free tortillas, which are available in most grocery stores, to make these wraps gluten-free without compromising flavor.
Can I prepare these wraps ahead of time?
Yes, you can prepare and refrigerate the wraps for up to a day before toasting. Alternatively, freeze assembled wraps for up to 3 months and toast directly from frozen when ready.
What other cheeses work well in this recipe?
Try gouda, pepper jack, or Swiss cheese for different flavors. Each adds its own unique twist to the filling.
Are there vegetarian options for this wrap?
Yes! Substitute the chicken with sautéed mushrooms, black beans, or roasted vegetables for a hearty vegetarian option.
How do I keep the wraps from falling apart while toasting?
Wrap tightly and place seam-side down in the pan to secure them. Toasting the seam first helps keep the wrap intact.
What’s the best way to store leftovers?
Store wraps in an airtight container in the refrigerator for up to 3 days. Reheat in a skillet or microwave until warmed through.
Can I make these wraps spicy?
Yes! Add chopped jalapeños or a dash of hot sauce to the filling for added heat.
Is there a low-fat version of this recipe?
Use lower-fat cheeses, Greek yogurt instead of sour cream, and light mayonnaise to reduce calories and fat.
Cheesy Garlic Chicken Wraps
- Author: Christophe
- Total Time: 20 minutes
Description
These Cheesy Garlic Chicken Wraps are a perfect blend of tender shredded chicken, melty mozzarella and cheddar cheeses, and a creamy garlic-infused filling wrapped in toasted tortillas. Ideal for a quick lunch or an easy dinner, these wraps are simple to make and bursting with flavor.
Ingredients
- 2 cups cooked chicken, shredded
- 1/2 cup shredded mozzarella cheese
- 1/2 cup shredded cheddar cheese
- 2 garlic cloves, minced
- 2 tablespoons butter
- 1/4 cup sour cream
- 1/4 cup mayonnaise
- 4 large tortillas
- Salt and pepper, to taste
- Fresh parsley, chopped (for garnish)
Instructions
1️⃣ Sauté Garlic: Melt the butter in a pan over medium heat. Add minced garlic and sauté until fragrant, about 1 minute.
2️⃣ Prepare Filling: In a large bowl, combine the shredded chicken, mozzarella, cheddar, sour cream, mayonnaise, and sautéed garlic. Season with salt and pepper to taste, then mix well to combine.
3️⃣ Assemble Wraps: Lay out the tortillas and divide the chicken mixture evenly among them. Wrap each tortilla tightly around the filling.
4️⃣ Toast Wraps: Heat a skillet over medium heat. Place the wraps in the skillet, seam-side down first, and toast for 2-3 minutes on each side until golden brown and the cheese is melted.
5️⃣ Garnish and Serve: Garnish with chopped fresh parsley and serve warm. Enjoy these delicious wraps with a side of your favorite dipping sauce!
Notes
- Chicken Options: Use rotisserie chicken for added flavor or pre-cooked chicken breast for convenience.
- Add Extra Veggies: Include chopped spinach, bell peppers, or green onions for additional texture and flavor.
- Make It Spicy: Add a pinch of red pepper flakes or drizzle a bit of hot sauce into the filling for some heat.
- Prep Time: 10 minutes
- Cook Time: 10 minutes
Nutrition
- Serving Size: 4


")

")


")
