


There are some desserts that just feel like a hug from your childhood—cool, creamy, and always showing up at the best kind of potlucks. For me, Cherry Delight is one of those nostalgic treats that never goes out of style. It’s the dessert that made its way to every family picnic, church function, and holiday gathering when I was growing up. And let’s be honest—no one ever left a square of it behind.
This recipe is a total classic, and it checks all the boxes: it’s incredibly easy to make, no baking involved, and the flavor is absolutely dreamy. We’re talking a buttery graham cracker crust, a rich and fluffy cheesecake-style filling, and that glossy cherry topping that makes your heart skip a beat. Whether you’re prepping for the Fourth of July, a casual weekend BBQ, or just craving something sweet and refreshing, Cherry Delight is the kind of crowd-pleaser that never disappoints.
And the best part? It’s made with just a handful of everyday ingredients and takes minimal effort. Seriously—this is one of those “I can’t believe how simple it is” kind of desserts. So let’s dive in and start whipping up this delicious no-bake wonder!
BUILDING THE BASE (AND THAT DREAMY CREAM CHEESE FILLING)
Alright, let’s get started with the first part of this recipe. Before anything else, go ahead and grab your ingredients. You’ll need:
Ingredients for the Crust:
9 graham crackers
2 tablespoons granulated sugar
½ cup (1 stick) salted butter, melted
Ingredients for the Cheesecake Filling:
16 ounces (2 blocks) cream cheese, room temperature
1 cup powdered sugar
1 teaspoon vanilla extract
8 ounces (1 tub) Cool Whip
Ingredients for the Topping:
1 (21-ounce) can cherry pie filling
Now that we’ve got everything ready, let’s break it down step-by-step.
STEP 1: PREP YOUR PAN
Start by prepping an 8×8-inch baking dish. Give it a quick spray with non-stick spray and then line the bottom with parchment paper. I like to leave a bit of parchment hanging over the sides so I can lift the bars out easily once they’re set. It makes serving way less messy, especially if you’re going for clean, photo-worthy squares.

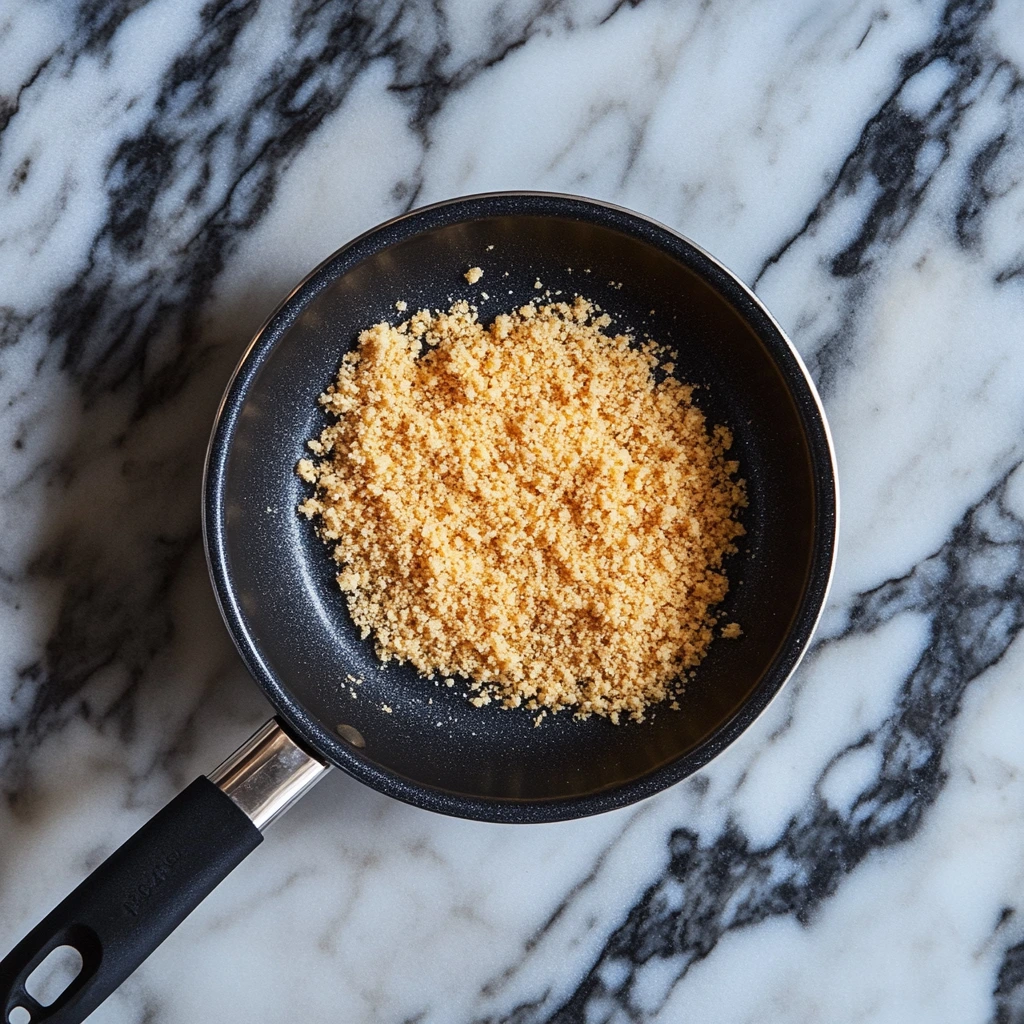
STEP 2: MAKE THAT GRAHAM CRACKER CRUST
Next up, we’re building the foundation—literally. In a food processor, pulse your graham crackers into fine crumbs. Then add in the granulated sugar and melted butter. Keep pulsing until everything is well combined and the crumbs look like wet sand.
No food processor? No problem. You can toss the crackers into a zip-top bag and crush them with a rolling pin. Then just stir in the sugar and butter in a mixing bowl. It’s a little more hands-on, but just as effective.
STEP 3: PRESS THE CRUST INTO THE PAN
Once your crust mixture is ready, press it firmly into the bottom of your prepared pan. I like to use the bottom of a glass or a measuring cup to get it nice and even. Don’t skip this part—it’s what gives you that sturdy, satisfying base for all the creamy goodness that’s coming next.
STEP 4: MAKE THE CREAM CHEESE MIXTURE
In a medium mixing bowl, beat the softened cream cheese on medium-high speed for 4 to 5 minutes. You’re looking for a super smooth and creamy texture here—no lumps allowed. Room temperature cream cheese really helps with this step, so don’t rush it!
STEP 5: ADD THE SWEETNESS AND FLAVOR
Next, mix in the powdered sugar and vanilla extract. Beat just until everything is combined. You don’t want to overmix it—just make sure the sugar is fully incorporated into the cream cheese.
STEP 6: FOLD IN THE COOL WHIP
Now it’s time to give the filling that light and fluffy texture. Gently fold in the Cool Whip using a spatula. This part is key—you want to keep the mixture airy, so don’t stir too aggressively. Once it’s all smooth and well-blended, your cheesecake filling is ready to go.
STEP 7: ASSEMBLE THE LAYERS
Spread the cream cheese mixture evenly over the graham cracker crust. Use a spatula to smooth it out and make sure it’s covering every corner. Then pop the whole thing in the fridge and let it chill for at least 4 hours (or overnight if you have time). This step is crucial for setting the dessert properly, so don’t skip the wait!
FINISHING TOUCHES & EASY VARIATIONS FOR CHERRY DELIGHT
Alright, so now that your cream cheese layer is chilling in the fridge, it’s time to talk about the grand finale—that irresistible cherry topping. This is the moment when Cherry Delight truly lives up to its name. There’s just something about that glossy red pie filling on top of the creamy white layer that’s visually stunning and downright mouthwatering.
Whether you’re making this dessert ahead for a party or just sneaking a slice for yourself on a quiet afternoon, this final step is quick and easy. Plus, I’ve included a few helpful tips and fun variations if you want to get a little creative.
Let’s wrap up the rest of the recipe and talk about how to make this dessert your own!
STEP 8: ADD THE CHERRY PIE FILLING
Once your dessert has chilled for at least 4 hours (overnight is even better), you’re ready to add the cherry pie topping.
Just before serving, open up your can of cherry pie filling and spoon it evenly over the chilled cream cheese layer. Spread it gently with a spatula so that the cherries cover every bit of the surface. Don’t press down too hard—you want that pretty, glossy layer to sit right on top.
It’s as easy as that. No cooking, no fuss, just a gorgeous finish to your no-bake masterpiece.
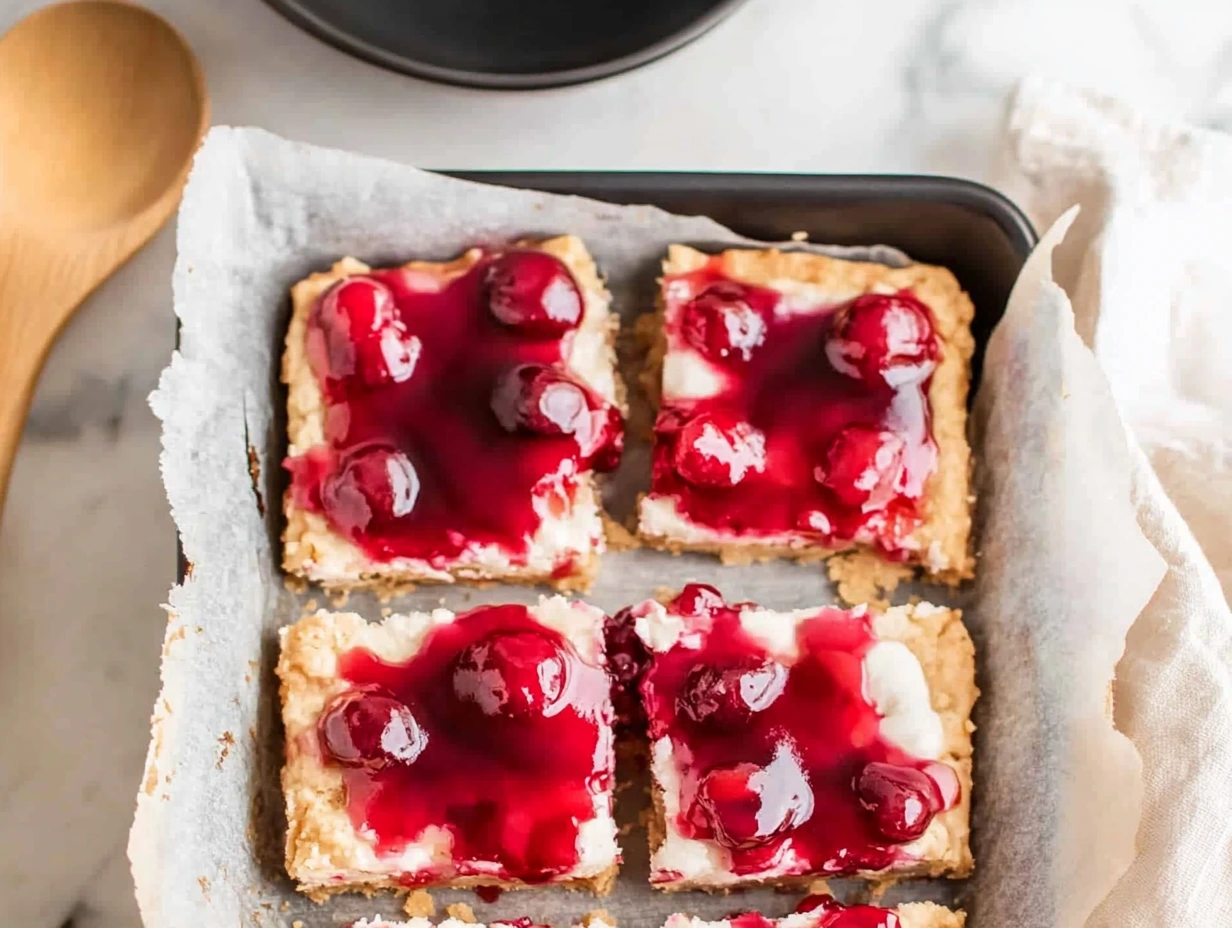
STEP 9: SLICE AND SERVE
Using the parchment paper overhang, lift the entire dessert out of the pan and place it on a cutting board. This makes slicing a whole lot easier. Use a sharp knife to cut it into 9 squares. For cleaner slices, wipe the knife between each cut.
Serve chilled, and get ready for lots of “oohs” and “aahs”—and probably a few requests for the recipe.
TIPS FOR THE BEST CHERRY DELIGHT
Here are a few quick tips to help make your dessert even better:
Use full-fat cream cheese. It gives the filling a richer texture and better structure, especially when you’re not baking it.
Make sure the cream cheese is fully softened. Cold cream cheese can create lumps, and you want that filling smooth and creamy.
Chill time matters. Don’t rush the setting process. Giving it a full 4 hours (or overnight) helps everything firm up beautifully.
Use a glass measuring cup to press the crust. It makes it easier to get a compact, even layer.
Serve it cold. This dessert tastes best straight from the fridge.
EASY VARIATIONS TO TRY
While classic cherry is the go-to, you can totally put your own spin on this recipe. Here are some of my favorite swaps and add-ins:
Blueberry Delight: Swap out the cherry pie filling for blueberry. It’s just as easy and has a sweet, slightly tangy twist.
Strawberry Shortcake Version: Use strawberry pie filling and add sliced fresh strawberries for a bright, juicy topping.
Lemon Cream Delight: Add a teaspoon of lemon zest to the cream cheese mixture for a hint of citrus, then top with blueberry filling.
Nutty Crust: Mix in finely chopped pecans or walnuts with the graham cracker crumbs for a bit of crunch.
Chocolate Cherry Dream: Drizzle a little chocolate syrup on top of the cherry layer for a black forest-inspired dessert.
This recipe is super forgiving, so don’t be afraid to experiment. The no-bake format makes it a breeze to try new combinations, and it’s hard to go wrong when the base flavors are this delicious.
CHERRY DELIGHT FAQ & FINAL THOUGHTS
Now that your Cherry Delight is chilling in the fridge (or maybe already sliced and halfway gone!), let’s talk about some of the most common questions I get when sharing this recipe. Whether you’re making it for the first time or looking to tweak it to fit your needs, these quick tips will help you get it just right every time.
FREQUENTLY ASKED QUESTIONS ABOUT CHERRY DELIGHT
1. Can I use homemade whipped cream instead of Cool Whip?
Absolutely! If you prefer not to use store-bought whipped topping, you can whip about 1 cup of heavy cream with 2 tablespoons of powdered sugar until stiff peaks form. Just make sure it’s well-whipped before folding it into the cream cheese mixture to maintain that light, fluffy texture.
2. How far in advance can I make Cherry Delight?
This dessert is a great make-ahead option. You can prepare it up to 2 days in advance. Just keep it covered in the refrigerator until you’re ready to serve. In fact, letting it sit overnight often improves the texture and flavor.
3. Can I freeze Cherry Delight?
You can freeze it, but there are a couple of things to keep in mind. The texture may change slightly upon thawing, especially with the cream cheese layer. If you do freeze it, wrap it tightly and thaw it in the fridge overnight before serving. It’s best served fresh, but freezing can work in a pinch.
4. What kind of pan should I use if I want to double the recipe?
If you’re making this for a larger group, you can easily double the recipe and use a 9×13-inch baking dish. The process stays exactly the same—just scale up all the ingredients. Keep in mind that the chill time might be a bit longer due to the increased volume.
5. My crust is crumbly. What did I do wrong?
A crumbly crust usually means there wasn’t enough butter or it wasn’t pressed down firmly enough. Make sure your graham cracker crumbs are well-saturated with the melted butter and take the time to really press the mixture into the bottom of the pan using the bottom of a measuring cup or glass.
6. Can I use low-fat cream cheese or sugar substitutes?
You can use low-fat cream cheese, but the texture might be a bit softer. For best results, full-fat cream cheese is recommended. As for sugar substitutes, powdered sugar alternatives like Swerve can work in a 1:1 ratio, but keep in mind that it may affect the overall taste slightly.
7. Is it possible to make individual servings instead of one big pan?
Definitely! You can press the crust into small jars or ramekins, then layer the filling and topping. These make great personal-size desserts for parties or meal prepping. Just adjust the chill time slightly—they may set faster in smaller portions.
CONCLUSION: A CLASSIC TREAT YOU’LL MAKE AGAIN AND AGAIN
Cherry Delight is the kind of dessert that’s always a hit, no matter the season or occasion. It’s cool and creamy, rich without being heavy, and so simple to make that it hardly feels like work. And the best part? It brings that nostalgic, homemade feeling to the table every single time.
Whether you stick with the classic cherry topping or branch out into blueberries, strawberries, or even a chocolate drizzle, this no-bake dessert is one you’ll come back to again and again. It’s great for summer barbecues, holiday get-togethers, or those nights when you just need something sweet without turning on the oven.
Print
Cherry Delight
- Author: David
Description
Cherry Delight is a no-bake dessert that’s both refreshing and indulgent, featuring a buttery graham cracker crust, a creamy cheesecake filling, and a luscious cherry pie topping. It’s an easy-to-make treat perfect for holidays, picnics, or any time you want a cool, classic dessert.
Ingredients
For the crust
9 graham crackers
2 tablespoons granulated sugar
½ cup (1 stick) salted butter, melted
For the cheesecake
16 ounces (2 blocks) cream cheese, room temperature
1 cup powdered sugar
1 teaspoon vanilla extract
8 ounces (1 tub) Cool Whip
For the topping
1 (21-ounce) can cherry pie filling
Instructions
1️⃣ Prepare an 8×8-inch baking dish by spraying it with non-stick spray. Line the bottom with parchment paper, leaving overhang on two sides for easier removal.
2️⃣ In a food processor, pulse the graham crackers into fine crumbs. Add the sugar and melted butter, pulsing until the mixture is evenly combined. If you don’t have a food processor, place the crackers in a sealed plastic bag and crush with a rolling pin, then mix with sugar and butter in a bowl.
3️⃣ Press the crumb mixture firmly into the bottom of the prepared pan using the bottom of a glass or measuring cup to form a compact crust.
4️⃣ In a mixing bowl, beat the cream cheese on medium-high speed for 4 to 5 minutes until smooth and creamy.
5️⃣ Add the powdered sugar and vanilla extract to the cream cheese and mix until just combined.
6️⃣ Gently fold the Cool Whip into the cream cheese mixture using a spatula until fully incorporated.
7️⃣ Spread the cream cheese filling evenly over the graham cracker crust. Refrigerate for at least 4 hours or overnight to allow it to set.
8️⃣ Just before serving, spoon the cherry pie filling evenly over the top. Cut into 9 squares and serve chilled.
Notes
This dessert is best served cold and can be made a day ahead. For a different twist, try using blueberry or strawberry pie filling instead of cherry. Make sure the cream cheese is fully softened before mixing to avoid lumps in the filling.


")

")


")
