

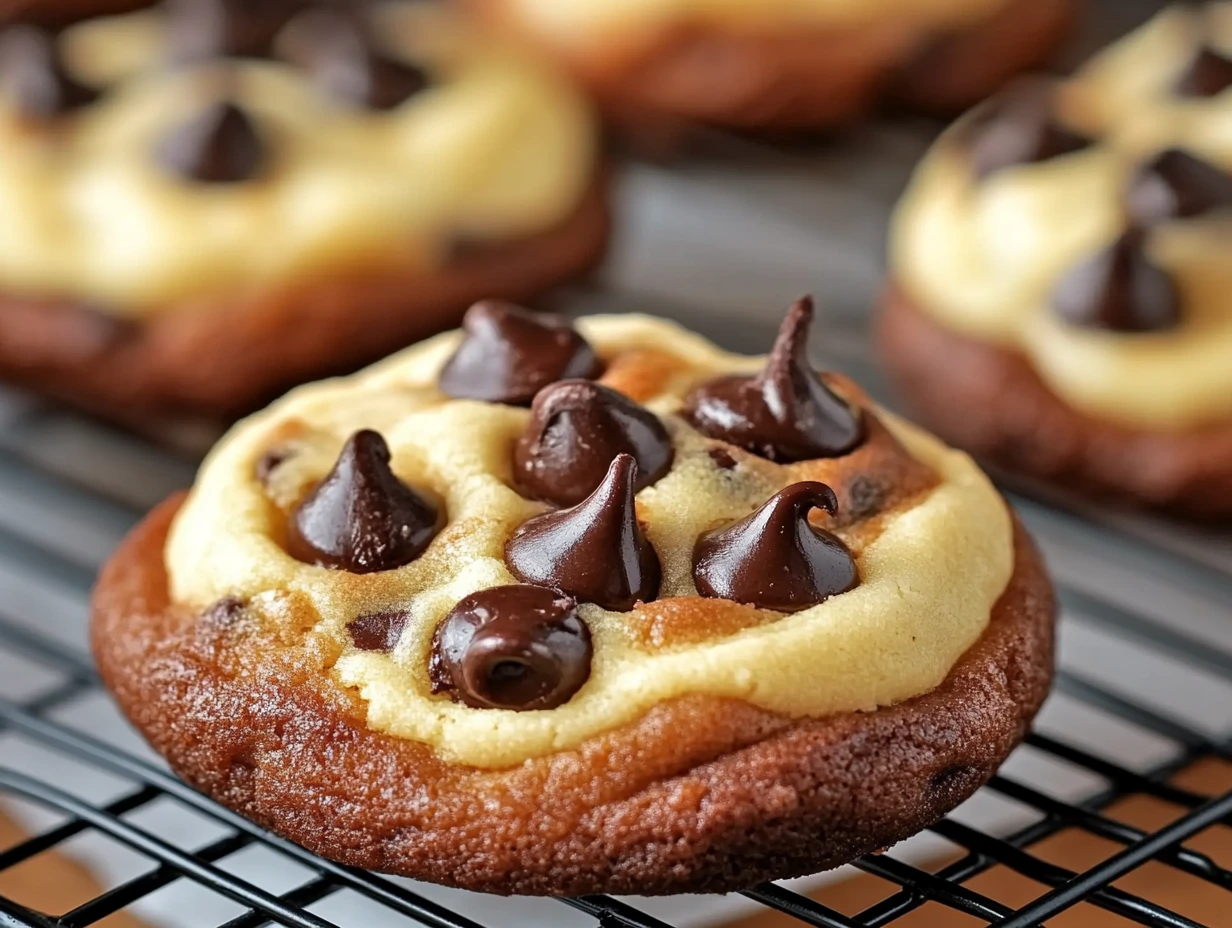
If you’re a fan of chocolate chip cookies (who isn’t?), then get ready to meet your new favorite treat: Chocolate Chip Cheesecake Cookies! Imagine biting into a soft, chewy chocolate chip cookie, only to find a creamy, slightly tangy cheesecake filling in every bite. These cookies are a dream come true for anyone who loves the combination of cheesecake and cookies—and trust me, it’s a match made in heaven.
I remember the first time I made these cookies. I was in the mood for something sweet, but I didn’t want the usual. So, I took my classic chocolate chip cookie recipe and thought, “Why not add a little cream cheese for some richness and a twist on the texture?” It was an instant hit. They came out of the oven golden brown on the edges, soft in the center, and with that perfect combination of creamy, tangy cheesecake flavor mingled with gooey chocolate chips. It was exactly what I had hoped for, and now I make them all the time for family gatherings, potlucks, and even just for a cozy night in. I’m sure you’ll love them too!
What Makes These Cookies So Special?
These Chocolate Chip Cheesecake Cookies are different from your standard cookie for a few reasons. First, they’re made with both butter and cream cheese, which gives them a soft, melt-in-your-mouth texture. The cream cheese adds a subtle tang that balances out the sweetness of the brown sugar and chocolate chips. This recipe is a delightful cross between two favorites—cheesecake and chocolate chip cookies.
And let’s talk about those chocolate chips. They’re the perfect little pockets of chocolate goodness that melt into the dough as they bake, giving you that familiar chocolatey burst with every bite. But what really makes these cookies stand out is the cream cheese. It makes the dough just a little richer and adds a soft, melt-in-your-mouth texture that you won’t get from your average chocolate chip cookie.
But enough about why they’re great—let’s get into the how-to! It’s actually super simple and doesn’t require any fancy ingredients. If you have butter, cream cheese, sugar, flour, and a few other pantry staples, you’re good to go.
Ingredients for Chocolate Chip Cheesecake Cookies
Here’s what you’ll need to gather:
- ½ cup unsalted butter, softened
- ¼ cup cream cheese, softened (don’t forget to take it out in advance so it’s nice and soft!)
- ¾ cup brown sugar
- ¼ cup granulated sugar
- 1 large egg
- 1 teaspoon vanilla extract
- 2 cups all-purpose flour
- 1 teaspoon baking soda
- ½ teaspoon salt
- 1 cup chocolate chips
You’ll notice that the list is pretty straightforward and easy to follow. Most of these ingredients are pantry staples you probably already have on hand, which means you don’t have to go running to the store just to make a batch of cookies! Now, let’s get baking. I promise it’s going to be worth the wait!
Step 1: Preheat the Oven
Start by preheating your oven to 350°F (175°C). This ensures your cookies bake evenly, and it helps the dough spread just the right amount. While the oven is heating up, line your baking sheets with parchment paper or silicone baking mats. If you don’t have those, a quick spray of non-stick cooking spray will work too. These sheets will help your cookies bake evenly and make cleanup a breeze!
Step 2: Cream the Wet Ingredients
In a large mixing bowl, you’ll want to beat together the softened butter, cream cheese, brown sugar, and granulated sugar. I recommend using a hand mixer or stand mixer for this part, but you can also do it by hand if you’re feeling a little more old-school. The goal here is to beat the mixture until it’s light, fluffy, and smooth. This process will incorporate air into the dough, making your cookies soft and chewy when they bake.
It’s also important that both the butter and cream cheese are softened, so if you’ve just pulled them from the fridge, give them a few minutes to warm up on the counter. Softened butter and cream cheese combine more easily, ensuring you don’t end up with any lumps in your dough. Trust me, you want that silky, smooth texture!
Step 3: Incorporate the Egg and Vanilla Extract
Next, add the egg and vanilla extract to the creamed mixture. Beat it all together until fully combined and smooth. The egg helps bind everything together, while the vanilla adds a warm, comforting flavor that will make your whole kitchen smell like heaven as the cookies bake.

Step 4: Mix the Dry Ingredients
Now, in a separate bowl, whisk together the dry ingredients—flour, baking soda, and salt. Whisking them together ensures that the baking soda and salt are evenly distributed throughout the flour, which helps your cookies bake uniformly. Once that’s done, you’ll gradually add this dry mixture to the wet ingredients.
It’s best to add the dry ingredients in batches, mixing gently after each addition. This step is crucial because overmixing at this point can result in tough cookies. We’re aiming for tender, melt-in-your-mouth cookies here, so just mix until everything is incorporated. You don’t need to worry about getting rid of every last little bit of flour. A few streaks are perfectly fine.

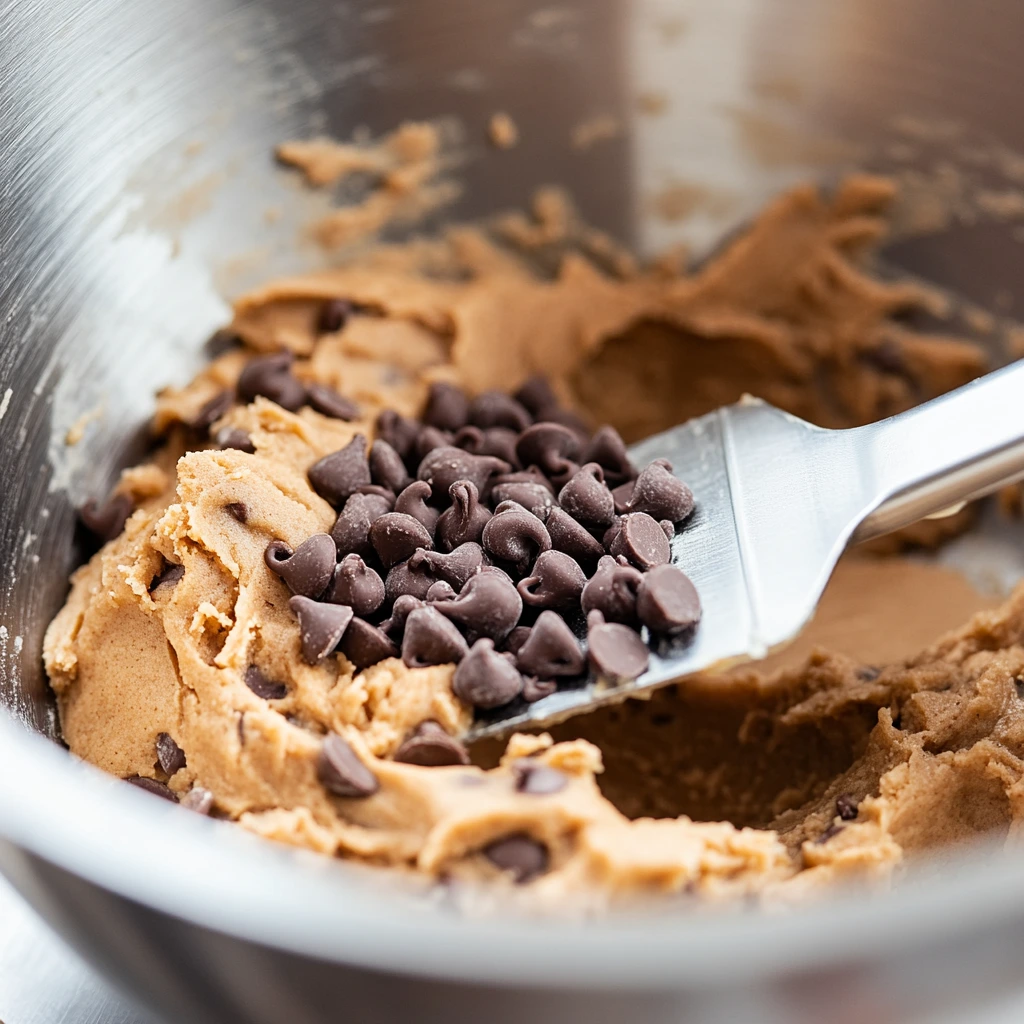
Step 5: Fold in the Chocolate Chips
Now, the best part—chocolate chips! Gently fold in the chocolate chips, being careful not to overmix. You want them evenly distributed throughout the dough, but you also don’t want to mash them up or overwork the dough. I usually use semi-sweet chocolate chips for a classic flavor, but if you prefer milk chocolate or dark chocolate, feel free to swap them in.
The chocolate chips will create those delicious melty pockets of chocolate in every bite. Yum!
Step 6: Shape the Cookies
Now that you’ve got that irresistible dough, it’s time to shape your cookies. This part is really fun because it’s where you get to start seeing the finished product come to life!
Take a tablespoon-sized scoop of dough and drop it onto your prepared baking sheets. If you don’t have a cookie scoop, just use a regular spoon or even your hands to shape the dough. Make sure you space each scoop about 2 inches apart from the others. These cookies do spread a bit while baking, so giving them room to spread out will ensure they bake evenly without sticking together.
Pro Tip: If you want perfectly round cookies, gently roll the dough into balls with your hands before placing them on the baking sheet. This will give you those beautifully uniform, bakery-style cookies!
Step 7: Bake the Cookies
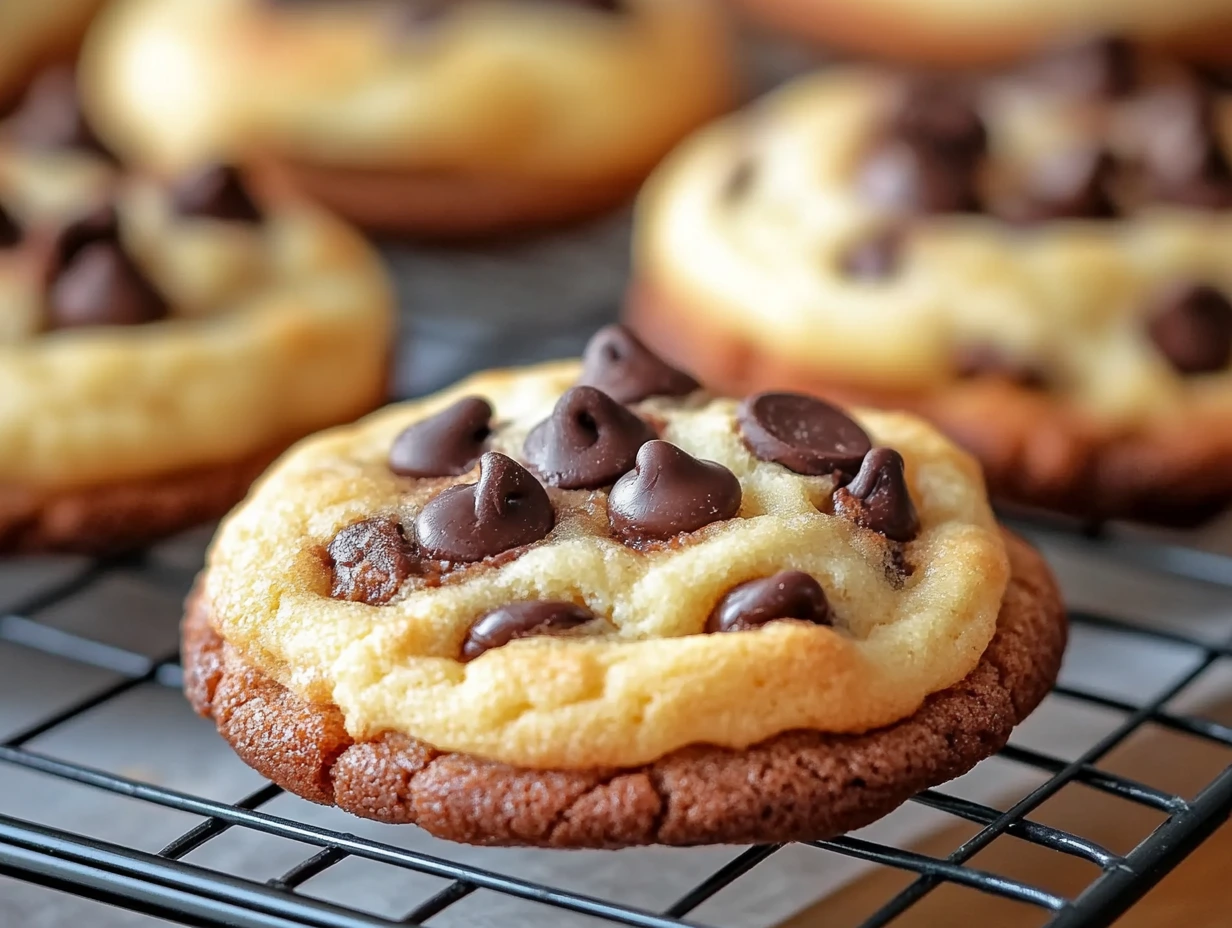
Now, it’s time to pop the cookies into the oven. Bake them at 350°F (175°C) for 10 to 12 minutes. The exact baking time may vary slightly depending on your oven, so keep a close eye on them. You’ll know they’re ready when the edges are lightly golden and the centers are just set but still soft.
Don’t worry if the centers look a little undercooked when you take them out. As they cool, the residual heat from the baking sheets will continue to cook the cookies, and that’s what keeps them soft and chewy in the middle.
Here’s a quick visual guide to help you know when they’re done:
- Golden edges: The edges should be just starting to turn golden brown.
- Set centers: The centers should appear set, but still soft (they’ll firm up as they cool).
- Soft and chewy: You want to see a little softness when you press lightly on the center, not a firm cookie.
Step 8: Cool the Cookies
Once they’re out of the oven, let the cookies cool on the baking sheets for about 5 minutes. This short cooling time will help them set and prevent them from falling apart when you transfer them. After the initial 5 minutes, carefully move the cookies to a wire rack to cool completely. This step helps the cookies firm up fully, and it ensures they maintain that chewy, soft texture.
Tips for Perfect Chocolate Chip Cheesecake Cookies
Now that you know how to make these delicious cookies, let me share a few pro tips to make sure they turn out perfectly every single time.
- Don’t Overmix the Dough: When you’re mixing the dry ingredients into the wet ingredients, mix just until combined. Overmixing can lead to dense cookies, and we want soft and tender ones!
- Room Temperature Ingredients: Make sure your butter and cream cheese are softened before you begin. Cold ingredients can cause the dough to be too stiff and difficult to work with.
- Add More Chocolate Chips: If you love a more chocolaty cookie (who doesn’t?), feel free to toss in a few extra chocolate chips. You can also experiment with different types of chocolate chips—milk, dark, or even white chocolate chips—for a fun twist.
- Chill the Dough (Optional): If you’ve got the time and want to reduce spreading while baking, you can chill the dough in the refrigerator for 30 minutes to an hour before scooping. This isn’t necessary but can help create thicker cookies with slightly less spread.
- Watch the Baking Time: Every oven is a little different, so it’s a good idea to check your cookies a minute or two before the timer goes off. If you see the edges browning too quickly, take them out to avoid overbaking.
Should You Use Parchment Paper or Silicone Mats?
You might be wondering if it’s worth the extra effort to use parchment paper or silicone baking mats instead of just greasing your baking sheets. The answer is: Yes! Both parchment paper and silicone mats are great tools for ensuring that your cookies bake evenly and come off the baking sheet without sticking. I highly recommend using one of these options to make the process easier and to avoid any cookie mishaps.
What Makes These Cookies Different from Regular Chocolate Chip Cookies?
Great question! These Chocolate Chip Cheesecake Cookies have the same soft, chewy texture that you love in a classic chocolate chip cookie, but they also have a richness from the cream cheese. The cream cheese gives these cookies an extra creamy, melt-in-your-mouth quality that makes them feel more indulgent. The slight tang from the cream cheese balances the sweetness of the chocolate chips, creating a unique flavor combination that you won’t find in a traditional chocolate chip cookie. If you’re a fan of cheesecake, this will feel like the best of both worlds!
What’s the Best Way to Store These Cookies?
Once your cookies have cooled completely, you’ll want to store them properly to keep them fresh. These cookies store beautifully in an airtight container at room temperature for up to a week. If you need to store them for a little longer, you can pop them in the fridge, where they’ll last for about 10–12 days. You can also freeze them for up to 3 months! Just be sure to layer the cookies between sheets of parchment paper or wax paper to prevent them from sticking together.
To enjoy them again, simply let them thaw at room temperature, or warm them up in the microwave for a few seconds to bring back that fresh-from-the-oven softness.
Can You Make These Cookies Ahead of Time?
Absolutely! You can prepare the cookie dough ahead of time and store it in the refrigerator for up to 48 hours. This is great for when you want to make the dough in advance and bake the cookies later. Just make sure to bring the dough to room temperature for a few minutes before scooping and baking. If you prefer, you can even freeze the dough in individual cookie dough balls. Just pop them on a baking sheet to freeze, and once they’re solid, transfer them to a zip-top bag. When you’re ready to bake, just place them directly on the baking sheet and bake for a few extra minutes.
Why Are My Cookies Spreading Too Much?
If your cookies are spreading too much in the oven, it could be due to a couple of reasons:
- Butter and Cream Cheese Too Soft: If your butter or cream cheese was too soft (or even melted), the dough can spread too much. Try chilling the dough for 30 minutes before baking to help prevent excess spreading.
- Overmixing the Dough: Overmixing the dough can also cause cookies to spread more. When you add the dry ingredients, mix just until combined to keep the dough firm.
If you follow these tips, your cookies should come out perfectly every time!
FAQ Section: Common Questions About Chocolate Chip Cheesecake Cookies
I know you’re going to have some questions as you make these Chocolate Chip Cheesecake Cookies, so let’s take a moment to answer a few of the most common ones. Hopefully, this will clear up any uncertainties and help you bake with confidence!
1. Can I use low-fat cream cheese in this recipe?
While you can use low-fat cream cheese, I highly recommend sticking with full-fat cream cheese if you want the best flavor and texture. Low-fat cream cheese may alter the richness and creaminess of the cookies, making them a little less indulgent. But if you’re looking to cut some calories or use what you have on hand, go ahead and swap it out. Just keep in mind that the cookies might not be as soft or rich.
2. Can I make these cookies without using cream cheese?
Great question! You can skip the cream cheese if you prefer a more traditional chocolate chip cookie. The cream cheese adds a unique texture and flavor, but if you don’t have it or just don’t want to use it, you can make these cookies using only butter. They’ll still be delicious, though they won’t have the same creamy, slightly tangy quality. If you want to mimic the cream cheese flavor, you could try adding a touch of sour cream or Greek yogurt as a substitute.
3. Can I use a different type of chocolate chip?
Absolutely! While I recommend semi-sweet chocolate chips for the perfect balance of sweetness and richness, you can totally swap them for any type of chocolate chip you prefer. Milk chocolate will give you a sweeter cookie, and dark chocolate chips will make the cookies more intense and less sugary. You could even try adding a combination of different types, like milk and dark chocolate chips, for a fun twist!
4. Can I add nuts to the dough?
Yes! If you love the crunch of nuts in your cookies, feel free to add them. Chopped walnuts or pecans would be a perfect addition, especially if you want to elevate the flavor profile. Add about ½ cup of chopped nuts along with the chocolate chips in Step 5 when you fold them into the dough. Just make sure to give them a gentle fold so the nuts are evenly distributed without overmixing the dough.
5. Why are my cookies spreading too much?
If your cookies are spreading too much while baking, it might be because your butter and cream cheese were too soft to start with. Try chilling the dough for 30 minutes to an hour before baking to help control the spread. This gives the dough a chance to firm up and hold its shape better in the oven. Another tip is to avoid overmixing the dough once you add the dry ingredients, as overmixing can also contribute to excessive spreading.
6. Can I freeze the cookie dough?
Yes, you can! In fact, freezing the dough is a fantastic way to make cookies in advance. Scoop the dough into tablespoon-sized balls and place them on a baking sheet. Freeze the dough balls until they’re solid, and then transfer them to a zip-top bag or airtight container. When you’re ready to bake, place the frozen dough balls on a baking sheet and bake at the usual temperature—just add an extra 1–2 minutes to the baking time. You’ll have fresh cookies ready whenever you want them!
7. How long do these cookies stay fresh?
These cookies stay fresh for about a week when stored in an airtight container at room temperature. If you want them to last a little longer, you can store them in the fridge for up to 10–12 days. To freeze them, just place them in a freezer-safe bag or container, and they’ll last for up to 3 months. When you’re ready to enjoy them again, just thaw them out or microwave for a few seconds to get that soft, chewy texture back.
Conclusion: Enjoy Your Chocolate Chip Cheesecake Cookies!
And there you have it—your ultimate guide to making Chocolate Chip Cheesecake Cookies! Whether you’re baking them for a special occasion, a family gathering, or just because you’re craving something sweet, I’m confident these cookies will become a favorite in your home.
The combination of rich cream cheese and gooey chocolate chips makes these cookies a truly irresistible treat. They’re the perfect balance of creamy, sweet, and slightly tangy, all wrapped up in a soft and chewy cookie that’s just as delicious as it sounds. What’s not to love, right?
I encourage you to try these out and experiment with your own variations. Maybe you’ll add a handful of nuts, or try different types of chocolate chips. Whatever you do, I’d love to hear how they turn out! Drop a comment below to let me know how your batch came out and if you tried any fun twists of your own. Don’t forget to share the recipe with friends and family—everyone loves a good cookie recipe!
Print
Chocolate Chip Cheesecake Cookies
- Total Time: 30 minutes
Description
Soft, chewy cookies with a hint of creamy cheesecake flavor and studded with rich chocolate chips—a delicious twist on a classic favorite!
Ingredients
- ½ cup unsalted butter, softened
- ¼ cup cream cheese, softened
- ¾ cup brown sugar
- ¼ cup granulated sugar
- 1 large egg
- 1 tsp vanilla extract
- 2 cups all-purpose flour
- 1 tsp baking soda
- ½ tsp salt
- 1 cup chocolate chips
Instructions
1️⃣ Preheat the Oven
Preheat your oven to 350°F (175°C). Line baking sheets with parchment paper or silicone baking mats.
2️⃣ Cream the Wet Ingredients
In a large mixing bowl, beat the softened butter, cream cheese, brown sugar, and granulated sugar together until the mixture is light and fluffy.
3️⃣ Incorporate Egg and Vanilla
Add the egg and vanilla extract, beating until fully combined and smooth.
4️⃣ Mix the Dry Ingredients
In a separate bowl, whisk together the all-purpose flour, baking soda, and salt.
Gradually add the dry mixture to the wet ingredients, mixing until just combined. Avoid overmixing to keep the cookies tender.
5️⃣ Fold in Chocolate Chips
Gently fold in the chocolate chips, ensuring they are evenly distributed throughout the dough.
6️⃣ Shape the Cookies
Drop tablespoon-sized scoops of dough onto the prepared baking sheets, spacing them about 2 inches apart.
7️⃣ Bake
Bake in the preheated oven for 10–12 minutes, or until the edges are lightly golden and the centers appear set but still soft.
8️⃣ Cool the Cookies
Allow the cookies to cool on the baking sheets for 5 minutes. Then transfer them to a wire rack to cool completely.
Notes
- Storage: Store cookies in an airtight container at room temperature for up to 5 days.
- Freezing Tip: Freeze the dough in pre-scooped balls for up to 3 months. Bake directly from frozen, adding an extra 1–2 minutes to the baking time.
- Variations: Substitute half of the chocolate chips with white chocolate, peanut butter chips, or chopped nuts for a fun twist.
- Prep Time: 15 minutes
- Cook Time: 10–12 minutes
Nutrition
- Serving Size: 24 cookies


")

")


")
