

Who doesn’t love a dessert that’s comforting, nostalgic, and oh-so-easy to whip up? Classic banana pudding is one of those treats that takes me right back to childhood family gatherings, where we’d all fight over the last creamy spoonful. This recipe is my go-to for a no-fail dessert that’s guaranteed to please any crowd. Whether you’re a banana pudding newbie or a seasoned pro, this step-by-step guide will make sure you nail it every time. So grab your whisk, and let’s dive into this dreamy dessert!
Why You’ll Love This Banana Pudding Recipe
This recipe is the perfect balance of creamy, sweet, and fruity goodness. Layers of crisp vanilla wafers, ripe bananas, and a luscious pudding mixture come together in a harmony of textures and flavors. The best part? No oven required. Whether you’re making it for a potluck, a family dinner, or just because you’re craving something sweet, this banana pudding is a winner every time.
Step 1: Start with the Layers
The first step in this banana pudding journey is creating the base layers. You’ll need a trusty 9×13-inch dish for this, as it gives the perfect canvas for those beautiful, alternating rows of bananas and wafers. Here’s how to do it:
- Line the Dish: Start by covering the bottom of your dish with half the vanilla wafers. Make sure they’re evenly spread out to create a sturdy base.
- Layer the Bananas: Slice 4–6 bananas into ¼ to ½-inch rounds and arrange them on top of the wafers. Try to distribute them evenly, so you get a bit of banana in every bite.
Pro Tip: Use bananas that are ripe but not overly mushy. They should have a few brown specks on the peel for the best flavor.

Step 2: Whip Up the Pudding Mixture
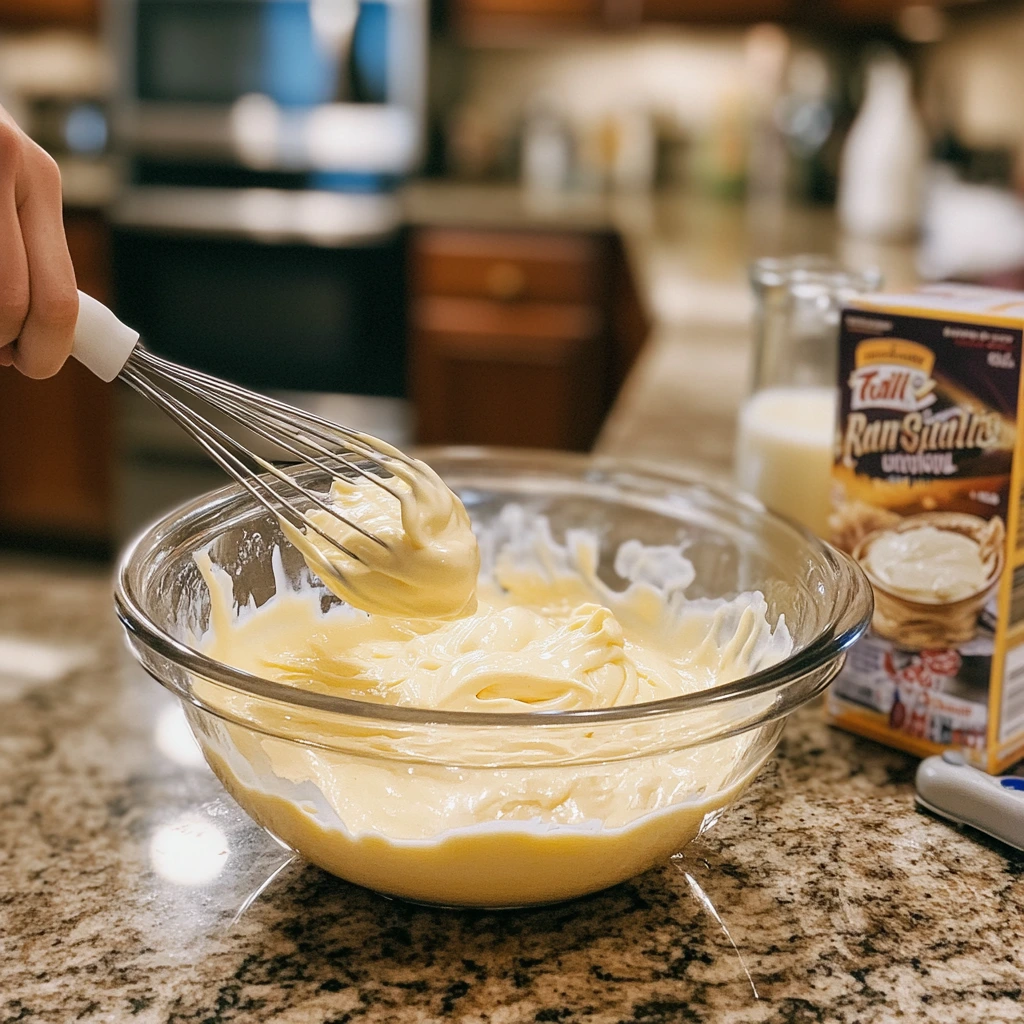
Now comes the fun part—mixing up the pudding that holds everything together. This step is simple but crucial to achieving that silky texture we all love.
- Prepare the Pudding: In a medium bowl, pour in 2 cups of milk and add the instant French vanilla pudding mix. Use a hand mixer to blend until the mixture is smooth and begins to thicken slightly. Let it sit for a few minutes to fully set.
Pro Tip: Want to elevate the flavor? Add a teaspoon of vanilla extract to the pudding for an extra punch of flavor.
Step 3: Create the Cream Cheese Magic
This next layer is where things get extra creamy and decadent. Combining cream cheese with sweetened condensed milk makes a luxurious base that takes this dessert to the next level.
- Cream the Cheese: In a large bowl, beat the softened cream cheese and sweetened condensed milk until smooth. This step ensures there are no lumps in your pudding mixture.
- Add Whipped Topping: Using a rubber spatula, gently fold in the thawed whipped topping (or whipped cream, if you prefer). This makes the mixture light and airy, creating that cloud-like texture we’re after.
Pro Tip: Make sure your cream cheese is fully softened to room temperature before mixing. This prevents lumps and ensures a smooth, creamy result.

Layering, Assembling, and Expert Tips
Now that we’ve prepared all the delicious components of our classic banana pudding, it’s time to bring everything together. This step is where the magic happens—layering those creamy, fruity, and crunchy elements into a dessert masterpiece. Let’s dive back in and finish this irresistible dish!
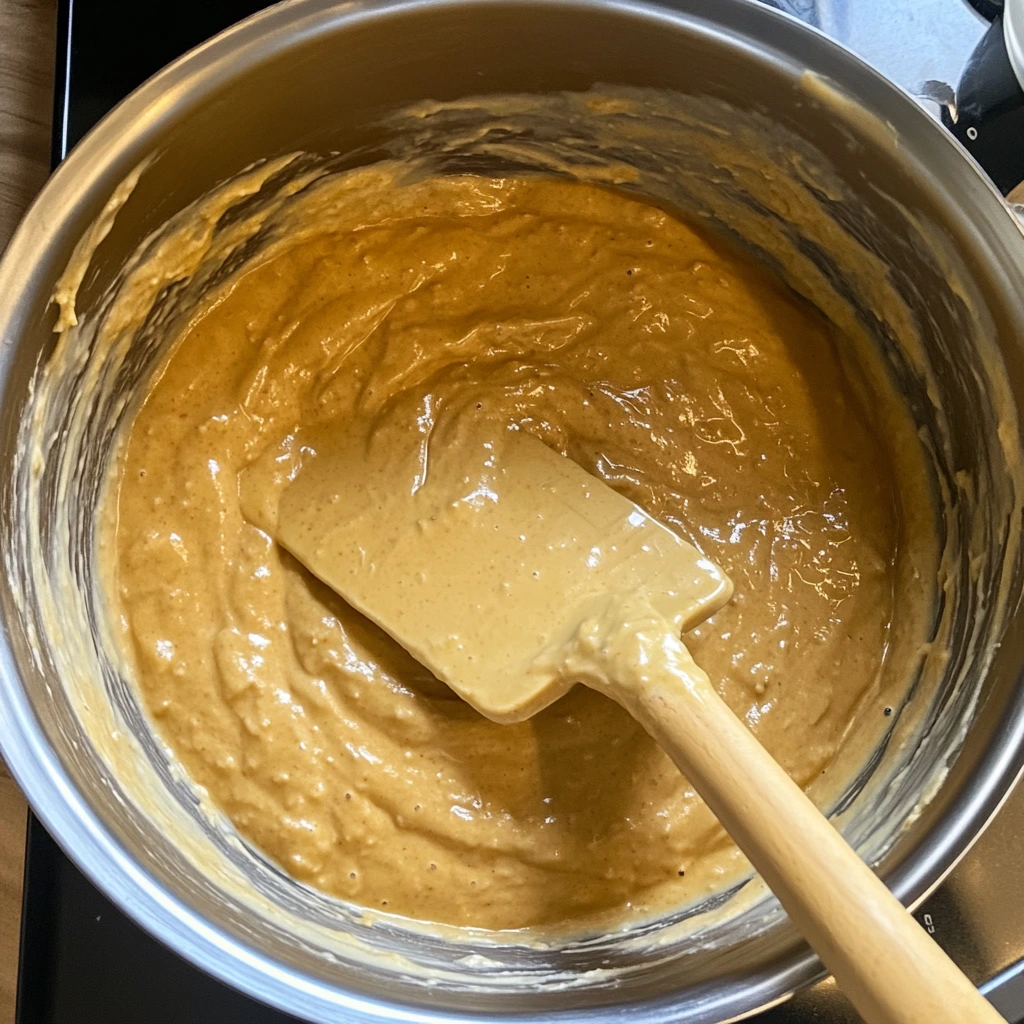
Step 4: Combine the Pudding and Cream Mixtures
Before we start layering, we need to marry the pudding and cream cheese mixtures into one smooth, luscious filling.
- Fold Them Together: Slowly add the prepared pudding into the cream cheese mixture. Use a spatula to gently fold until everything is fully blended and creamy. Be careful not to overmix—you want to keep that fluffy texture intact.
Pro Tip: Folding, rather than stirring, keeps the mixture light and airy. Take your time for the best results!
Step 5: Build the Layers
Now that your pudding-cream mixture is ready, it’s time to assemble the final masterpiece. The layering process is straightforward, but getting even, beautiful layers is key to both presentation and taste.
- Pour the Creamy Mixture: Pour half of the pudding-cream mixture over the wafers and bananas in your dish. Use a spatula to spread it evenly, ensuring every corner is covered.
- Repeat the Layers: Add another layer of the remaining vanilla wafers, followed by another layer of sliced bananas. Finish by pouring the rest of the pudding-cream mixture on top.
- Final Touch: Smooth out the top layer with a spatula and arrange the remaining vanilla wafers over the surface as a decorative topping. You can create a pattern or simply scatter them—it’s your pudding, your rules!
Pro Tip: For an extra decorative flair, crush a few vanilla wafers and sprinkle them over the top layer for added texture and visual appeal.
Step 6: Chill for Perfection
This is the part where patience pays off! Banana pudding needs time to set and let all the flavors meld together.
- Refrigerate: Cover the dish with plastic wrap or aluminum foil and place it in the refrigerator. Let it chill for at least 1 hour. If you have more time, letting it sit for 3–4 hours (or even overnight) will yield the best results.
Pro Tip: If you’re making this for a party or gathering, you can prepare it the day before and let it chill overnight. It tastes even better the next day!
Tips and Variations for the Perfect Banana Pudding
While the classic version is already divine, there are so many ways to customize your banana pudding to suit your taste or dietary preferences. Here are some ideas to try:
- Use Homemade Whipped Cream: Skip the store-bought whipped topping and make your own! Whip 1 cup of heavy cream with 2–3 tablespoons of powdered sugar until soft peaks form. It’s a simple upgrade that makes a big difference.
- Add a Caramel Drizzle: For an extra touch of decadence, drizzle caramel sauce between the layers or on top of the pudding before serving.
- Experiment with Cookies: Swap vanilla wafers for graham crackers, shortbread cookies, or even chocolate wafers for a fun twist.
- Make It Boozy: Add a splash of rum or banana liqueur to the pudding mixture for an adults-only version of this classic dessert.
- Go Nutty: Sprinkle chopped pecans or walnuts between the layers for added crunch and flavor.
Pro Tip: If you’re serving guests with dietary restrictions, you can easily make this recipe gluten-free by using gluten-free vanilla wafers and ensuring all other ingredients are labeled gluten-free.
FAQs, Serving Tips, and the Perfect Ending
You’ve made it to the final part of our banana pudding adventure! By now, your dessert is chilling in the fridge, waiting to wow everyone who takes a bite. But before we dig in, let’s address some frequently asked questions and share tips for serving and storing your banana pudding masterpiece. Finally, we’ll wrap things up with a sweet and encouraging conclusion.
Frequently Asked Questions About Classic Banana Pudding
1. Can I use homemade pudding instead of instant pudding mix?
Absolutely! If you prefer a from-scratch approach, you can use homemade vanilla pudding. Just ensure it’s completely cooled before folding it into the cream cheese mixture.
2. How far in advance can I make banana pudding?
Banana pudding is best made at least 3–4 hours ahead to allow the flavors to meld. You can prepare it up to 24 hours in advance, but keep in mind that the bananas may soften slightly over time.
3. How can I prevent the bananas from turning brown?
To keep bananas fresh-looking, lightly toss the slices in lemon juice or pineapple juice before layering them in the dish. This step adds a slight tang but keeps the bananas vibrant.
4. Can I use a different type of cookie?
Definitely! While vanilla wafers are traditional, you can substitute them with graham crackers, shortbread cookies, or even biscoff biscuits for a unique twist.
5. What can I use instead of whipped topping?
You can make your own whipped cream by beating 1 cup of heavy cream with 2–3 tablespoons of powdered sugar until soft peaks form. It’s a fresh, homemade alternative to frozen whipped topping.
6. Can I freeze banana pudding?
Freezing is not recommended for banana pudding, as the texture of the bananas and cream mixture can become grainy when thawed. It’s best enjoyed fresh from the fridge.
7. What’s the best way to store leftovers?
Cover the pudding tightly with plastic wrap and store it in the refrigerator for up to 3 days. For the best flavor and texture, consume it within 1–2 days.
Serving Tips for Maximum Enjoyment
- Presentation is Key: Serve banana pudding in clear dessert glasses or bowls to show off the beautiful layers. This works especially well for individual portions.
- Add Garnishes: Top each serving with a dollop of whipped cream, a whole vanilla wafer, or even a sprinkle of crushed cookies for a professional-looking finish.
- Serve Cold: Banana pudding tastes best when it’s well-chilled, so make sure it’s been in the fridge for at least an hour before serving.
- Pair with Coffee or Tea: A hot cup of coffee or tea makes the perfect companion to this creamy dessert, especially after a hearty meal.
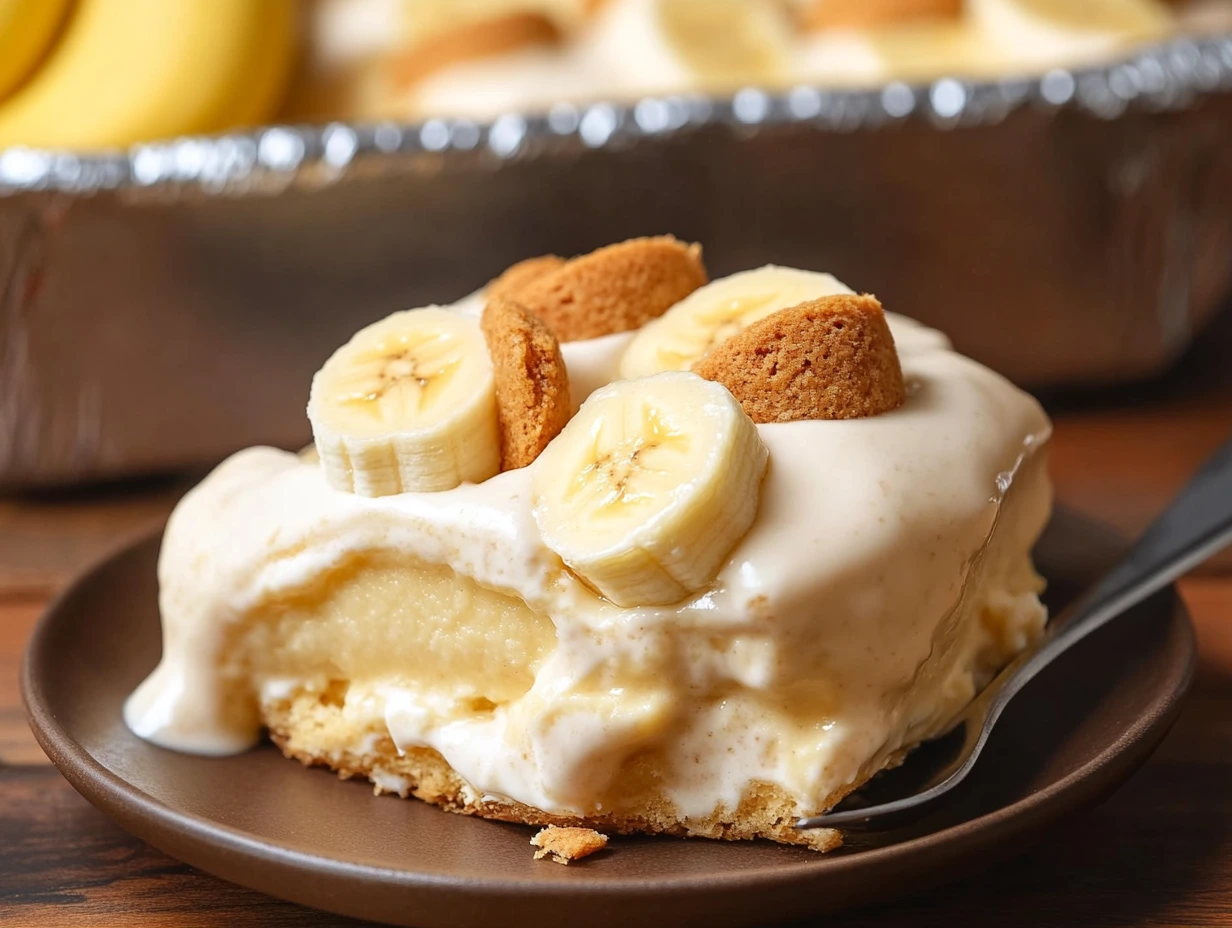
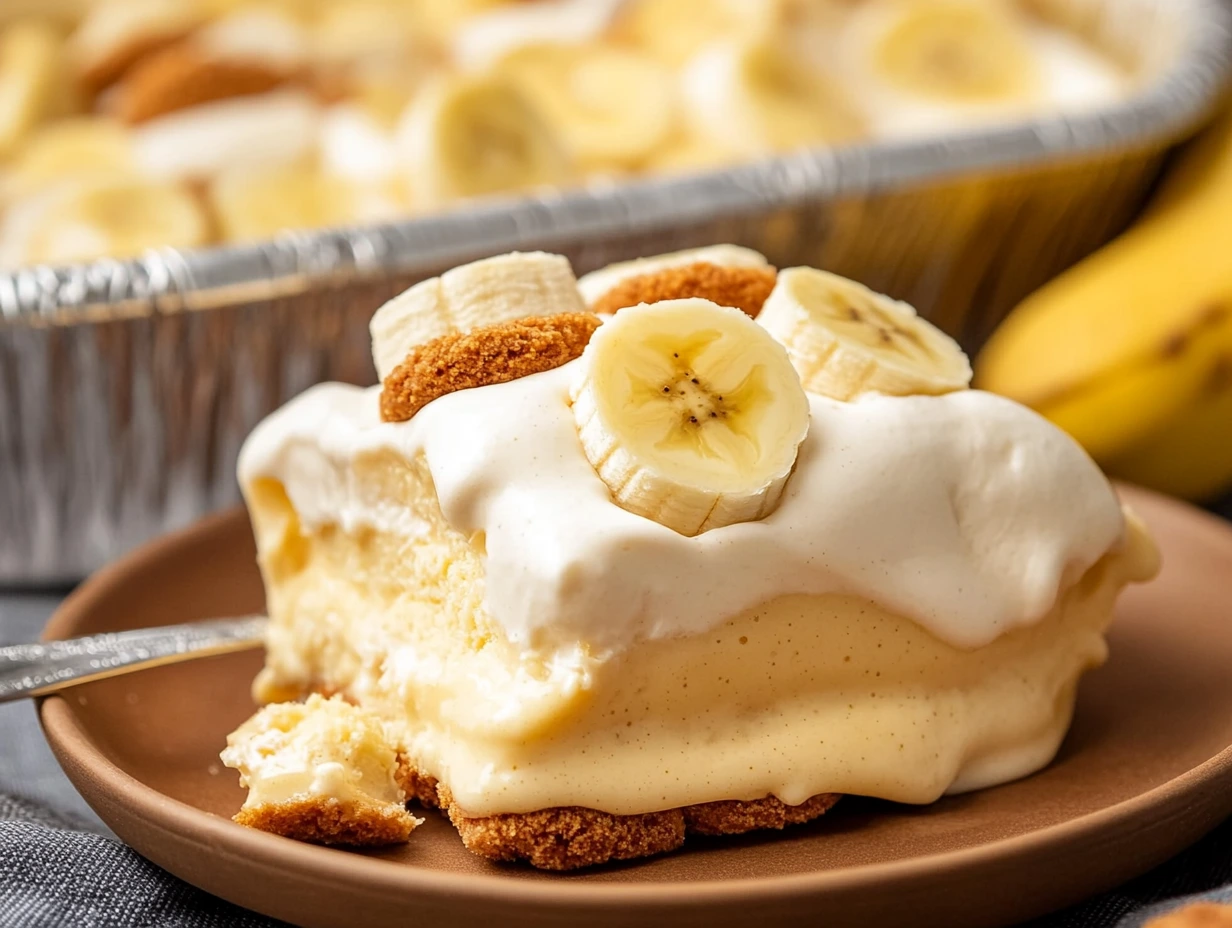
Conclusion: A Dessert to Remember
And there you have it—the ultimate classic banana pudding recipe that’s as easy to make as it is to devour! Whether you’re making this for a family gathering, potluck, or just a cozy night at home, it’s a dessert that never fails to impress. The layers of crunchy wafers, ripe bananas, and velvety pudding blend together in a harmony of flavors that’s nothing short of magical.
Print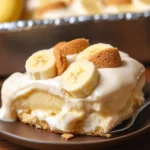
Classic Banana Pudding
- Author: David
- Total Time: 1 hour 15 minutes
Description
This creamy, indulgent dessert is layered with vanilla wafers, sweet bananas, and a luscious pudding-cream cheese mixture. A no-bake Southern classic perfect for gatherings or a cozy treat!
Ingredients
- 1 (11 oz) box vanilla wafers
- 4–6 bananas, sliced into ¼ to ½ inch thick rounds
- 2 cups milk
- 1 (5 oz) box instant French vanilla pudding mix
- 1 (8 oz) package cream cheese, softened to room temperature
- 1 (14 oz) can sweetened condensed milk
- 1 (12 oz) container frozen whipped topping, thawed (or equal amount of sweetened whipped cream)
Instructions
1️⃣ Layer the Dish:
Cover the bottom of a 9×13-inch dish evenly with half of the vanilla wafers.
Add a layer of sliced bananas on top of the wafers, ensuring an even distribution.
2️⃣ Prepare the Pudding Mixture:
In a medium bowl, use a hand mixer to combine the milk and instant pudding mix until smooth. Let it set for a few minutes to thicken slightly.
3️⃣ Make the Cream Mixture:
In a large bowl, beat the softened cream cheese and sweetened condensed milk together with a hand mixer until smooth and creamy.
Gently fold in the thawed whipped topping using a rubber spatula until fully incorporated.
4️⃣ Combine Mixtures:
Fold the prepared pudding into the cream cheese mixture until well blended and creamy.
5️⃣ Assemble the Layers:
Pour the pudding-cream mixture over the wafers and bananas, spreading it evenly to cover.
Top with the remaining vanilla wafers to create a final layer.
6️⃣ Chill:
Refrigerate the banana pudding for at least 1 hour to allow the flavors to meld and the dessert to set.
Notes
- Make Ahead: This dessert is even better when made a day ahead, as the flavors intensify.
- Variations: Swap French vanilla pudding for banana pudding mix for a stronger banana flavor.
- Storage: Store leftovers in an airtight container in the refrigerator for up to 3 days.
- Prep Time: 15 minutes
- Cook Time: 1 hour
Nutrition
- Serving Size: 12


")

")


")
