

There’s just something about cotton candy that takes you straight back to summer fairs and twinkling lights. That sweet, airy, melt-in-your-mouth magic? It’s the kind of nostalgic joy you can’t help but love—and now, you can bring that feeling to life in cake form.
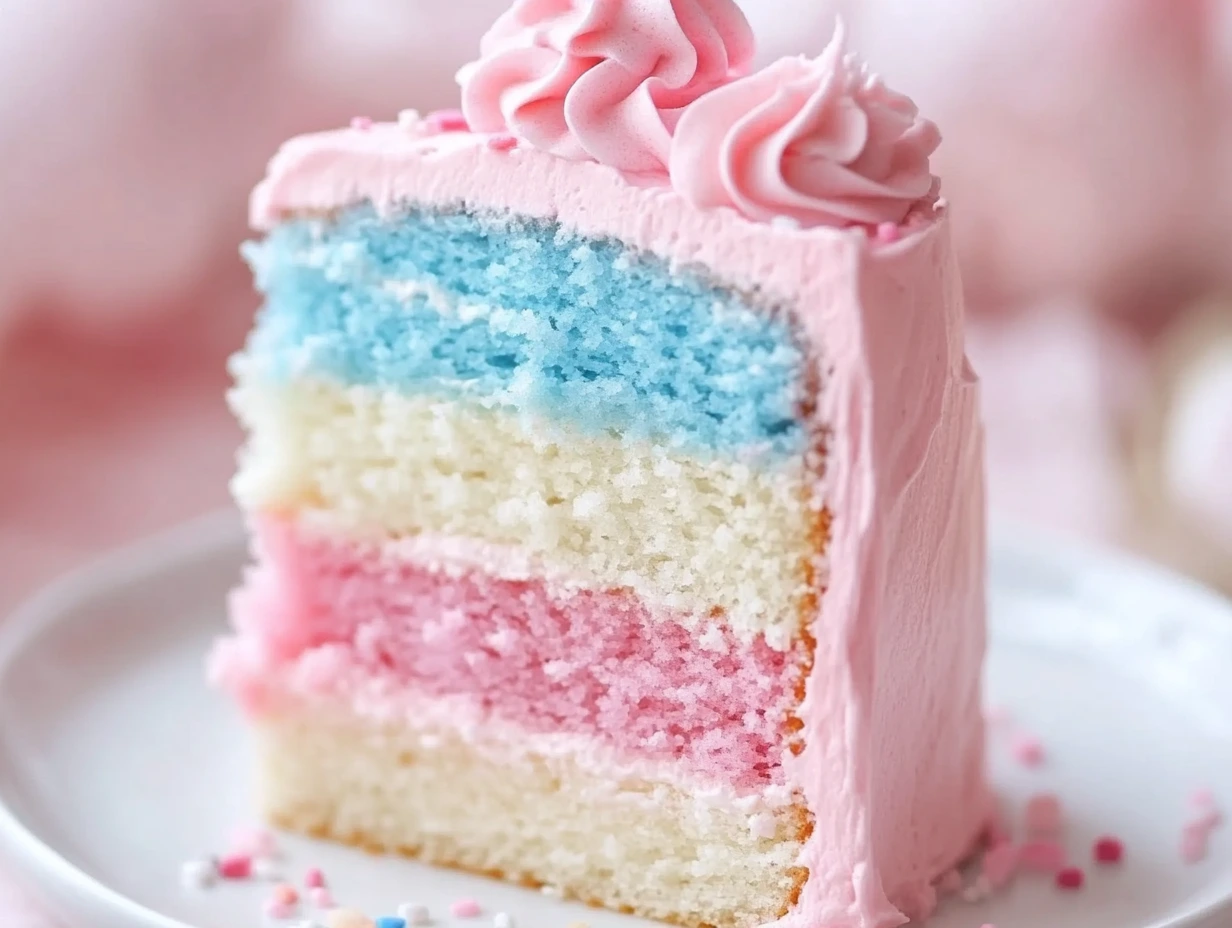
This Cotton Candy Cake is more than just a pretty dessert. It’s a celebration of whimsy, color, and flavor, all wrapped into one fluffy, pastel-layered masterpiece. With soft vanilla cake layers infused with cotton candy flavor, dreamy swirls of pastel frosting, and a sprinkle of edible glitter, it’s everything you want in a show-stopping cake. Whether you’re planning a birthday party, a baby shower, or just looking to treat yourself to something a little special, this cake totally delivers.
I made this last summer for my niece’s birthday, and let’s just say—it was the star of the table. The look on her face when she saw the pink and blue swirls and the little cloud of real cotton candy on top? Worth every minute. The best part? You don’t have to be a professional baker to pull this off. The steps are simple, and with a few tips, you’ll have a gorgeous cotton candy cake that tastes as magical as it looks.
Ingredients You’ll Need
For the Cake:
2½ cups all-purpose flour
2½ teaspoons baking powder
½ teaspoon salt
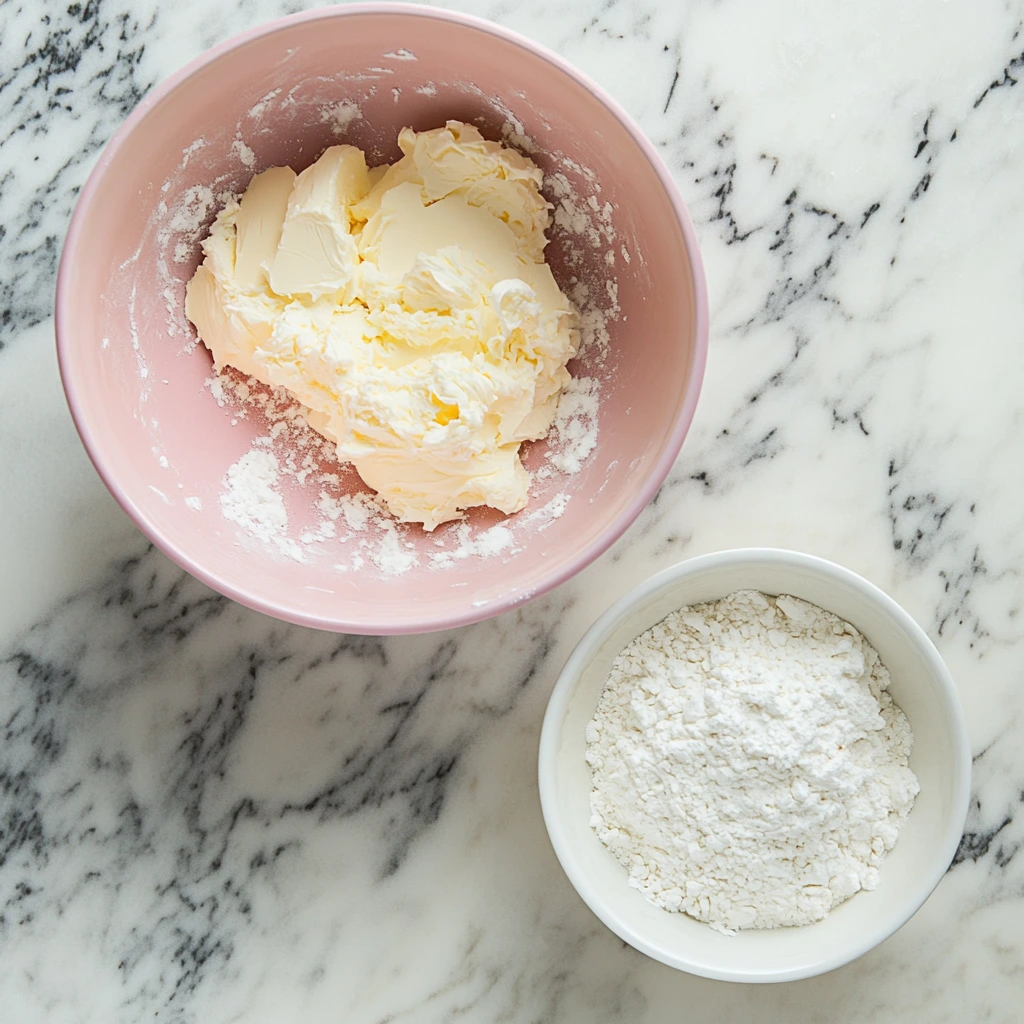
1 cup unsalted butter, softened
1¾ cups granulated sugar
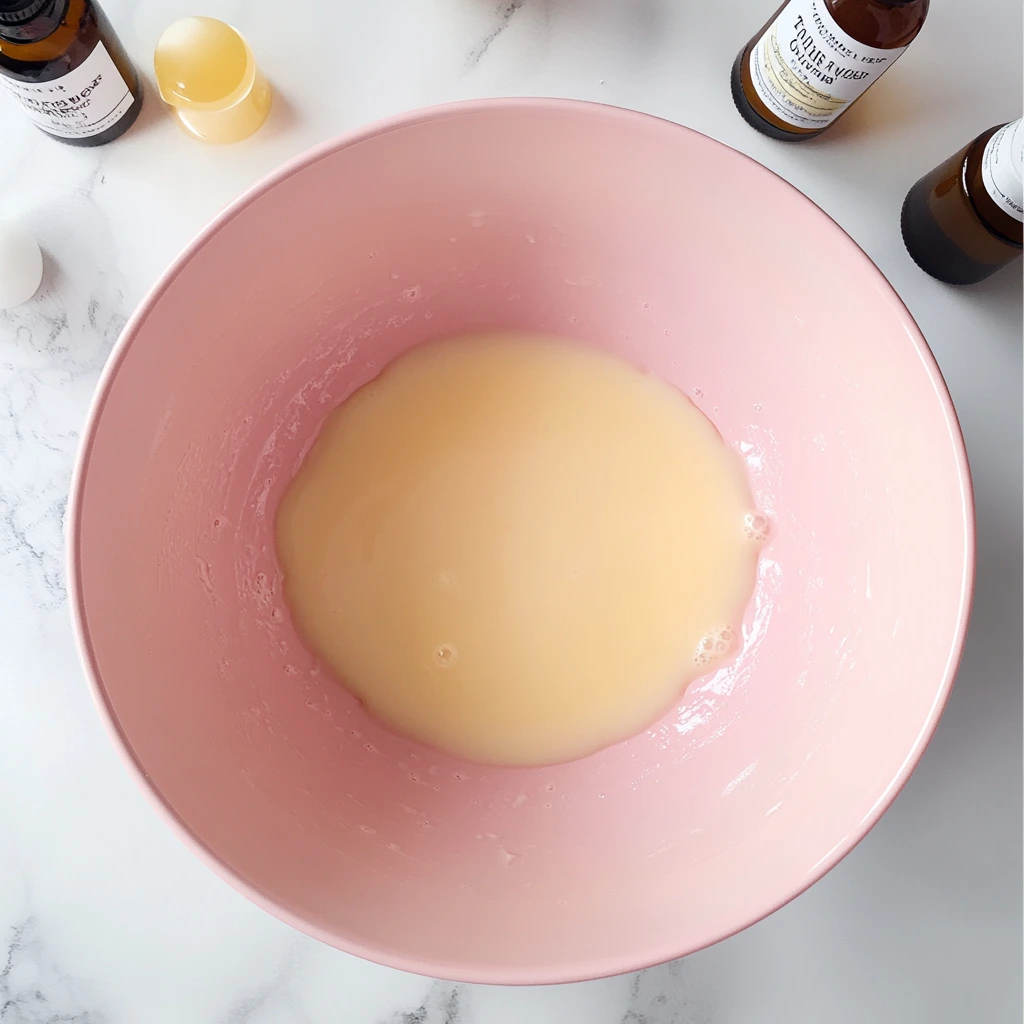
4 large egg whites
1 tablespoon cotton candy flavoring
1 teaspoon vanilla extract
1 cup whole milk
Optional: pink and blue gel food coloring
For the Frosting:
1½ cups unsalted butter, softened
4 cups powdered sugar
2–3 tablespoons heavy cream or milk
1 teaspoon vanilla extract
Cotton candy flavoring to taste (about 1–2 teaspoons)
Optional: food coloring for pastel swirls
For Decoration:
Real cotton candy (add just before serving)
Pastel sprinkles or edible glitter
Let’s Get Baking!
Step 1: Prep the Pans and Preheat
Go ahead and preheat your oven to 350°F. Grease three 8-inch round cake pans and line the bottoms with parchment paper. This makes it so much easier to get your cakes out in one beautiful piece later. Set those aside while you get started on the batter.

Step 2: Mix the Dry Ingredients
In a medium bowl, whisk together your flour, baking powder, and salt. This step ensures everything is evenly distributed, and it gives your cake that soft, even texture we’re going for.
Step 3: Cream the Butter and Sugar
In a large mixing bowl, beat the softened butter and granulated sugar together on medium speed until the mixture is light and fluffy. This usually takes about 2 to 3 minutes. Don’t skip this step—creaming is what helps the cake rise properly and gives it that irresistible, tender crumb.
Step 4: Add Egg Whites and Flavoring
Now, add the egg whites into the butter and sugar mixture. Beat until everything is smooth and well combined. Then stir in the cotton candy flavoring and vanilla extract. That dreamy scent? That’s your kitchen turning into a carnival.
Step 5: Alternate Mixing the Dry Ingredients and Milk
With your mixer on low speed, begin adding the dry ingredients and milk to your wet mixture. Start and end with the dry ingredients (dry–milk–dry–milk–dry is the usual pattern). Mix just until combined—you don’t want to overmix or your cake might turn out dense instead of fluffy.
Step 6: Add Color and Swirl (Optional but Fun!)
If you’re going for that classic cotton candy look, divide the batter into two bowls. Add a drop or two of pink food coloring to one and blue to the other. Stir until you get those pastel tones you love, then spoon alternating colors into your cake pans. Use a butter knife to gently swirl the colors together for that signature cotton candy swirl. Don’t overdo it, or you’ll just end up with purple batter.
How to Bake, Frost, and Decorate Your Cotton Candy Cake Like a Pro
Now that your batter is ready and those dreamy pastel swirls are all set in the pans, it’s time to bake and build this magical cake. The best part? This cake doesn’t just look impressive—it’s actually super doable, even if you’re not a frequent baker. And I’ve got a few tried-and-true tips to help you make sure it turns out picture-perfect.
Let’s get into the next steps, from baking to frosting and finally decorating this beauty into a full-blown centerpiece.
Bake It Until Fluffy and Golden
Step 7: Bake the Cake Layers
Slide your cake pans into the preheated oven (350°F) and bake for about 25–30 minutes. Keep an eye on them toward the end, because every oven runs a little differently. You’ll know they’re done when a toothpick inserted in the center comes out clean and the tops are just lightly golden.
Once they’re baked, let the cakes cool in their pans for about 10 minutes. Then carefully turn them out onto wire racks to cool completely. This part is key—if the cake is even a little warm, the frosting can melt and slide right off.

Whip Up That Cotton Candy Frosting
Frosting is where this cake really starts to come alive. We’re keeping things sweet and buttery with a subtle cotton candy flavor and the prettiest swirls of pastel color.
Step 8: Make the Buttercream
In a large mixing bowl, beat the softened butter until it’s creamy and smooth. This takes about 2 minutes with an electric mixer on medium speed. Gradually add in the powdered sugar, one cup at a time, and alternate with a tablespoon of heavy cream or milk to keep the texture silky.
Once it’s all incorporated, mix in the vanilla extract and your cotton candy flavoring (start with 1 teaspoon and add more to taste—this stuff is strong, so a little goes a long way). If you want to go full pastel dream mode, divide the frosting into two or three bowls and tint each one a different color with gel food coloring. Then gently swirl the colors back together without fully mixing—you want streaks, not a solid color.
Assemble Your Dream Cake
This part might seem intimidating, but take your time and enjoy it. The key is patience (and not rushing through the cooling process).
Step 9: Stack and Frost
Start by placing one cooled cake layer on your cake stand or serving plate. Spread a generous layer of frosting over the top, then add the second layer and repeat. Once your third layer is on top, use the rest of the frosting to cover the sides and top of the cake. Don’t worry about getting it completely smooth—some texture gives it that whimsical, homemade look.
If you’re using your pastel swirled frosting, apply it in sections and smooth it gently to keep the color streaks visible. You can also use an offset spatula or bench scraper to give it a cleaner finish.
Decorate with Carnival Vibes
Now for the fun part—decorating! This is where you get to let your creativity shine. Sprinkles, edible glitter, and of course, real cotton candy make this cake feel like it came straight out of a storybook.
Step 10: Add the Finishing Touches
Once your cake is fully frosted, add pastel sprinkles or edible glitter for a little sparkle. Then, just before serving, place tufts of real cotton candy on top for that iconic carnival look. Be sure to wait until the very last moment to add the cotton candy—it starts to dissolve when exposed to air or moisture, and we want it to look light and fluffy when it hits the table.
Tips for Success
1. Chill the layers (optional but helpful): If your cake layers are a little delicate or you’re frosting with multiple colors, it helps to pop them in the fridge for 20–30 minutes before stacking. It firms them up just enough to make the process easier.
2. Use gel food coloring: Liquid food coloring can thin out your batter or frosting. Gel colors give you vibrant pastels without affecting the texture.
3. Add flavoring slowly: Cotton candy flavoring can go from magical to overpowering pretty fast. Start small, taste as you go, and stop when it’s just right.
4. Make ahead: You can bake the cake layers a day ahead and wrap them tightly in plastic wrap at room temperature. Just wait to frost and decorate the day of serving so everything stays fresh.
Cotton Candy Cake FAQs + Final Thoughts
You’ve baked the layers, swirled your frosting, and decorated like a pastel-loving pro—but maybe you still have a few questions. Whether you’re planning ahead for a party or just wondering if you can tweak a few things, this FAQ section should help you feel totally confident before you dive in.
Frequently Asked Questions
1. Can I make this cake ahead of time?
Yes! You can bake the cake layers a day in advance. Once they’re completely cool, wrap them tightly in plastic wrap and store them at room temperature. Wait to frost and decorate the cake until the day you’re serving it to keep everything fresh.
2. Where can I find cotton candy flavoring?
Cotton candy flavoring is available at specialty baking stores or online. Brands like LorAnn make concentrated flavorings that are perfect for this recipe—just a teaspoon or two is all you need.
3. Can I use a cake mix instead of making the cake from scratch?
Absolutely. If you’re short on time, you can start with a boxed white or vanilla cake mix and add the cotton candy flavoring and food coloring. It won’t be quite the same texture, but it’ll still be delicious and super fun to decorate.
4. What’s the best way to get pastel swirls in the frosting?
Divide your frosting into separate bowls and color each with a different pastel shade. Then spoon them side-by-side into a piping bag or straight onto the cake and gently smooth it out with a spatula. Don’t overmix or you’ll lose the swirl effect.
5. How do I keep the cotton candy from melting?
Cotton candy starts to dissolve when it’s exposed to air or moisture. To keep it looking fluffy and fresh, only add it to the cake right before you serve it. If you need to transport the cake, bring the cotton candy in a separate container and place it on top at the last minute.
6. Can I use a different frosting?
Sure! If you’re not into buttercream, a whipped cream frosting would be light and lovely. Just keep in mind that whipped toppings won’t hold up as long at room temperature and might not support decorations as well.
7. How should I store leftover cake?
Cover the cake with plastic wrap or store it in an airtight container in the refrigerator. It’ll stay fresh for about 3 days. Just remember to remove the cotton candy before storing—it won’t last once it’s been exposed to air.
Final Thoughts: Bring a Bit of Magic to Your Table
This Cotton Candy Cake isn’t just dessert—it’s an experience. From the vibrant colors to that unmistakable sweet aroma, it’s the kind of treat that makes people pause, smile, and ask, “Did you really make that?” And the best part? Yes, you really did.
Whether you’re making it for a birthday bash, a baby shower, or just because your inner child could use something fun and fluffy, this cake delivers charm in every bite. It’s light, it’s whimsical, and it’s so much easier to make than it looks.
I’d love to hear how your cake turns out—did you stick with pink and blue, or try your own color combo? Did the cotton candy hold up for the party? Drop a comment and share your baking adventure. And if you gave it your own twist, let me know! There’s always room for more creativity in the kitchen.
Until next time—keep baking, keep creating, and never underestimate the magic of a good slice of cake.
Print
Cotton Candy Cake
- Author: David
- Total Time: 1 hour
Description
This Cotton Candy Cake is a whimsical, pastel-colored dessert that tastes just as dreamy as it looks. With layers of fluffy vanilla cake infused with cotton candy flavor and topped with swirls of light, colorful frosting, it’s a perfect showstopper for birthdays, celebrations, or whenever you want to add a bit of magic to your table. Finished with real cotton candy and sprinkles, this cake brings carnival vibes straight to your kitchen.
Ingredients
For the Cake:
2½ cups all-purpose flour
2½ teaspoons baking powder
½ teaspoon salt
1 cup unsalted butter, softened
1¾ cups granulated sugar
4 large egg whites
1 tablespoon cotton candy flavoring
1 teaspoon vanilla extract
1 cup whole milk
Optional: pink and blue gel food coloring
For the Frosting:
1½ cups unsalted butter, softened
4 cups powdered sugar
2–3 tablespoons heavy cream or milk
1 teaspoon vanilla extract
Cotton candy flavoring to taste (about 1–2 teaspoons)
Optional: food coloring for pastel swirls
For Decoration:
Real cotton candy (add just before serving)
Pastel sprinkles or edible glitter
Instructions
1️⃣ Preheat your oven to 350°F. Grease and line three 8-inch round cake pans with parchment paper. Set aside.
2️⃣ In a medium bowl, whisk together the flour, baking powder, and salt. In a large mixing bowl, beat the butter and sugar together until light and fluffy, about 2–3 minutes.
3️⃣ Add the egg whites to the butter-sugar mixture and beat until well combined. Mix in the cotton candy flavoring and vanilla extract.
4️⃣ Alternately add the dry ingredients and milk to the wet mixture, starting and ending with the dry ingredients. Mix just until everything is combined.
5️⃣ If desired, divide the batter into two portions and tint one pink and the other blue with food coloring. Gently swirl the two colors together in each cake pan for a cotton candy look.
6️⃣ Pour the batter evenly into the prepared pans and bake for 25–30 minutes or until a toothpick inserted into the center comes out clean. Allow the cakes to cool in the pans for 10 minutes, then transfer to wire racks to cool completely.
7️⃣ For the frosting, beat the butter until creamy. Gradually add the powdered sugar, one cup at a time, alternating with heavy cream or milk. Add vanilla extract and cotton candy flavoring to taste. If desired, tint the frosting with pastel colors and gently swirl them together without overmixing.
8️⃣ Once the cakes are completely cool, assemble them with a layer of frosting between each. Frost the outside of the cake with the cotton candy frosting and smooth it out.
9️⃣ Decorate with sprinkles, edible glitter, and real cotton candy on top just before serving (cotton candy dissolves quickly when exposed to air).
Notes
Cotton candy flavoring can be found in specialty baking stores or online—just a small amount goes a long way. To maintain the fluffy texture and visual appeal, add the real cotton candy topping right before presenting the cake. This cake can be made a day ahead and stored unfrosted, tightly wrapped, at room temperature. Frost and decorate the day of for best results.
- Prep Time: 25 minutes
- Cook Time: 30 minutes
Nutrition
- Serving Size: 10–12


")

")


")
