

If you’re anything like me, pizza is a year-round obsession—but that doesn’t mean it has to be the same old marinara-and-mozzarella situation every time. When the leaves start to fall and cranberry sauce makes its annual comeback, this Cranberry Chicken & Brie Pizza becomes an instant favorite in my kitchen.
This pizza is everything I love about cozy, festive meals—sweet, savory, creamy, and perfectly satisfying. It feels fancy enough to serve to guests during the holidays but comes together in just 30 minutes. Whether you’re working with leftover Thanksgiving turkey or you’ve got some rotisserie chicken to use up, this pizza is the perfect way to give those ingredients new life.
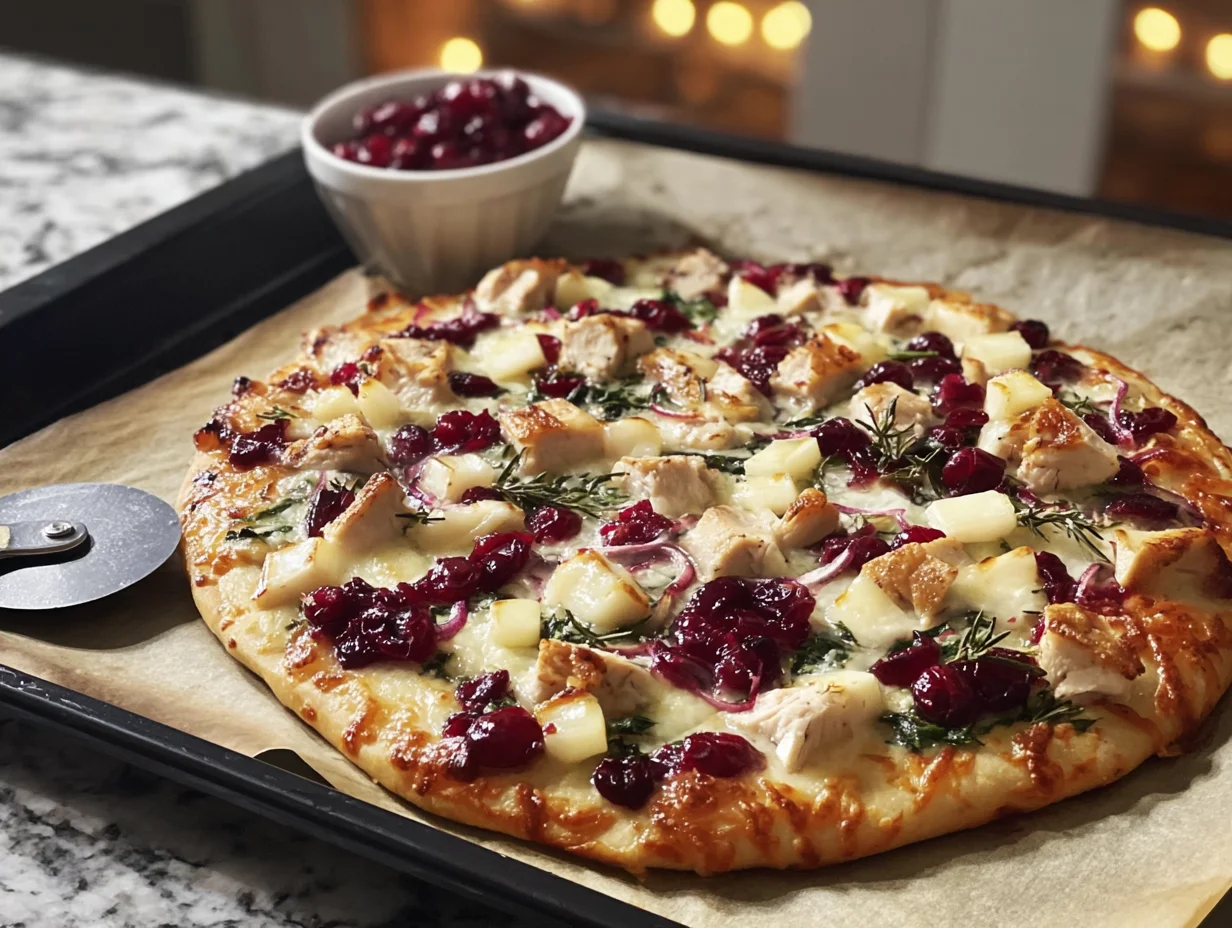
Let’s be honest—pizza night doesn’t have to mean the same pepperoni-and-cheese combo. This version is elevated, elegant, and yes, totally weeknight-friendly. It’s got that golden, crispy crust, melty mozzarella, rich Brie, sweet-tart cranberry sauce, and a sprinkle of fresh herbs to tie it all together. Honestly? It tastes like autumn on a pizza crust.
Alright, ready to get started? Let’s make it happen.

Ingredients You’ll Need
1 ball of pizza dough (store-bought or homemade)
1 cup cooked, shredded chicken (leftover turkey works too!)
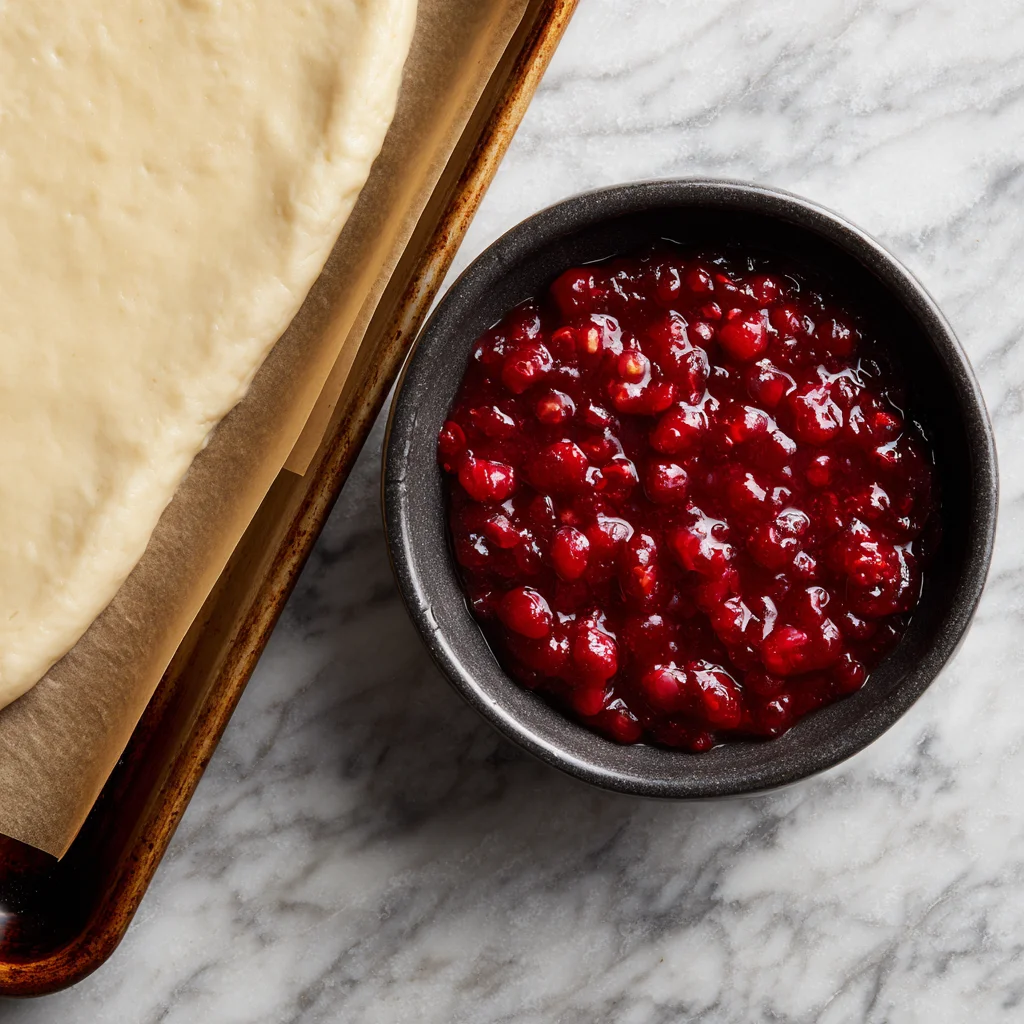
¾ cup whole berry cranberry sauce (not the jellied kind)
4 ounces Brie cheese, sliced with rind on
1 cup shredded mozzarella cheese
1 small red onion, thinly sliced
1 teaspoon chopped fresh rosemary or thyme
Olive oil for brushing
Salt and pepper to taste
Cornmeal or flour for dusting the pan or peel
STEP 1: PREHEAT AND PREP YOUR DOUGH
Start by preheating your oven to 475°F (245°C). If you’re using a pizza stone (which I highly recommend for that crispy, restaurant-style crust), go ahead and pop it in the oven while it heats up. This helps the crust cook evenly and get that nice golden bottom.
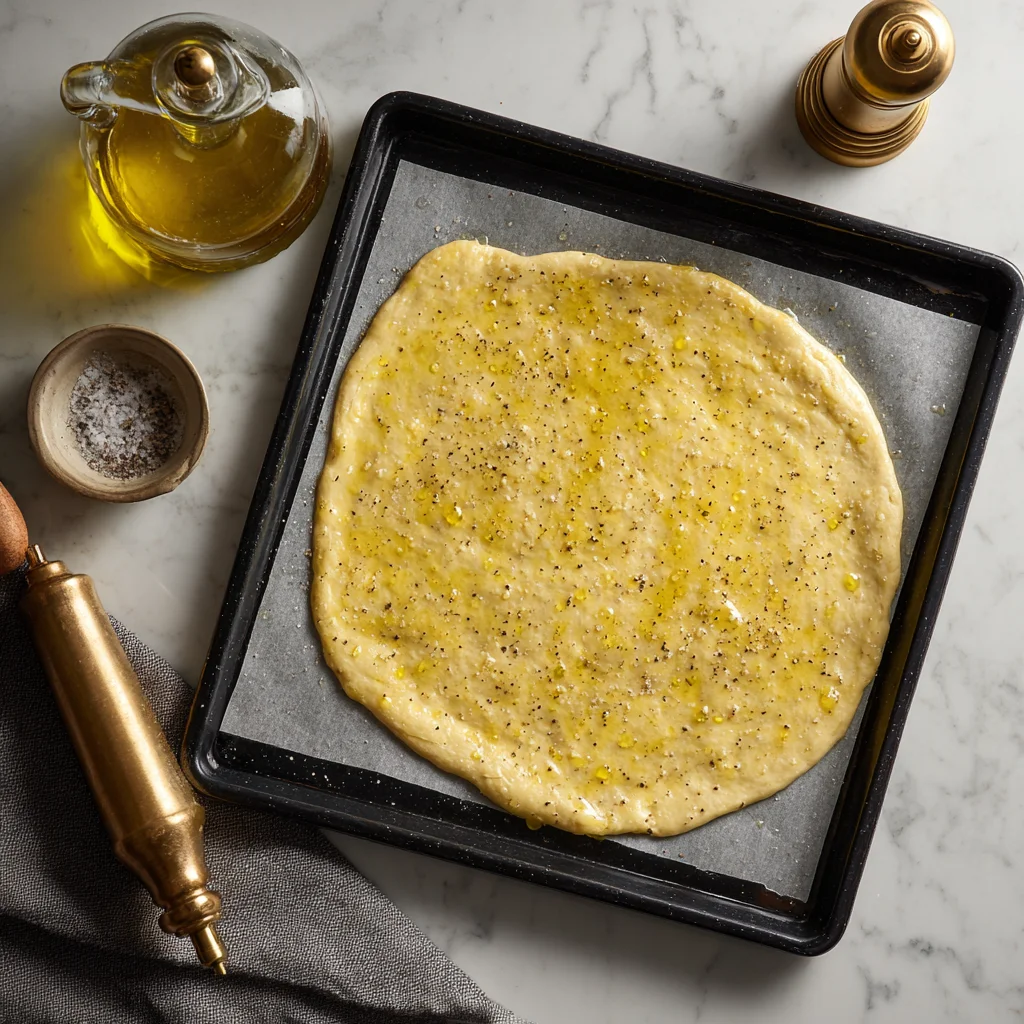
Lightly flour your work surface and roll out your pizza dough into a 12-inch circle. If it starts snapping back while you roll, let it rest for a few minutes to relax the gluten—this will make it much easier to shape. Once it’s rolled out, transfer the dough to a baking sheet or pizza peel that’s been dusted with cornmeal or flour. This helps prevent sticking and gives your crust a little extra crunch.
STEP 2: BUILD YOUR FLAVOR BASE
Now for the fun part—layering those flavors. Brush your pizza dough lightly with olive oil to give it that golden glow as it bakes. Sprinkle with a pinch of salt and pepper to season the crust.
Next, spread your whole berry cranberry sauce evenly over the surface of the dough, leaving a small border around the edges. Don’t go too heavy here—it’s meant to complement the savory elements, not overwhelm them.
STEP 3: ADD THE CHICKEN, CHEESE & TOPPINGS
Time to pile on the good stuff. Evenly scatter your shredded chicken (or turkey) over the cranberry base. Then tuck in slices of Brie cheese—yes, rind and all. The rind is totally edible and adds a subtle earthiness that works beautifully with the cranberry and herbs.
Add a handful of thinly sliced red onions for a little bite and crunch, then sprinkle on your shredded mozzarella for that classic melty cheese moment. Finally, finish it off with a light sprinkle of fresh rosemary or thyme—either herb adds a cozy, aromatic note that just screams fall.
Cranberry Chicken & Brie Pizza: Baking, Tips & Creative Variations
Now that your pizza is assembled with all that beautiful flavor—sweet cranberry sauce, creamy Brie, and herby shredded chicken—it’s time to get it in the oven and bring it all together. This is the part where your kitchen starts to smell absolutely amazing, and you realize just how special this pizza really is.
Whether you’re prepping this for a cozy fall night in or want to impress guests at your next get-together, this next step is where the magic happens. Trust me, once that Brie starts melting and the crust gets golden and crisp, you’ll wonder why you haven’t made this combo before.
Let’s finish this delicious masterpiece.
STEP 4: BAKE TO GOLDEN PERFECTION
With your oven fully preheated to 475°F (245°C), it’s time to bake. If you’re using a pizza stone, carefully slide your pizza onto it from the peel. If you’re using a baking sheet, just place it directly into the oven.
Bake for 12 to 15 minutes, or until the crust is golden and crisp around the edges and the cheese is fully melted and bubbly. Keep an eye on it during the last few minutes—Brie melts quickly, and you want those lovely little browned spots on the mozzarella and the edges of the crust, but not a scorched bottom.

STEP 5: COOL SLIGHTLY, THEN SERVE
Once baked to perfection, remove your pizza from the oven and let it cool for 2-3 minutes before slicing. This helps the cheese set up just a bit and keeps everything from sliding off when you cut into it.
Use a pizza cutter or sharp knife to slice into 4-6 pieces, depending on how hungry everyone is. And just like that—you’re ready to serve a pizza that’s anything but ordinary.
PRO TIPS FOR THE PERFECT HOLIDAY PIZZA
Even though this pizza is simple to make, a few little tricks can take it from good to absolutely amazing. Here are my go-to tips to make sure your Cranberry Chicken & Brie Pizza turns out just right every time:
Use Whole Berry Cranberry Sauce: The texture and tartness of whole berry sauce work so much better here than the jellied version. It holds up during baking and adds little bursts of fruity flavor.
Leave the Brie Rind On: It’s totally edible and adds a subtle, earthy flavor that balances the sweetness. Plus, it helps the Brie slices hold their shape a bit as they melt.
Add Fresh Herbs After Baking (Optional): If you want a brighter herbal note, sprinkle a bit of fresh thyme or rosemary on top after baking. It adds great aroma and a fresh pop of flavor.
Crispier Crust Tip: Pre-bake your crust for 3-4 minutes before adding toppings if you like a super crisp bottom. Just brush with olive oil and give it a quick head start in the oven.
Make It a Meal: Pair this pizza with a simple arugula salad dressed in balsamic vinaigrette for a complete, well-balanced meal that’s perfect for dinner parties or holiday brunches.
FUN VARIATIONS TO TRY
Once you’ve made this pizza once, you’ll probably be inspired to put your own twist on it. Here are a few easy ways to switch things up:
Swap the Brie for Goat Cheese or Blue Cheese: If you’re a fan of bold flavors, goat cheese adds a tangy richness, and blue cheese brings an intense, savory punch that pairs beautifully with cranberry sauce.
Try a Balsamic Glaze Drizzle: A light drizzle of balsamic glaze over the top after baking gives the pizza a sweet-tangy finish that feels super gourmet.
Add Arugula for Freshness: Toss a handful of arugula with olive oil and lemon juice, then scatter it over the hot pizza right before serving. It adds a peppery freshness and a pop of green color.
Use Turkey Instead of Chicken: This recipe is the perfect way to use up leftover Thanksgiving turkey. It tastes just as delicious as chicken—maybe even better with those holiday flavors.
Make Mini Pizzas: Use smaller portions of dough to make individual-sized pizzas—great for holiday gatherings or personalized pizza night with the family.
Cranberry Chicken & Brie Pizza: FAQs & Final Thoughts
By now, your kitchen has probably already smelled like a cozy autumn dream—and hopefully, you’ve already had a slice (or two!) of this flavorful Cranberry Chicken & Brie Pizza. But before we wrap things up, let’s take a quick moment to answer some common questions that might pop up when making this recipe.
Whether you’re wondering about substitutions, storage, or how to take this pizza to the next level, I’ve got you covered.
FREQUENTLY ASKED QUESTIONS
1. Can I use a pre-baked pizza crust instead of raw dough?
Yes, definitely! If you’re short on time, a pre-baked crust is a great option. Just reduce the baking time to about 8–10 minutes since the crust is already cooked—you’re just heating and melting everything together.
2. Is there a substitute for Brie cheese?
Absolutely. If Brie isn’t your favorite (or you don’t have it on hand), goat cheese, blue cheese, or even a creamy Camembert are great substitutes. Each one brings its own unique flavor, so feel free to experiment.
3. Can I use leftover turkey instead of chicken?
Yes! In fact, that’s one of the best parts of this recipe—it’s super versatile. Leftover roasted turkey works beautifully here and gives it that extra holiday twist.
4. Can I make this pizza ahead of time?
You can prep the dough and toppings ahead of time, but for the best texture, it’s best to assemble and bake the pizza right before serving. If needed, you can partially bake the crust for 5 minutes in advance, then finish with toppings and bake when ready.
5. How do I store and reheat leftovers?
Store leftover slices in an airtight container in the fridge for up to 3 days. To reheat, pop them in the oven at 375°F for about 8–10 minutes, or until heated through. This helps the crust stay crispy. Avoid microwaving if possible—it can make the crust soggy.
6. Can I make this recipe gluten-free?
Yes! Just use your favorite gluten-free pizza dough. Most stores carry pre-made versions that bake up beautifully. All the toppings are naturally gluten-free, so it’s an easy adjustment.
7. What wine pairs well with this pizza?
Great question! A medium-bodied red wine like Pinot Noir or a fruity white like Riesling pairs perfectly. The sweetness from the cranberry and richness of the Brie balance beautifully with a wine that’s not too dry or too bold.
FINAL THOUGHTS
If you’ve been searching for a way to bring some fresh energy to pizza night—or if you’re just looking for something new to do with that extra cranberry sauce—this Cranberry Chicken & Brie Pizza might just become your new seasonal go-to.
It’s festive, flavorful, and comes together in just 30 minutes. Plus, it’s one of those recipes that feels special without requiring hours in the kitchen. Whether you’re serving it as a cozy weeknight dinner, a holiday party appetizer, or a creative way to use up leftovers, it never fails to impress.
If you give this recipe a try, I’d love to hear how it turned out! Let me know in the comments what twists you added—maybe you tried a new cheese, swapped in turkey, or added that drizzle of balsamic glaze. However you make it, I hope it brings a little extra warmth and flavor to your table this season.
Print
Cranberry Chicken & Brie Pizza
- Author: David
Description
This Philly Cheesesteak Wrap is a quick and satisfying twist on the classic sandwich, wrapped in a soft tortilla instead of a hoagie roll. Tender slices of beef, sautéed onions and peppers, and gooey melted provolone cheese come together in a warm, handheld wrap that’s perfect for lunch, dinner, or meal prep. It delivers all the bold, savory flavors of a traditional Philly cheesesteak with added convenience and portability.
Ingredients
1 lb thinly sliced beef (ribeye or sirloin recommended)
1 tablespoon olive oil
1 green bell pepper, thinly sliced
1 small yellow onion, thinly sliced
1 teaspoon garlic powder
Salt and black pepper to taste
4 large flour tortillas
4 slices provolone cheese
Instructions
Preheat a large skillet over medium-high heat. Add the olive oil and sauté the sliced onions and green bell peppers for about 5 to 6 minutes, or until they are soft and slightly caramelized. Remove from the skillet and set aside.
In the same skillet, add the sliced beef. Season with garlic powder, salt, and black pepper. Cook for about 4 to 5 minutes, or until the beef is browned and cooked through. Return the peppers and onions to the skillet and stir to combine everything evenly.
Lay out the tortillas on a flat surface. Place one slice of provolone cheese in the center of each tortilla. Divide the beef and pepper mixture evenly among the tortillas, placing it on top of the cheese.
Fold in the sides of the tortilla, then roll it tightly into a wrap. If desired, place the wraps seam-side down in a clean skillet over medium heat for 2 to 3 minutes per side to lightly crisp the outside and melt the cheese.
Slice in half and serve hot.
Notes
For added flavor, try toasting the tortilla before rolling, or add a dash of Worcestershire sauce to the beef during cooking. You can swap out provolone for mozzarella or American cheese based on your preference. These wraps reheat well and can be made ahead for easy grab-and-go meals.


")

")


")
