

This Creamy Garlic Parmesan Chicken Pasta is a cozy, flavorful casserole that combines tender chicken, hearty pasta, and a rich blend of cheeses and sauces. It’s the kind of dish that brings warmth to the table and satisfies a craving for comfort food, making it perfect for weeknight dinners or gatherings with family and friends. With a short prep time and easy baking process, it’s a convenient go-to recipe that’s as easy to make as it is to enjoy.
One of the main appeals of this pasta bake is its creamy, indulgent texture, achieved through the harmonious combination of Alfredo and garlic parmesan sauces. The Alfredo sauce provides a velvety richness, while the garlic parmesan sauce adds an extra layer of savory depth, creating a balance that coats each piece of pasta with a satisfying flavor. The roasted or shredded chicken brings a tender, protein-packed element, making the dish hearty and filling, while the rotini pasta’s spirals help hold onto every drop of sauce for a truly luxurious experience.
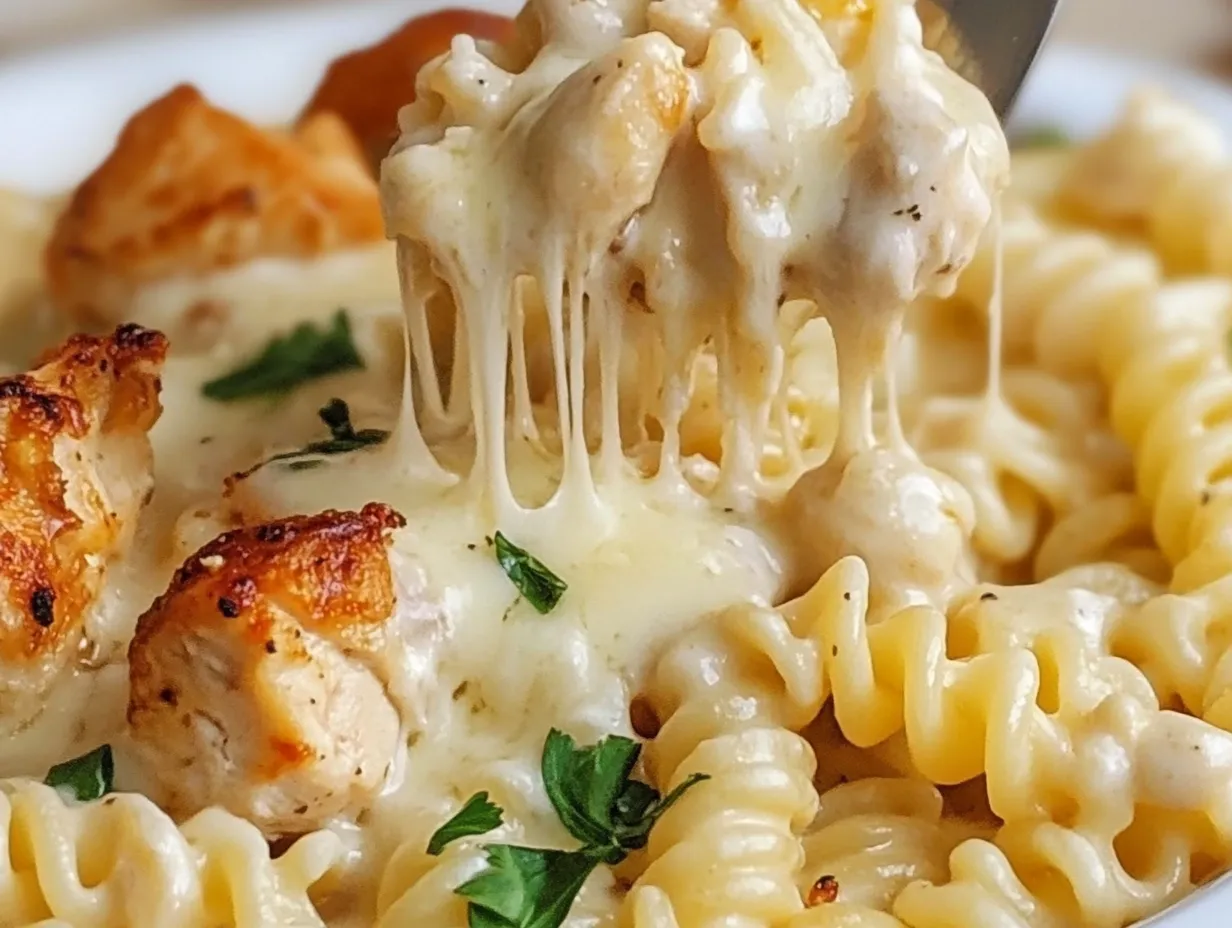
In addition to the Alfredo and garlic parmesan sauces, mozzarella and parmesan cheeses play a key role in giving this dish its cheesy, melty goodness. Half of the mozzarella and parmesan is mixed into the pasta, creating a creamy interior, while the remaining cheese is sprinkled on top for a golden, bubbling crust after baking. The result is a layered texture: creamy and soft inside, with a hint of crispiness on the outside. A sprinkle of fresh parsley adds a pop of color and a hint of freshness, making each serving feel vibrant and well-rounded.
This recipe is also versatile; you can easily customize it by adding your favorite vegetables, swapping in gluten-free pasta, or adjusting the level of creaminess to your liking. Whether you’re serving it on a cool evening or as a centerpiece for a cozy gathering, this Creamy Garlic Parmesan Chicken Pasta is sure to please. Its combination of simple ingredients and straightforward steps makes it a dish that’s both accessible and impressive—perfect for anyone seeking an easy yet delicious pasta bake that brings out the best of garlic, parmesan, and alfredo in one delightful casserole.

Ingredients Needed
Each ingredient in this Creamy Garlic Parmesan Chicken Pasta plays a unique role in building the dish’s flavor, texture, and appeal. Here’s a breakdown of the essential ingredients and why they were chosen, as well as some ideas for substitutions and additions to customize the recipe to your taste.
Essential Ingredients and Their Roles
- Rotini Pasta (1 pound, cooked and drained)
- Purpose: Rotini is a spiral pasta, ideal for capturing sauces in its grooves, which ensures every bite is packed with creamy goodness. Its texture holds up well in baked dishes, staying al dente after baking.
- Substitutions: Any short pasta, such as penne, fusilli, or bow-tie, works well if you don’t have rotini. For a gluten-free option, use gluten-free rotini or your favorite gluten-free pasta.
- Cooked Chicken (3 cups, diced or shredded)
- Purpose: Chicken adds heartiness and protein, making the dish more filling. Dicing or shredding it allows the chicken to blend seamlessly with the pasta and sauce.
- Tips: Rotisserie chicken is a convenient option, saving time on prep. You can also use leftover grilled or roasted chicken for added flavor. To make the dish vegetarian, you could swap chicken for sautéed mushrooms or a plant-based meat substitute.
- Alfredo Sauce (2 jars, 15 ounces each)
- Purpose: Alfredo sauce is the base of the creamy texture, delivering a buttery richness with hints of garlic and parmesan. It creates a luscious coating that complements the pasta and chicken.
- Substitutions: Use a homemade Alfredo sauce if you prefer, or a lighter cream sauce if you want a lower-calorie option.
- Garlic Parmesan Sauce (1 cup)
- Purpose: This sauce intensifies the garlic and parmesan flavors, enhancing the Alfredo sauce for a more robust, savory profile.
- Substitutions: If garlic parmesan sauce is unavailable, you can substitute an extra cup of Alfredo sauce and add minced garlic and extra parmesan cheese for a similar effect.
- Shredded Mozzarella Cheese (2 cups, divided)
- Purpose: Mozzarella’s melty, stretchy quality is perfect for creating a creamy interior and a bubbly, golden crust on top.
- Substitutions: Swap mozzarella with provolone for a similar melt or use a mozzarella-provolone blend for added depth. For a bolder flavor, add some shredded gouda or cheddar.
- Grated Parmesan Cheese (½ cup, divided)
- Purpose: Parmesan offers a nutty, salty taste that enriches the sauce, creating a deeper umami flavor. Its hard texture allows it to crisp up nicely on the surface.
- Substitutions: Pecorino Romano or Asiago can replace parmesan if desired. Just note that these cheeses are often sharper, so adjust to taste.
- Salt and Black Pepper (½ teaspoon salt, ¼ teaspoon black pepper)
- Purpose: These basic seasonings enhance the flavors of the sauce, cheese, and chicken. Black pepper provides a subtle warmth without overpowering other ingredients.
- Tips: Adjust salt and pepper levels based on personal preference or the saltiness of your cheeses and sauces.
- Fresh Parsley, chopped (optional, for garnish)
- Purpose: Fresh parsley adds a pop of color and a fresh, slightly peppery taste that brightens the dish visually and flavor-wise.
- Substitutions: Chopped basil or chives can add a different, refreshing herbal note. If herbs aren’t available, a sprinkle of red pepper flakes can also add visual interest and a touch of spice.
Additional Ingredient Ideas
- Vegetables: For extra nutrition and color, add vegetables like spinach, mushrooms, or sun-dried tomatoes. Sautéed mushrooms blend well with the sauce, while spinach adds color and nutrients.
- Different Cheeses: To experiment with flavors, try adding a bit of gouda or cheddar to the mozzarella for extra richness. Gouda offers a smoky undertone, while cheddar adds sharpness.
By understanding the roles of each ingredient, you can easily make adjustments based on availability, dietary needs, or flavor preferences, ensuring a Creamy Garlic Parmesan Chicken Pasta that’s uniquely yours.
Pre-Preparation Tips
A few simple pre-preparation tips can make a big difference in achieving the perfect Creamy Garlic Parmesan Chicken Pasta. By focusing on the chicken, pasta, and sauces, you’ll ensure that every element comes together smoothly for the best texture and flavor.
1. Preparing the Chicken
- Using Rotisserie Chicken for Convenience:
- Rotisserie chicken is a great choice if you want to save time. It’s already seasoned and cooked, so you can simply shred or dice it for the recipe. Just remove the skin and shred the meat into bite-sized pieces to mix easily with the pasta and sauce.
- Leftover or Pre-Cooked Chicken:
- If you have leftover chicken (grilled, baked, or roasted), this is a perfect way to repurpose it. Just dice or shred as needed. Pre-cooked chicken works well because it has absorbed flavors from previous cooking, adding a subtle depth to the dish.
- Cooking Chicken from Scratch:
- If you’re starting with raw chicken, season it lightly with salt, pepper, and garlic powder, then cook it in a skillet over medium heat until fully cooked (about 5–7 minutes per side, depending on thickness). This way, you’ll infuse flavor without overpowering the dish. Once cooked, allow the chicken to cool slightly, then dice or shred for the casserole.
2. Cooking the Pasta
- Choosing the Right Pasta:
- Rotini pasta is ideal because of its shape, which holds onto sauce well. However, any short pasta, like penne or fusilli, will work if you have it on hand.
- Cooking to Al Dente:
- Cook the pasta until al dente, or slightly firm to the bite. This prevents it from becoming mushy during baking. Since the pasta will continue to cook slightly in the oven, it’s better to undercook than overcook at this stage.
- Saving Pasta Water:
- When draining the pasta, reserve at least 1 cup of pasta water. The starchy pasta water can help adjust the sauce’s consistency, especially if it seems too thick. Adding a splash of pasta water to the sauce mix creates a silkier texture that clings well to the pasta.
3. Working with Sauces
- Understanding Alfredo and Garlic Parmesan Sauces:
- Alfredo Sauce: Alfredo sauce is a creamy base typically made with heavy cream, butter, and Parmesan cheese. It’s known for its rich, smooth texture and mild flavor that complements various ingredients without overpowering them.
- Garlic Parmesan Sauce: Garlic Parmesan sauce is similar to Alfredo but with a stronger garlic flavor. It typically has extra garlic and sometimes a slightly thicker consistency. Adding this sauce enhances the garlic flavor and adds depth, creating a richer profile than Alfredo alone.
- Combining the Sauces for a Balanced Flavor:
- Mixing Alfredo with garlic parmesan sauce creates a balanced, creamy base with a nice garlic punch. If you prefer a lighter garlic flavor, adjust by adding more Alfredo sauce. For a stronger garlic taste, you can increase the garlic parmesan sauce or add a little minced garlic when combining the sauces.
- Tips for Sauce Consistency:
- The sauce should be creamy but not overly thick before baking. Use reserved pasta water to thin the sauce slightly if it feels too dense. This trick keeps the pasta moist and prevents the dish from drying out during baking, ensuring a smooth, creamy texture throughout.
These pre-preparation tips will help streamline the cooking process, prevent common pitfalls, and ensure a perfectly creamy and flavorful pasta bake every time.
Step 1: Preheat the Oven
Preheating the oven is a crucial first step in this recipe, ensuring the Creamy Garlic Parmesan Chicken Pasta bakes evenly and develops the perfect texture. This step allows the oven to reach a consistent, stable temperature before placing the dish inside, which helps avoid common issues like uneven cooking or overly browned edges.
Why Preheating the Oven is Essential
- Consistent Cooking Temperature: Starting with a preheated oven ensures the pasta casserole bakes at a consistent temperature, which is essential for even cooking throughout. If the oven is not fully preheated, the pasta and cheese may cook unevenly, resulting in undercooked or overcooked areas.
- Ideal Cheese Melting and Browning: A preheated oven is also necessary for the cheese topping to melt evenly and achieve a golden, bubbly crust. Without preheating, the cheese might start melting before the rest of the dish warms up, potentially becoming too brown or crispy before the casserole is heated through.
- Controlled Bake Time: When you place the casserole in a fully heated oven, it will cook within the expected bake time of 20–25 minutes. Without preheating, the dish may take longer to bake, and results can be inconsistent.
Preheating Tips
- Temperature Setting: Set your oven to 375°F (190°C), a suitable temperature for casseroles that require even baking without drying out. Preheat for at least 10 minutes or until your oven signals it has reached the desired temperature.
- Avoiding Over-Browning: If you find your oven has “hot spots” (areas where food browns more quickly), consider turning the dish halfway through baking. This helps ensure an evenly golden cheese crust.
Choosing the Right Baking Dish
- Size: A 9×13-inch baking dish is ideal for this recipe. This size offers enough space for the pasta mixture to spread out and bake evenly, and it’s also deep enough to prevent bubbling sauce or cheese from spilling over the sides.
- Materials: Both glass and ceramic baking dishes work well for this pasta casserole. These materials conduct heat evenly, helping the dish bake consistently throughout. Glass dishes also allow you to check the casserole’s progress, while ceramic dishes retain heat well, keeping the pasta warm for serving.
Greasing the Dish
- Why Greasing Matters: Lightly greasing the baking dish prevents the pasta and cheese from sticking to the sides, making serving and cleanup much easier. This step ensures the casserole portions come out smoothly without any residue left behind.
- Best Options for Greasing: Use a cooking spray for convenience or lightly coat the dish with softened butter for a richer flavor. Alternatively, you can use a small amount of olive oil, spread evenly with a paper towel, which provides a non-stick barrier without altering the flavor.
By taking the time to preheat the oven and prepare the baking dish, you set the stage for a perfectly baked pasta casserole with a creamy interior and a golden, bubbly top.
Step 2: Prepare the Pasta Mixture
The pasta mixture is the heart of this Creamy Garlic Parmesan Chicken Pasta, where all the ingredients come together to create a rich, flavorful, and creamy base. In this step, you’ll combine the cooked pasta, chicken, sauces, cheeses, and seasonings to ensure every bite is perfectly balanced and coated in a deliciously creamy sauce.
Combining Ingredients for the Pasta Mixture
- Cooked Rotini Pasta:
- Place the drained, cooked rotini pasta into a large mixing bowl. Rotini’s spiral shape is ideal for capturing sauces, ensuring that each piece of pasta clings to the creamy mixture.
- Diced or Shredded Chicken:
- Add the diced or shredded chicken to the bowl. Whether using rotisserie, leftover, or freshly cooked chicken, make sure it’s in bite-sized pieces to mix seamlessly with the pasta and absorb the sauce.
- Alfredo and Garlic Parmesan Sauces:
- Pour in the Alfredo and garlic parmesan sauces. The Alfredo sauce provides a creamy, mild base, while the garlic parmesan sauce introduces a stronger garlic and parmesan flavor, enhancing the richness and adding a savory depth.
- Mixing Tip: Stir the sauces thoroughly into the pasta and chicken, ensuring every piece is evenly coated. If the mixture feels too thick, you’ll adjust it with pasta water later.
- Half of the Shredded Mozzarella Cheese:
- Add half of the shredded mozzarella to the mixture. This step creates an initial layer of cheese throughout the pasta, contributing to a gooey, stretchy texture when baked. The other half will be used as a topping to form a golden, melty crust.
- Half of the Grated Parmesan Cheese:
- Add half of the grated parmesan cheese, which brings a nutty, slightly salty flavor that enhances the overall savory profile. Parmesan also adds a creamy texture when melted, balancing out the Alfredo sauce’s richness.
- Seasonings – Salt and Black Pepper:
- Season with ½ teaspoon of salt and ¼ teaspoon of black pepper, or adjust to taste. These basic seasonings enhance the sauce and cheese flavors without overpowering them.
- Seasoning Tip: If you’re using jarred sauces, keep in mind they often contain salt. Start with a smaller amount of salt and taste as you mix. You can always add more if needed.
Achieving the Perfect Texture
- Adding Reserved Pasta Water:
- Gradually add about ½ cup of reserved pasta water to the mixture. The starchy pasta water helps thin out the sauce slightly, making it more spreadable without losing its creamy texture.
- Texture Tip: The mixture should be creamy and spreadable, not overly thick or dry. If you prefer a saucier casserole, add more pasta water in small increments (up to 1 cup in total). This trick prevents the casserole from drying out in the oven, keeping the pasta moist and creamy.
- Mixing Thoroughly:
- Stir everything together gently but thoroughly to ensure that the sauces, chicken, and cheeses are evenly distributed throughout the pasta. This step is essential for a consistent, creamy texture in each bite.
- Avoiding Over-Mixing: Be gentle when stirring to avoid breaking the pasta. Over-mixing can also cause the sauce to lose some of its creaminess, so mix until combined, then stop.
Balancing Flavors with Seasoning
- Salt:
- Salt is essential for bringing out the flavors of the cheeses and sauces. If using salted jarred sauces, adjust the salt level to avoid an overly salty dish. Taste the mixture before adding extra salt to control the seasoning.
- Black Pepper:
- Black pepper adds subtle warmth, enhancing the creamy sauce without competing with the garlic and parmesan flavors. Add to taste, starting with a small amount and increasing if desired.
- Optional Additions:
- If you enjoy a bit of heat, consider adding a pinch of red pepper flakes to the mixture for a slight kick.
- For extra depth, a sprinkle of Italian herbs (like oregano or basil) can add a complementary herbal note without altering the dish’s creamy character.
By carefully combining the pasta, chicken, sauces, cheeses, and seasonings, and adjusting with pasta water, you’ll create a creamy, flavorful pasta mixture that’s ready for baking. This thorough preparation ensures the perfect consistency, making each bite rich, saucy, and bursting with the flavors of garlic, parmesan, and mozzarella.
Step 3: Assemble the Casserole
Once you’ve prepared the pasta mixture, it’s time to transfer everything to your baking dish and assemble the casserole for baking. This step is where you’ll add the finishing touches, including layering cheeses and optional toppings, to create a deliciously golden, cheesy crust on top.
Transferring the Pasta Mixture to the Baking Dish
- Prepare the Baking Dish:
- Use the greased 9×13-inch baking dish you prepared earlier. This size is perfect for evenly baking the casserole and providing enough surface area for the cheese to melt into a bubbly layer.
- Add the Pasta Mixture:
- Carefully transfer the pasta mixture from the mixing bowl into the baking dish. Use a spatula to ensure you scrape every last bit of sauce and cheese from the bowl, maximizing the creamy mixture in the dish.
- Spread Evenly:
- Use the back of a spoon or spatula to spread the pasta mixture evenly across the dish. This step ensures even baking and makes sure every portion has a good balance of pasta, sauce, and chicken.
- Pro Tip: Press the pasta mixture gently to create a flat surface. This will allow the cheese topping to melt and brown evenly during baking.
Layering Cheeses for a Melty Top Layer
- Remaining Mozzarella Cheese:
- Sprinkle the remaining mozzarella cheese over the top of the pasta mixture. Mozzarella’s gooey, stretchy texture is ideal for creating a creamy, melty layer on top.
- Layering Tip: Spread the mozzarella evenly to cover the entire surface, which will help form a uniform golden crust.
- Remaining Parmesan Cheese:
- Add the remaining grated parmesan on top of the mozzarella. Parmesan has a nutty flavor and a slightly harder texture, so it adds a contrasting element to the stretchy mozzarella. It will also create some golden brown spots, adding to the dish’s visual appeal.
- Pro Tip: If you love a crispy, golden top, add a bit more Parmesan. Its lower moisture content compared to mozzarella helps it brown nicely, giving the dish a deliciously savory, crispy finish.
Optional Toppings and Garnishes for Added Flavor
Adding toppings or garnishes can elevate the flavor and texture of your casserole. Here are a few optional ideas:
- Breadcrumbs:
- Crunchy Topping: Sprinkle a light layer of breadcrumbs over the cheese for an added crunch. Use regular breadcrumbs, panko, or even Italian-seasoned breadcrumbs for extra flavor.
- Tip: Lightly drizzle a small amount of olive oil over the breadcrumbs before baking to help them brown and crisp up. This adds a golden, crunchy layer that contrasts with the creamy pasta.
- Extra Parmesan:
- For even more cheesy depth, sprinkle an additional tablespoon or two of grated Parmesan on top. This boosts the nutty, savory flavor and contributes to the golden color of the baked crust.
- Herbs and Seasonings:
- Italian Herbs: A sprinkle of dried Italian herbs, such as oregano, basil, or thyme, can add a hint of herbal aroma to the dish.
- Red Pepper Flakes: For a touch of heat, add a light sprinkle of red pepper flakes on top. The slight spice balances the richness of the cheese and cream sauce.
- Fresh Garnish After Baking:
- Once the casserole is baked and slightly cooled, garnish it with fresh chopped parsley or basil. This adds a vibrant pop of color and a hint of fresh flavor, which complements the creamy and cheesy layers beautifully.
By carefully assembling and layering the ingredients in the baking dish, you set up the casserole to bake evenly and develop a satisfying, melty crust. The additional toppings or garnishes enhance the flavor and appearance, making this Creamy Garlic Parmesan Chicken Pasta both visually appealing and irresistibly delicious.
Step 4: Bake the Casserole
Baking is the final step that brings together all the flavors and textures, transforming the prepared pasta mixture into a bubbling, gooey casserole with a golden, cheesy crust. Baking at the right temperature and using foil during the initial stages ensures the dish cooks evenly, achieving the perfect creamy consistency without over-browning the cheese.
Importance of Covering the Dish with Foil
- Prevents Cheese from Browning Too Quickly:
- Covering the casserole with aluminum foil helps protect the cheese topping from direct heat, preventing it from browning or crisping too quickly. This allows the interior to cook thoroughly before the cheese starts to bubble and brown.
- Encourages Even Heating:
- Foil traps steam inside the baking dish, which keeps the casserole moist and helps it heat evenly. This step is especially important for a pasta bake, ensuring that the cheese melts smoothly and the sauce stays creamy rather than drying out.
- Timing for Removing the Foil:
- About 5–10 minutes before the end of baking, remove the foil to allow the cheese on top to melt fully and achieve a golden-brown finish. This step provides the casserole with a bubbly, crispy crust without risking burnt cheese.
Baking Times and Temperatures
- Temperature:
- Bake the casserole at 375°F (190°C), an ideal temperature for a pasta bake that allows the casserole to cook through while keeping the cheese from over-browning.
- Baking Time:
- Covered Bake: Cover the dish with foil and bake for 20–25 minutes. This time allows the sauce to heat through, the cheese inside to melt, and the flavors to meld together.
- Uncovered Bake: After 20–25 minutes, remove the foil and bake uncovered for an additional 5–10 minutes, or until the cheese on top is golden and bubbly. Keep an eye on the casserole to ensure it doesn’t brown too much.
Adjusting Baking Time Based on Preferences and Oven Variations
- For a Saucier Casserole:
- If you prefer a saucier texture, reduce the initial covered bake time slightly (about 5 minutes less) to maintain a creamier consistency. Reducing baking time helps retain moisture in the sauce, preventing it from thickening too much.
- For a Firmer Texture:
- If you prefer a firmer, slightly more set casserole, increase the covered baking time by an additional 5 minutes. This will allow the sauce to thicken slightly, resulting in a denser texture.
- Oven Variations:
- Because ovens can vary in temperature accuracy, keep an eye on the casserole during the last 10 minutes of baking. If your oven tends to run hot, you may need to reduce the baking time slightly to prevent over-browning. Conversely, if your oven runs cool, you might extend the baking time by 5–10 minutes.
- Testing for Doneness: When ready, the casserole should be bubbling around the edges and the cheese should be fully melted and golden brown on top. You can also check the center of the casserole with a fork or spoon to ensure the pasta and sauce are hot throughout.
By following these guidelines, you’ll achieve a perfectly baked Creamy Garlic Parmesan Chicken Pasta with a gooey, bubbly consistency and a golden, melty top layer. This step completes the cooking process, setting up the dish for a warm, comforting, and visually appealing presentation.
Step 5: Optional Broiling for a Golden Top
Broiling is a quick, optional step that can give your Creamy Garlic Parmesan Chicken Pasta a beautiful, golden-brown cheese layer with a slight crispness. By broiling for just a couple of minutes, you can elevate the casserole’s appearance and add a hint of texture that contrasts nicely with the creamy layers beneath.
Broiling Techniques for a Crispy, Golden Cheese Layer
- Switch to Broil Setting:
- After the casserole has finished baking, turn your oven to the “Broil” setting. Most ovens offer “High” and “Low” broil options; for this dish, “High” is recommended to achieve the golden-brown top in a short amount of time.
- Adjust the Oven Rack Position:
- Move the baking dish to the top rack, about 4–6 inches from the broiler element. This close proximity to the broiler creates intense heat that quickly browns the cheese. Positioning is key here, as being too close could burn the cheese, while being too far may not yield the desired golden crust.
- Broiling Time:
- Broil for 2–3 minutes, or until the cheese on top is bubbly and golden. Keep a close eye on the casserole, as broiling happens fast and can turn from golden to burnt within seconds.
- Visual Cues: The cheese should develop a rich golden color with small browned spots. When you see these signs, the casserole is ready to come out of the oven.
Safety Tips for Broiling
- Watch Carefully to Prevent Burning:
- Broiling can quickly over-brown or burn the top layer if left unattended, so stay by the oven while broiling and watch closely. The cheese may brown unevenly depending on your oven, so you may need to turn the dish halfway through broiling to achieve an even golden top.
- Avoid Using Foil While Broiling:
- Remove any foil before broiling, as it can trap heat unevenly and potentially burn parts of the dish. Direct exposure to the broiler’s heat ensures even browning and a better overall texture on top.
- Be Cautious of Heat and Steam:
- When you open the oven after broiling, be prepared for a burst of hot air. Use oven mitts and allow any steam to escape before reaching in to remove the dish. The casserole will be extremely hot right after broiling, so let it sit for a few minutes before serving.
Broiling gives your Creamy Garlic Parmesan Chicken Pasta a professionally baked look and adds a slightly crispy texture to the cheese topping, enhancing both the flavor and visual appeal of the dish. With careful timing and attention, broiling is a quick and rewarding step that can make a delicious difference in your pasta bake.
Step 6: Garnish and Serve
Once your Creamy Garlic Parmesan Chicken Pasta is baked to perfection, garnishing and serving it thoughtfully can elevate the dish further. With simple garnishes, portioning tips, and ideas for complementary sides, you’ll have a pasta casserole that looks as good as it tastes. Additionally, knowing how to store and reheat leftovers ensures that any remaining portions stay just as creamy and flavorful.
Garnishing for Added Flavor and Presentation
- Fresh Parsley:
- Chopped fresh parsley is a classic garnish for creamy pasta dishes, adding a vibrant pop of green and a hint of fresh, slightly peppery flavor. Sprinkle it lightly over the casserole just before serving to enhance its visual appeal.
- Other Fresh Herbs:
- Basil: Fresh basil adds a sweet, aromatic note that complements garlic and Parmesan beautifully. Tear a few basil leaves and sprinkle over each serving.
- Chives or Green Onions: Chopped chives or thinly sliced green onions provide a mild oniony taste and an extra dash of color.
- Red Pepper Flakes (optional): For those who enjoy a bit of heat, a sprinkle of red pepper flakes on top can add a subtle kick that contrasts nicely with the creamy sauce.
Serving Tips
- Portion Sizes:
- This recipe is designed to serve about 6–8 people, depending on portion sizes. For larger servings (main course portions), aim to divide the casserole into 6 portions; for smaller servings (side portions), you could easily stretch it to 8–10 servings.
- Recommended Accompaniments:
- Garlic Bread: Classic garlic bread or garlic knots are the perfect match, providing a crunchy, garlicky element to balance the creamy pasta.
- Side Salad: A crisp green salad with a light vinaigrette is a refreshing complement that balances the richness of the casserole. Consider including ingredients like arugula, cherry tomatoes, and cucumbers for extra freshness.
- Steamed Vegetables: Lightly steamed broccoli, green beans, or asparagus are great additions for extra nutrition and can be served on the side.
Storage and Reheating Tips for Leftovers
- Storage:
- Refrigeration: Store any leftovers in an airtight container in the refrigerator. The pasta will stay fresh for up to 3–4 days.
- Freezing: To freeze, portion the pasta into airtight containers or freezer-safe bags. The casserole can be frozen for up to 2 months. Thaw in the refrigerator overnight before reheating.
- Reheating Tips:
- Oven Reheating: For the best results, reheat leftovers in the oven to maintain the creamy texture. Place the pasta in an oven-safe dish, cover it with foil, and bake at 350°F (175°C) for 15–20 minutes or until heated through. Add a splash of milk or pasta water if it seems dry.
- Microwave Reheating: If using a microwave, transfer a portion to a microwave-safe dish, cover lightly, and heat on medium power in 1-minute intervals, stirring in between. Add a little milk or pasta water to help keep it creamy.
- Avoid Overheating: Reheat only until warm, as overcooking can cause the cheese and sauce to become dry.
By garnishing with fresh herbs, pairing with complementary sides, and following storage and reheating tips, you can ensure every serving of this Creamy Garlic Parmesan Chicken Pasta is flavorful, creamy, and satisfying. These final steps add to the overall dining experience, making it a dish you’ll want to serve and enjoy repeatedly.
FAQs Section
1. Can I use a different type of pasta for this recipe?
- Yes, you can substitute rotini with other types of pasta. Short pasta shapes that hold sauce well, like penne, fusilli, or farfalle (bow-tie), are ideal. These shapes are designed to capture the creamy sauce in their ridges, making each bite flavorful. However, avoid long pasta like spaghetti, as it may not bake as evenly or mix as well with the other ingredients.
2. How do I make this recipe gluten-free?
- To make this dish gluten-free, simply swap regular pasta with your favorite gluten-free pasta. Most gluten-free pasta options, such as those made from rice, corn, or quinoa, work well in baked dishes like this. Be sure to check the ingredient labels on your Alfredo and garlic parmesan sauces, as some pre-made sauces may contain gluten. Opt for gluten-free versions of these sauces or make them from scratch.
3. What’s the best way to reheat this dish without drying it out?
- Reheating in the oven is the best way to preserve the creamy texture. Cover the pasta with foil and heat in a 350°F (175°C) oven for about 15–20 minutes, adding a splash of milk or pasta water to maintain moisture if needed. If using a microwave, heat on medium power in 1-minute intervals, stirring between each, and adding a little milk if it seems dry.
4. Can I make this recipe ahead of time?
- Absolutely! You can assemble the casserole up to a day in advance. Prepare the pasta mixture, transfer it to the baking dish, and cover it with foil before refrigerating. When you’re ready to bake, remove it from the refrigerator, let it sit at room temperature for about 15 minutes, and then bake as directed. This makes it a convenient option for meal prep or gatherings.
5. Is there a way to make this dish a bit lighter?
- For a lighter version, consider using light Alfredo sauce, low-fat mozzarella, and reduced-fat Parmesan. You can also add more vegetables, such as spinach, mushrooms, or zucchini, to increase volume and nutrition without adding extra calories. Alternatively, try using a mix of cream and broth instead of solely relying on Alfredo sauce, which can lighten the dish while maintaining a creamy texture.

Creamy Garlic Parmesan Chicken Pasta
- Author: Christophe
- Total Time: 45-50 minutes
Description
This Creamy Garlic Parmesan Chicken Pasta is a comforting and indulgent casserole packed with tender chicken, rotini pasta, and a rich, cheesy Alfredo and garlic parmesan sauce. With a golden, bubbly cheese topping, it’s the perfect hearty dinner for busy weeknights.
Ingredients
- 1 pound rotini pasta, cooked and drained (reserve 1 cup of cooking water)
- 3 cups cooked chicken, diced or shredded
- 2 (15-ounce) jars Alfredo sauce
- 1 cup garlic parmesan sauce
- 2 cups shredded mozzarella cheese, divided
- 1/2 cup grated Parmesan cheese, divided
- 1/2 teaspoon salt
- 1/4 teaspoon black pepper
- Fresh parsley, chopped (for garnish, optional)
Instructions
1️⃣ Preheat Oven: Preheat your oven to 375°F (190°C). Lightly grease a 9×13-inch baking dish with cooking spray or butter.
2️⃣ Prepare the Pasta Mixture: In a large mixing bowl, combine the cooked rotini pasta, diced or shredded chicken, Alfredo sauce, garlic parmesan sauce, half of the shredded mozzarella cheese, and half of the grated Parmesan cheese. Season with salt and pepper to taste. Add about 1/2 cup of the reserved pasta water if you prefer a saucier texture.
3️⃣ Assemble the Casserole: Transfer the pasta mixture to the prepared baking dish, spreading it evenly. Sprinkle the remaining mozzarella and Parmesan cheese over the top for a melty, cheesy crust.
4️⃣ Bake: Cover the baking dish with aluminum foil and bake for 20-25 minutes, or until the cheese is melted and the casserole is bubbly.
5️⃣ Optional Broil: For a golden top, remove the foil and broil on high for 2-3 minutes, watching carefully to avoid burning.
6️⃣ Garnish and Serve: Allow the casserole to cool for about 5 minutes. Garnish with chopped fresh parsley if desired and serve warm. Enjoy this creamy, cheesy pasta dish!
Notes
- Chicken Option: Use rotisserie chicken or leftover grilled chicken for added flavor and convenience.
- Additional Seasoning: Add a pinch of red pepper flakes for a slight kick.
- Pasta Swap: Try penne or rigatoni if you don’t have rotini on hand.
- Prep Time: 15 minutes
- Cook Time: 25-30 minutes
Nutrition
- Serving Size: 6


")

")


")
