

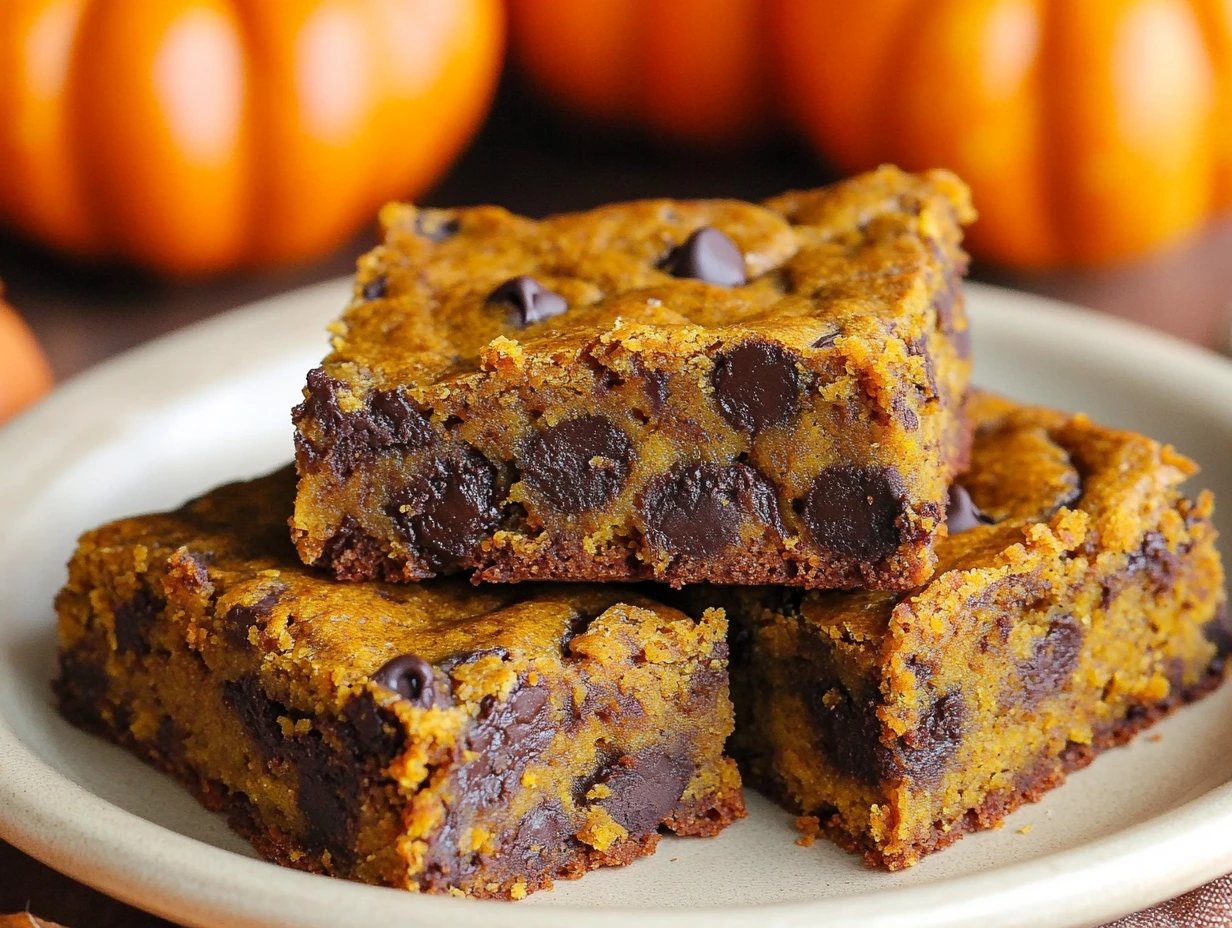
If there’s one thing I absolutely love about fall, it’s the warm, cozy flavors that come with it—especially pumpkin spice! And when you mix pumpkin with gooey chocolate chips? Pure magic. These Pumpkin Chocolate Chip Bars are the perfect combination of soft, moist texture, rich fall spices, and sweet bursts of chocolate. They’re ridiculously easy to make, and trust me, they won’t last long once they come out of the oven!
Let’s dive in and make these incredible bars that are perfect for potlucks, holiday gatherings, or just a cozy treat at home.
Why You’ll Love These Pumpkin Chocolate Chip Bars
- Soft and Moist: The pumpkin puree keeps these bars incredibly tender.
- Loaded with Chocolate: Chocolate chips in every bite make them extra indulgent.
- Easy to Make: No fancy equipment needed—just mix, bake, and enjoy!
- Perfect for Fall: The warm pumpkin pie spice makes these bars taste like autumn in every bite.
Ingredients You’ll Need
These bars use simple pantry staples, making them an easy go-to treat.
Dry Ingredients:
- 2 cups flour – Gives structure to the bars.
- 1 tablespoon pumpkin pie spice – Adds that signature warm and cozy fall flavor.
- 1 teaspoon baking soda – Helps the bars rise perfectly.
- ½ teaspoon salt – Balances the sweetness.

Wet Ingredients:
- 1 cup butter, softened – Adds richness and moisture.
- 1 cup sugar – Sweetens the bars just right.
- 1 egg – Helps bind everything together.
- 2 teaspoons vanilla extract – Enhances the overall flavor.
- 1 cup canned pumpkin puree – The star ingredient that makes these bars ultra-moist.
Mix-ins:
- 1 ½ cups chocolate chips – Because chocolate and pumpkin are a match made in heaven!
Step 1: Preheat the Oven
First things first—preheat your oven to 325°F (163°C). This ensures the bars bake evenly.
To prevent sticking, grease a 9×13-inch baking pan with butter or non-stick spray. You can also line it with parchment paper for easy removal.
Step 2: Mix the Dry Ingredients
In a medium bowl, whisk together: ✔️ Flour
✔️ Pumpkin pie spice
✔️ Baking soda
✔️ Salt
Set this aside for now. Mixing dry ingredients separately prevents clumps and helps evenly distribute the spices.
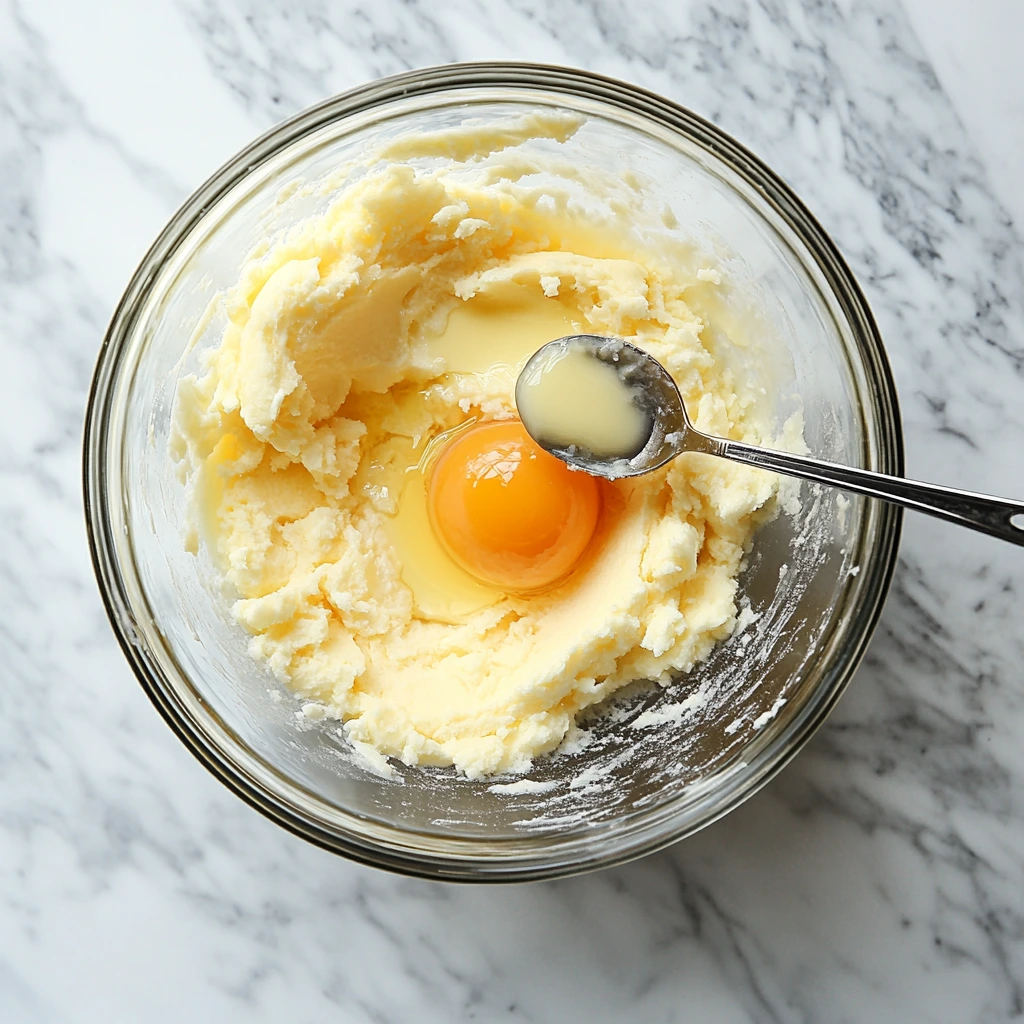
Step 3: Cream the Butter & Sugar
In a large mixing bowl, beat butter and sugar together using a hand mixer or stand mixer. Beat for about 2-3 minutes, until the mixture is light and fluffy.
This step is important—it creates tiny air pockets that make the bars soft and tender.
Step 4: Add Wet Ingredients
Once the butter and sugar are creamed, add the egg and vanilla extract. Mix until fully incorporated.
Then, beat in the canned pumpkin puree until smooth. The batter might look slightly curdled at this stage—don’t worry! It will all come together once we add the dry ingredients.
Bringing It All Together – Mixing, Baking, and Pro Tips!
Now that we’ve got our wet and dry ingredients prepped, it’s time to bring everything together and bake up these amazing Pumpkin Chocolate Chip Bars. If you’re already drooling at this point, you’re not alone—I can’t wait for you to taste these soft, chocolatey bites of fall goodness!
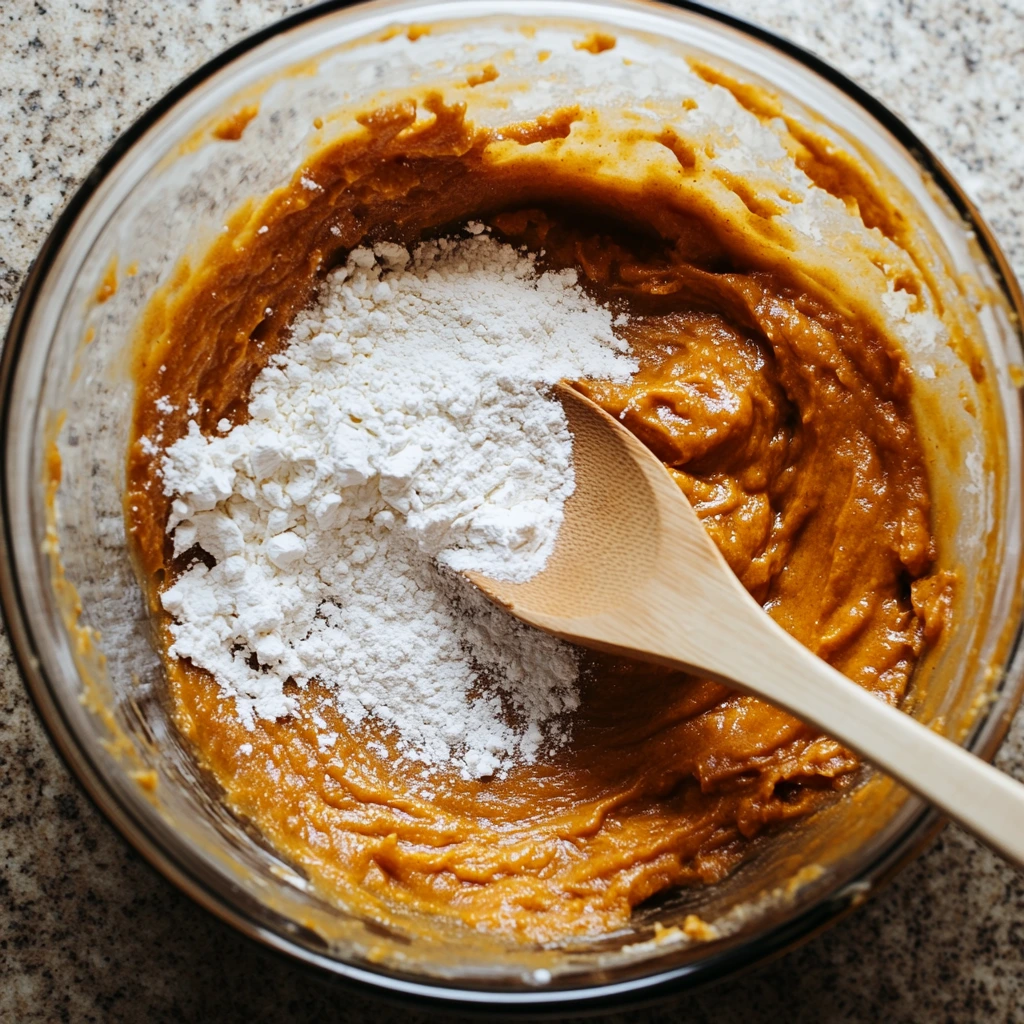
Step 5: Combine Wet & Dry Mixtures
Now it’s time to gently bring our dry ingredients into the mix.
1️⃣ Gradually add the dry ingredients to the wet mixture, stirring gently with a spatula or mixing on low speed until just combined.
2️⃣ Be careful not to overmix! Overmixing can lead to dense, tough bars instead of soft and tender ones. A few streaks of flour in the batter are totally fine—these will disappear when we add the chocolate chips.
Step 6: Fold in the Chocolate Chips
Now for the best part—chocolate chips!
Take 1 ½ cups of chocolate chips and gently fold them into the batter using a spatula. You want to distribute them evenly so every bite has that perfect balance of pumpkin and chocolate.
🔹 Pro Tip: Want extra chocolatey goodness? Save a handful of chocolate chips and sprinkle them on top of the batter before baking. This gives the bars a bakery-style look and makes them even more irresistible.
Step 7: Spread the Batter in the Pan
Once everything is mixed, pour the batter into your greased or parchment-lined 9×13-inch pan.
Use a spatula to spread the batter evenly into all corners of the pan.
The batter will be thick, but that’s totally normal! Smooth it out as best as you can so the bars bake evenly.
Step 8: Bake to Perfection
Pop the pan into your preheated oven at 325°F (163°C) and let it bake for 30 minutes.
The bars are ready when: ✔️ The edges pull slightly away from the sides of the pan.
✔️ A toothpick inserted in the center comes out clean or with just a few moist crumbs (but no wet batter).
Step 9: Cool & Slice
Once the bars are done baking, remove them from the oven and let them cool completely in the pan before cutting.
I know—it’s so tempting to cut into them while they’re warm, but trust me, letting them cool makes them easier to slice and helps the flavors settle.
For clean, perfect cuts:
🔸 Use a sharp knife and wipe it clean between each slice.
🔸 If you lined the pan with parchment paper, lift the bars out of the pan before cutting for even easier slicing.
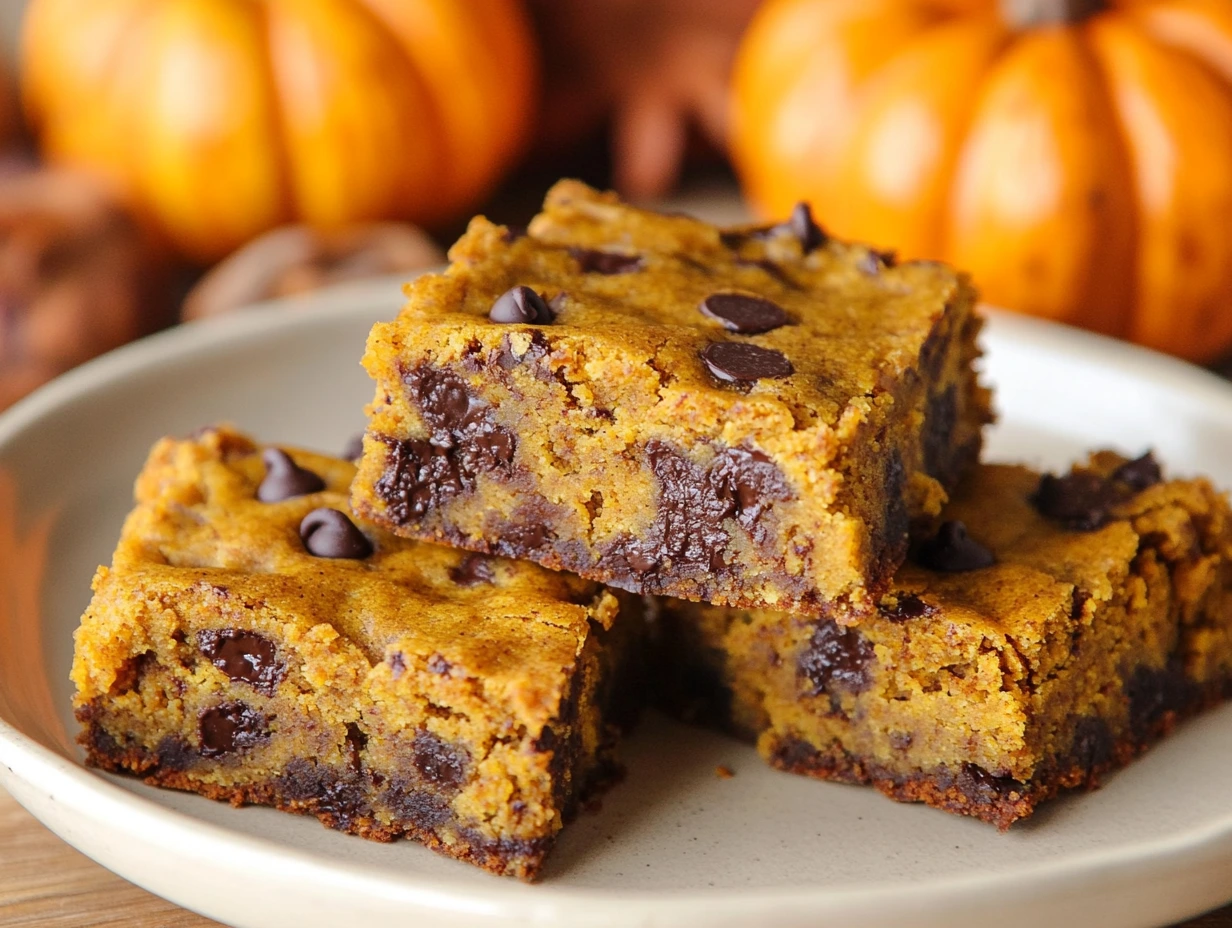
Step 10: Enjoy!
That’s it! Time to dig in and enjoy your homemade Pumpkin Chocolate Chip Bars. They’re soft, chocolatey, full of warm pumpkin spice, and absolutely perfect for fall.
Pair them with a hot cup of coffee, chai, or a glass of milk for the ultimate cozy treat.
Extra Tips for the Best Pumpkin Chocolate Chip Bars
✅ Use Room Temperature Ingredients: Softened butter and room temp egg mix more smoothly into the batter.
✅ Make Them Extra Spiced: Love bold fall flavors? Add a pinch of extra cinnamon or nutmeg.
✅ Try Different Chocolate Chips: Swap out semisweet chips for white chocolate or dark chocolate for a fun twist.
✅ Store for Freshness: Keep bars in an airtight container at room temperature for 3 days or in the fridge for up to a week.
FAQs & Final Thoughts on These Irresistible Pumpkin Chocolate Chip Bars
Now that your kitchen smells like a fall bakery and you’ve got a batch of soft, chocolatey pumpkin bars ready to devour, let’s wrap up with some frequently asked questions. These will help you get the best results every time you bake this recipe!
Frequently Asked Questions (FAQs)
1. Can I use fresh pumpkin instead of canned pumpkin puree?
Yes, you can! If you prefer using fresh pumpkin, make sure it’s pureed and well-drained before adding it to the batter. Fresh pumpkin contains more water than canned puree, so you may need to blot it with a paper towel to remove excess moisture.
2. Can I make these bars gluten-free?
Absolutely! Simply swap the all-purpose flour for a gluten-free 1:1 baking flour (such as Bob’s Red Mill or King Arthur). Just make sure your gluten-free flour contains xanthan gum for the best texture.
3. Can I freeze these bars?
Yes! These bars freeze beautifully. Here’s how to do it:
- Let the bars cool completely.
- Cut them into squares and wrap each piece individually in plastic wrap.
- Place the wrapped bars in an airtight container or freezer bag.
- Store in the freezer for up to 3 months.
- To thaw, let them sit at room temperature for about 30 minutes or microwave for 10-15 seconds.
4. How do I prevent the bars from being too dense?
If your bars turn out a little dense or gummy, here are a few possible reasons: ✔️ Overmixing the batter – Stir just until the dry ingredients are incorporated.
✔️ Too much moisture – Make sure you’re using pure pumpkin puree, not pumpkin pie filling, which has added sugars and liquids.
✔️ Baking at the right temperature – Double-check that your oven is set to 325°F (and use an oven thermometer if needed).
5. Can I add nuts or other mix-ins?
Of course! If you want some crunch, try chopped pecans, walnuts, or almonds. You can also mix in:
- White chocolate chips for a fun contrast.
- Coconut flakes for extra texture.
- Dried cranberries for a festive fall twist.
6. What’s the best way to store these bars?
- Room Temperature: Store in an airtight container for up to 3 days.
- Refrigerator: Keep in an airtight container for up to a week.
- Freezer: As mentioned earlier, they’ll stay fresh in the freezer for up to 3 months.

Delicious Pumpkin Chocolate Chip Bars
- Author: David
- Total Time: 40 minutes
Description
These soft, moist, and perfectly spiced pumpkin bars are loaded with chocolate chips and make the ultimate fall treat! Easy to make and perfect for sharing.
Ingredients
- 2 cups flour
- 1 tablespoon pumpkin pie spice
- 1 teaspoon baking soda
- ½ teaspoon salt
- 1 cup butter, softened
- 1 cup sugar
- 1 egg
- 2 teaspoons vanilla extract
- 1 cup canned pumpkin puree
- 1 ½ cups chocolate chips
Instructions
1️⃣ Preheat the Oven:
Preheat your oven to 325°F (163°C). Generously grease a 9×13-inch baking pan or line it with parchment paper.
2️⃣ Mix Dry Ingredients:
In a small bowl, whisk together the flour, pumpkin pie spice, baking soda, and salt until well combined. Set aside.
3️⃣ Cream Butter & Sugar:
In a large mixing bowl, beat the butter and sugar together until light and fluffy (about 2-3 minutes).
4️⃣ Add Wet Ingredients:
Mix in the egg and vanilla extract until fully incorporated. Then, beat in the pumpkin puree until smooth.
5️⃣ Combine Wet & Dry Mixtures:
Gradually add the dry ingredients to the wet mixture, stirring until just combined. Do not overmix.
6️⃣ Fold in Chocolate Chips:
Gently fold in the chocolate chips and evenly spread the batter into the prepared pan.
7️⃣ Bake:
Bake for 30 minutes, or until the edges pull away from the pan and a toothpick inserted in the center comes out clean.
8️⃣ Cool & Serve:
Let the bars cool completely in the pan before cutting into squares. Enjoy!
Notes
- Storage: Store in an airtight container at room temperature for up to 3 days, or refrigerate for up to a week.
- Make it Healthier: Swap ½ cup butter for ½ cup unsweetened applesauce for a lighter version.
- Nutty Twist: Add ½ cup chopped pecans or walnuts for extra crunch.
- Extra Flavor: A dash of cinnamon or nutmeg can enhance the warm flavors.
- Prep Time: 10 minutes
- Cook Time: 30 minutes
Nutrition
- Serving Size: 12-16 bars


")

")


")
