

If you’re looking for a quick, no-bake dessert that’s both delicious and fun to make, Easy Butterfinger Balls are the perfect choice. This simple recipe combines the iconic crunch and flavor of Butterfinger candy bars with the smooth richness of peanut butter and the indulgence of melted chocolate. With minimal ingredients and no need for an oven, it’s the ideal treat for busy parents, novice bakers, or anyone craving something sweet without the fuss.
One of the best things about Butterfinger Balls is their versatility. They’re easy enough for kids to help with, making them a fun family activity, and they’re guaranteed to be a hit at parties, holiday gatherings, or even as an everyday snack. The recipe requires only a few common pantry staples, but the end result is a decadent dessert that looks and tastes impressive. Whether you’re hosting friends or just want a quick treat to satisfy your sweet tooth, these Butterfinger Balls will deliver every time.
Ingredients Overview
To make Easy Butterfinger Balls, you only need a handful of simple, easily accessible ingredients. Here’s what you’ll need:
- 4-5 Butterfinger candy bars (regular size)
- 1 cup creamy peanut butter
- 1 cup powdered sugar
- 1½ cups chocolate chips (milk or dark, depending on your preference)
- 1-2 tablespoons vegetable oil (optional, to help with chocolate melting)
The ingredient list is short, but there’s plenty of room to customize based on your tastes. For example, you can swap creamy peanut butter for crunchy if you want an added texture, or use dark chocolate for a more intense flavor. These ingredients are affordable and likely already in your kitchen, making this recipe as convenient as it is delicious.

Step-by-Step Instructions
Step 1: Crush the Butterfinger Bars
To begin, you’ll need to crush the Butterfinger candy bars into small pieces. You can use a food processor to get the job done quickly, or if you don’t have one, place the candy bars in a ziplock bag and crush them with a rolling pin. Both methods work well, but be sure to aim for a texture that’s finely crushed yet still has some small chunks. The small pieces add a nice bit of crunch to the Butterfinger Balls and ensure that you get that signature Butterfinger flavor in every bite.
If you go too fine, you may lose some of that delicious texture, so aim for a balance between powdery and chunky. Once crushed, set the pieces aside.
Step 2: Mix Ingredients Together
In a large mixing bowl, combine the crushed Butterfinger pieces with 1 cup of creamy peanut butter and 1 cup of powdered sugar. Using a spatula or a sturdy spoon, mix the ingredients together until fully incorporated. The mixture should become firm but still pliable, similar to a cookie dough consistency. If it’s too sticky, add a little more powdered sugar in small increments. On the other hand, if it feels too dry and crumbly, try adding a little more peanut butter to help bind everything together.
The goal is to create a mixture that’s easy to shape without sticking too much to your hands. This balance will make rolling the balls easier in the next step. Take your time to make sure all the ingredients are evenly distributed, so every ball has the perfect blend of Butterfinger and peanut butter.
Step 3: Shape the Mixture into Balls
Once the mixture has the right consistency, it’s time to shape it into balls. Scoop out small portions of the mixture, about 1 tablespoon each, and roll them between your hands to form smooth, round balls. If you want more uniform sizing, consider using a small cookie scoop or a tablespoon to measure each portion.
After you’ve shaped all the balls, place them on a baking sheet lined with parchment or wax paper. Once they’re all rolled, pop the tray in the refrigerator for about 15-20 minutes to let the balls firm up. Chilling them before dipping in chocolate makes the process much easier, as the firmed-up balls won’t fall apart during coating.
Coating and Presentation
Step 4: Melt the Chocolate
While the Butterfinger balls are chilling, you can prepare the chocolate coating. In a microwave-safe bowl, melt 1½ cups of chocolate chips. You can use milk chocolate, dark chocolate, or even white chocolate based on your preference. Microwave the chocolate in 30-second intervals, stirring after each interval to ensure it melts evenly. Be careful not to overheat it—this could cause the chocolate to seize.
If you prefer, you can melt the chocolate over a double boiler instead, which gives you more control over the heat and ensures a smooth consistency. To make the chocolate extra glossy and easier to coat the balls, you can add 1-2 tablespoons of vegetable oil or shortening to the melted chocolate. This step is optional, but it helps create a beautiful finish and makes the chocolate easier to work with.
Step 5: Dip and Coat the Butterfinger Balls
Once the Butterfinger balls have firmed up in the fridge, it’s time to coat them in the melted chocolate. Using a fork or a toothpick, dip each ball into the chocolate, making sure it’s fully coated. Tap off any excess chocolate before placing the coated ball back onto the parchment-lined baking sheet.
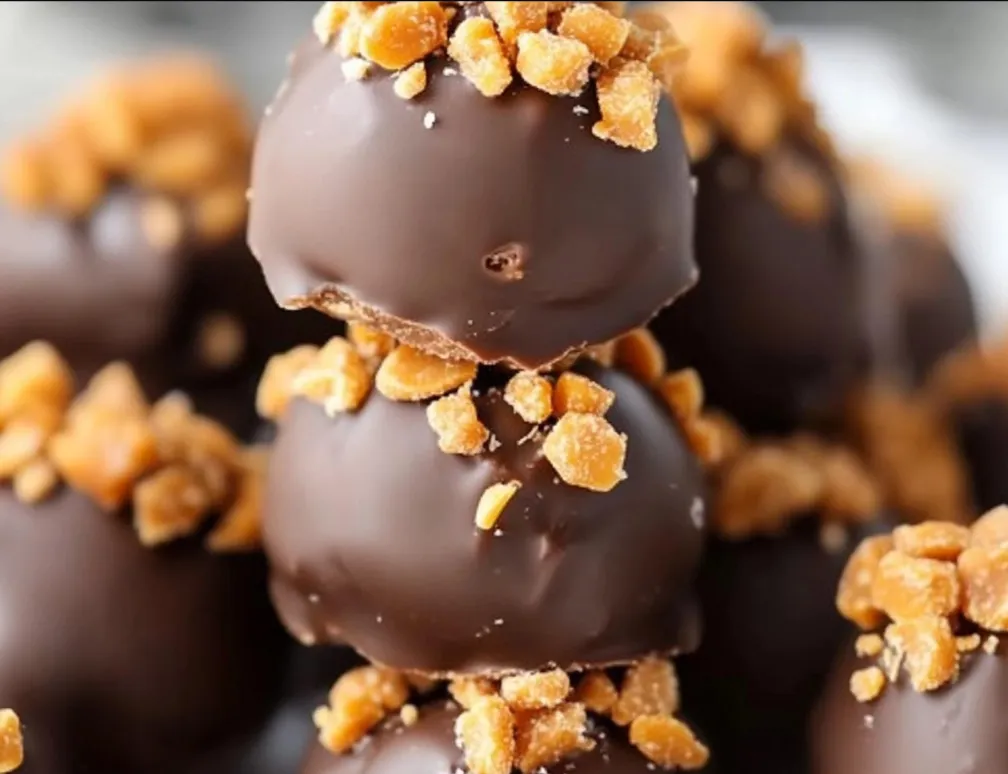
For added texture or decoration, you can sprinkle some crushed Butterfinger pieces, sprinkles, or drizzle extra chocolate on top while the coating is still wet. This not only adds visual appeal but also an extra layer of crunch and flavor.
After dipping all the balls, let them sit on the baking sheet until the chocolate sets. You can speed up this process by putting the tray back in the fridge for about 15 minutes.
Step 6: Chill and Set
After coating, the Butterfinger balls need time to fully set. Place the tray in the refrigerator for at least 30 minutes to allow the chocolate to harden completely. Once the chocolate is firm, your Butterfinger balls are ready to serve.
For storage, keep the Butterfinger balls in an airtight container in the refrigerator for up to two weeks. If you want to store them longer, you can freeze them for up to three months. When freezing, make sure to separate the layers with wax paper to prevent them from sticking together.
Tips, Variations, and Serving Suggestions
Recipe Tips and Tricks
To make this recipe even easier, consider using pre-crushed Butterfinger pieces, which are available at many grocery stores. This will save time and reduce the mess. If your mixture feels too sticky to handle, try refrigerating it for 10 minutes before shaping the balls, or dust your hands with a little powdered sugar to prevent sticking.
If the chocolate isn’t melting smoothly, double-check that no water or moisture has come into contact with it, as this can cause it to seize. For those working in warmer climates, you may want to chill the balls longer or work in small batches to prevent them from softening too much during the coating process.
Variations on Butterfinger Balls
There are many ways to get creative with this recipe. If you’re looking for a twist, you can substitute the Butterfinger bars with other candy bars like Snickers, Reese’s Peanut Butter Cups, or Kit-Kats. Each option will bring its own unique flavor and texture to the mix.
For a different flavor profile, try using almond butter, Nutella, or cookie butter instead of peanut butter. You can also experiment with different chocolate coatings—white chocolate, dark chocolate, or even a blend of both will give a different look and taste.
If you want to add more texture, consider rolling the coated balls in crushed nuts, shredded coconut, or graham cracker crumbs before the chocolate sets. For a flavor pairing, caramel drizzle or a bit of sea salt on top complements the sweet and salty Butterfinger flavor perfectly.
To make this recipe vegan or allergy-friendly, use vegan chocolate and candy alternatives and replace the peanut butter with almond butter or sunflower seed butter.
Serving and Presentation Ideas
Butterfinger Balls are perfect for parties, holidays, or special events. For a polished presentation, place each ball in a decorative cupcake liner or arrange them on a colorful dessert tray. This adds a festive touch and makes them easier to serve.
If you’re giving them as a gift, consider packaging the Butterfinger Balls in small gift boxes or festive tins. You can even wrap them in cellophane with a bow for an attractive and thoughtful homemade treat. These make excellent holiday gifts, party favors, or even a surprise treat for someone special.
FAQ Section
How long do Butterfinger Balls last?
Butterfinger Balls can last for up to two weeks when stored in an airtight container in the refrigerator. If you want to extend their shelf life, you can freeze them for up to three months. Just make sure to separate layers with wax paper to prevent them from sticking together.
Can I make these ahead of time?
Yes, Butterfinger Balls can be made ahead of time. You can prepare and shape the balls a day or two in advance and store them in the fridge. Dip them in chocolate closer to when you plan to serve them, or coat them fully and refrigerate until ready to eat.
Can I freeze Butterfinger Balls?
Absolutely! Butterfinger Balls freeze very well. After they’ve set, place them in an airtight container with layers of wax paper between them. To thaw, transfer them from the freezer to the fridge for a few hours before serving.
What other candy bars work well in this recipe?
Besides Butterfinger, you can experiment with Reese’s Peanut Butter Cups, Snickers, or even Kit-Kats. Each one will bring a slightly different texture and flavor, but they all make excellent alternatives.
Can I use crunchy peanut butter instead of creamy?
Yes, you can use crunchy peanut butter if you prefer. It will add a bit more texture to the Butterfinger Balls, giving them an extra crunch alongside the crushed candy bars.
Print
Easy Butterfinger Balls
Description
These Butterfinger Peanut Butter Balls are a delightful blend of creamy peanut butter, crushed Butterfinger candy, and smooth chocolate coating. With a crunchy surprise in every bite, they’re perfect for a sweet snack or homemade gift!
Ingredients
- 1 cup creamy peanut butter
- 1/4 cup unsalted butter, softened
- 2 cups powdered sugar
- 1 teaspoon vanilla extract
- Pinch of salt
- 6 Butterfinger candy bars, finely crushed
- 12 ounces semisweet or milk chocolate, chopped (for dipping, optional)
Instructions
1️⃣ Prepare the Peanut Butter Mixture:
- In a large mixing bowl, combine the creamy peanut butter, softened butter, powdered sugar, vanilla extract, and a pinch of salt. Mix until smooth and well combined, using either an electric mixer or mixing by hand.
2️⃣ Add Crushed Butterfingers:
- Fold in the finely crushed Butterfinger candy bars until evenly distributed throughout the peanut butter mixture.
3️⃣ Shape the Balls:
- Line a baking sheet with parchment or wax paper.
- Scoop tablespoon-sized portions of the peanut butter mixture and roll them into balls with your hands. Place each ball on the prepared baking sheet.
4️⃣ Melt the Chocolate (Optional):
- If you’d like to coat the peanut butter balls in chocolate, melt the semisweet or milk chocolate in a saucepan over low heat, stirring constantly until smooth. Alternatively, microwave the chocolate in 20-30 second intervals, stirring between each.
5️⃣ Dip the Balls (Optional):
- Using a fork or dipping tool, dip each peanut butter ball into the melted chocolate, coating it completely. Tap off any excess chocolate and place the coated balls back on the lined baking sheet.
6️⃣ Chill and Set:
- Place the baking sheet in the refrigerator for about 30 minutes, or until the chocolate is fully set.
7️⃣ Serve or Store:
- Once set, transfer the Butterfinger Peanut Butter Balls to an airtight container. Store in the refrigerator for up to 1 week.
Notes
- For extra crunch, try adding more crushed Butterfinger or a mix of other candy bars.
- You can skip the chocolate coating for a quicker, simpler version.
- These freeze well! Store in an airtight container in the freezer for up to 3 months.


")

")


")
