

If you’re a fan of turtle candies—those decadent delights with buttery caramel, crunchy nuts, and smooth chocolate—then you’re going to love these Easy Turtle Bars! They’re the perfect combination of everything you adore about those classic candies, but in a bar form that’s easy to make and share. With just a few simple ingredients, you can create a dessert that looks and tastes like it took hours to make, when in reality, it’s incredibly straightforward and quick.
Growing up, I was always drawn to the sweet, gooey caramel and crunchy pecans in turtle candies. There was something about that perfect mix of textures and flavors that made them irresistibly delicious. But when I wanted a quicker way to enjoy those flavors without all the fiddly candy-making, I came up with this easy recipe. These bars are ideal for parties, gatherings, or even just a cozy treat to share with family and friends at home. Plus, they are so customizable—you can even swap the pecans for walnuts or almonds if that’s more your style.
The Secret to These Turtle Bars
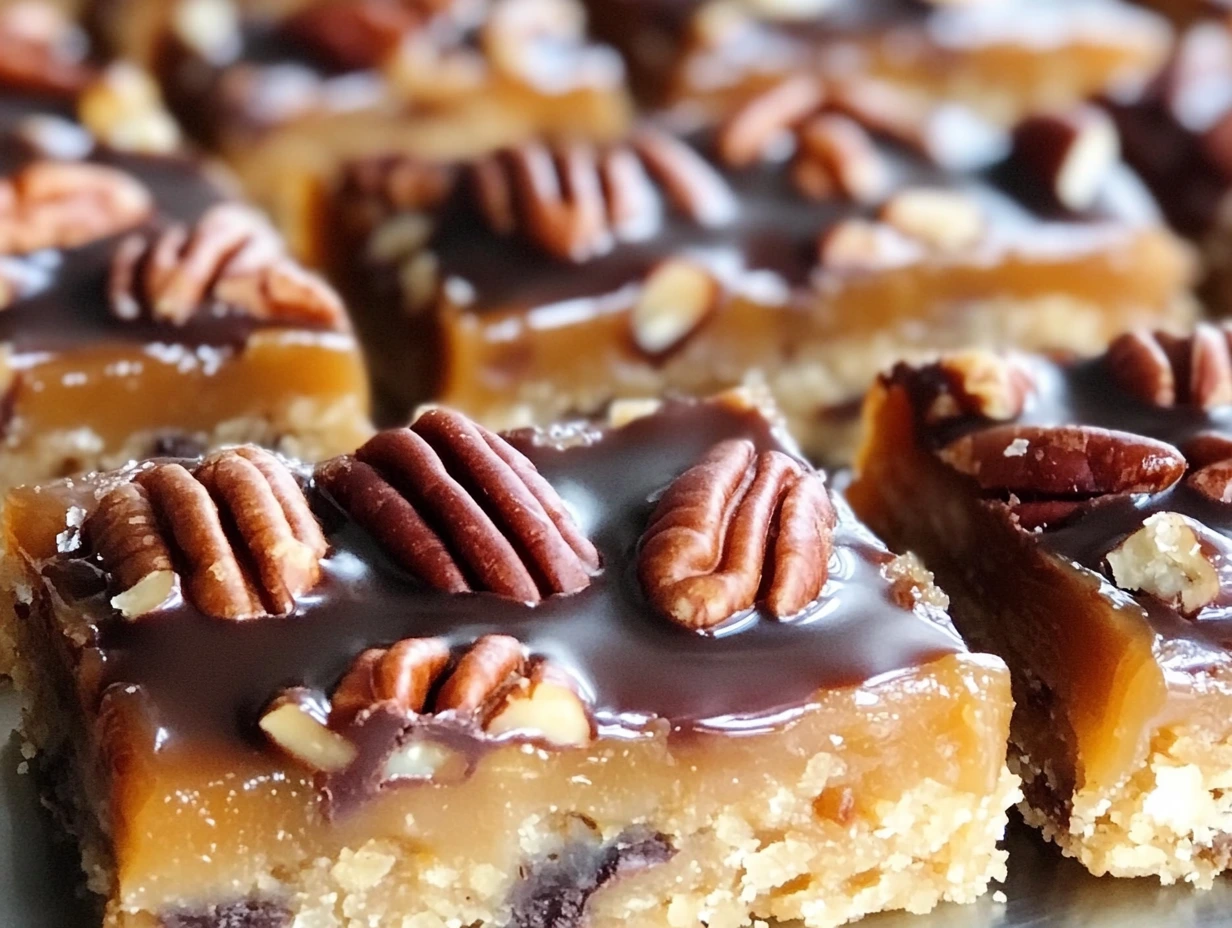
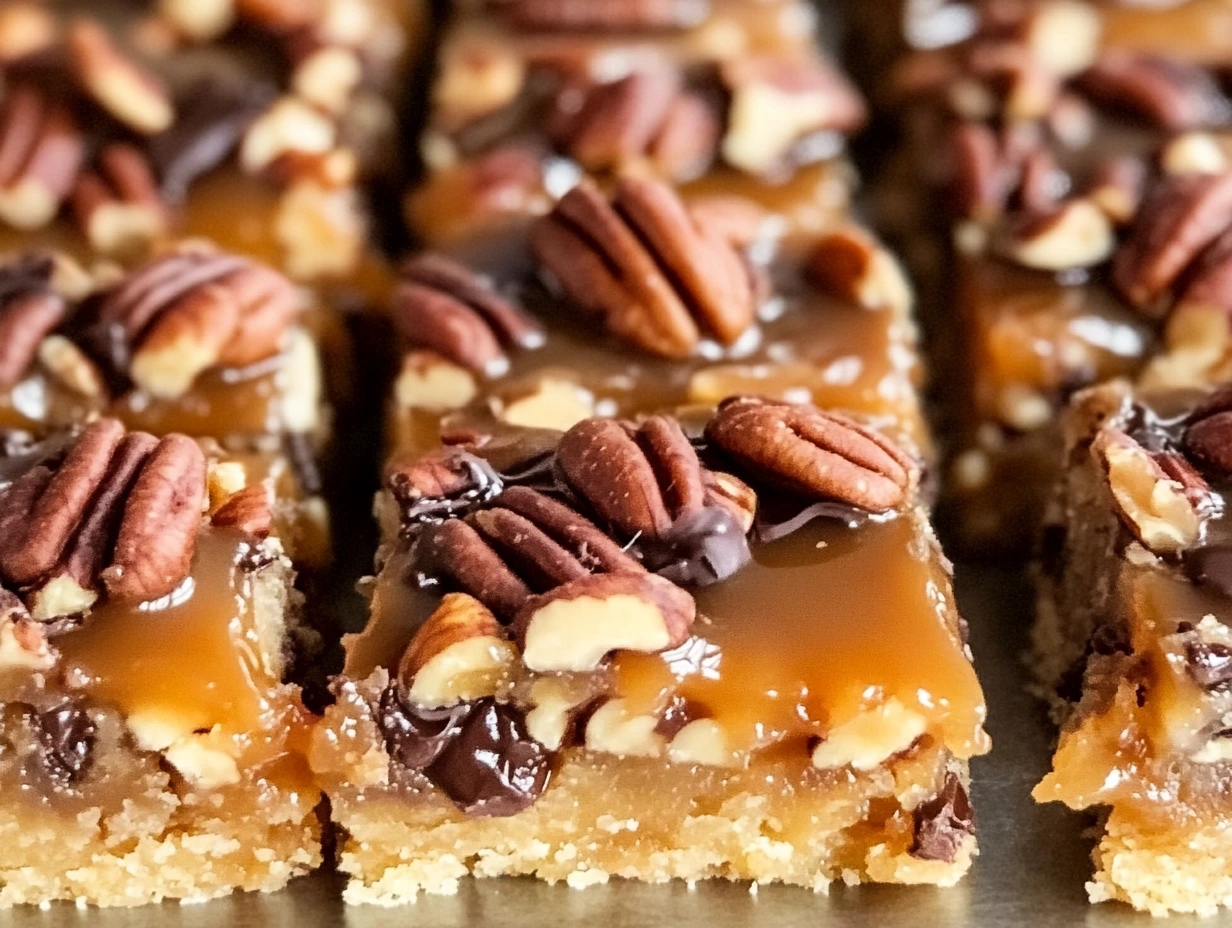
What I love most about these bars is the simplicity of the process. Unlike making individual turtle candies, these bars require just a few simple steps and a little patience while they chill in the fridge. You’ll start with a buttery shortbread base that’s slightly crisp and not too sweet. Then comes the layer of rich caramel that melts into every bite. On top of that, we have crunchy, toasted pecans that add the perfect amount of texture. Finally, the smooth semi-sweet chocolate gets spread on top to complete the irresistible flavor profile. It’s everything you love about a turtle candy in one gooey, rich bar.
So, grab your apron and let’s dive into this super easy recipe! I promise you’ll have a batch of these turtle bars ready to enjoy in no time.
Ingredients for Easy Turtle Bars
Before we get started, let’s make sure you have everything you need to make these bars. The ingredients are simple, but they come together to create a truly indulgent treat. Here’s what you’ll need:
For the Shortbread Base:
1 cup unsalted butter, softened
½ cup granulated sugar
2 cups all-purpose flour
¼ tsp salt
For the Topping:
14 oz caramels (soft, unwrapped)
¼ cup heavy cream
1 cup semi-sweet chocolate chips
1 cup chopped pecans (or walnuts, if preferred)
Steps to Make Easy Turtle Bars
Preheat & Prep
First things first, preheat your oven to 350°F (175°C). You want it nice and hot for the shortbread base to bake up perfectly golden. Then, line an 8×8-inch baking pan with parchment paper, leaving an overhang on the sides. This will make it super easy to lift the bars out of the pan once they’re set.

Make the Shortbread Base
Now, let’s get started on that buttery shortbread crust that’s going to hold everything together. In a mixing bowl, cream together the softened butter and sugar. Beat them until the mixture is light and fluffy, which should take about 2-3 minutes. This step is important because it will give your shortbread a nice, tender texture.
Once the butter and sugar are fully combined, gradually add the flour and salt. Mix everything together until a soft dough forms. You’ll know it’s ready when the dough pulls together and doesn’t feel sticky.
Take the dough and press it evenly into the bottom of your prepared pan. You want the crust to be level and smooth, so don’t rush this part—press it firmly into all the corners. Bake it in the preheated oven for about 20 minutes, or until it’s lightly golden around the edges. Once it’s done, let it cool for just a few minutes while you prepare the next layer.
Add the Caramel Layer
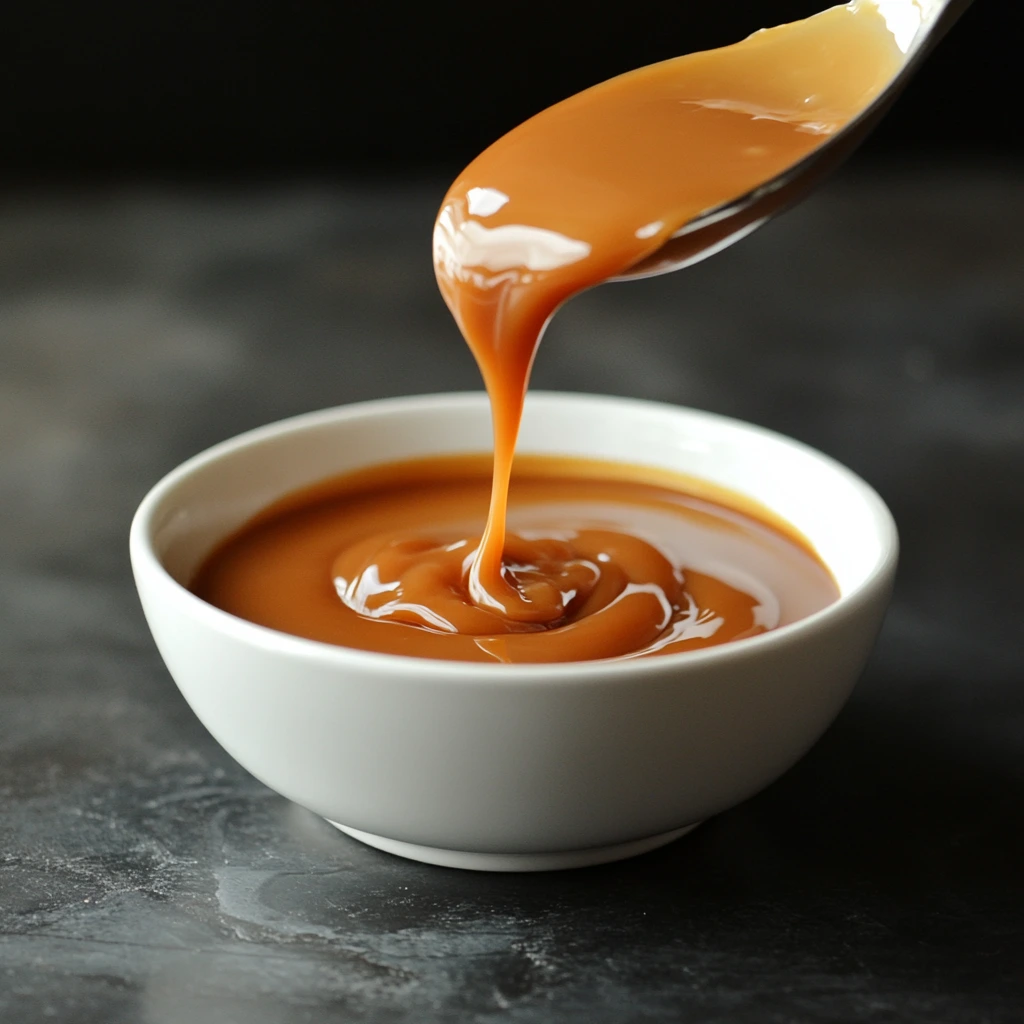
While your shortbread is cooling, it’s time to make the gooey caramel layer. In a microwave-safe bowl, combine the unwrapped caramels and heavy cream. Microwave the mixture in 30-second intervals, stirring after each, until the caramels have fully melted and are smooth. You want to make sure it’s completely melted to create that luscious, silky caramel texture.
Once the caramel is ready, pour it over the slightly cooled shortbread base, spreading it evenly across the entire surface. It should be a nice, even layer. Then, sprinkle your chopped pecans (or walnuts, depending on your preference) on top. The nuts will add crunch and a lovely nutty flavor that balances the richness of the caramel.
Next Up: The Chocolate Layer
Now, we’re getting to the best part—the chocolate! Sprinkle the semi-sweet chocolate chips over the caramel and nuts. Don’t worry about spreading them out yet; just get them evenly distributed.
Put the pan back in the oven for just 1-2 minutes. This short time in the oven will soften the chocolate chips, making them easier to spread. Once the chocolate is soft, use a spatula to gently spread it into an even layer over the caramel and nuts. The warm chocolate will melt perfectly into the caramel, giving you that signature gooey, chocolaty topping that everyone loves.

Chill & Slice
At this point, your turtle bars are looking pretty irresistible! But before you dig in, you need to let them chill in the fridge. Refrigerate them for at least 1-2 hours to allow the caramel and chocolate to set. Trust me, this step is key for getting those clean, perfect slices when it’s time to cut.
Once the bars are fully set and firm, lift them out of the pan using the parchment paper overhang. Place them on a cutting board, and slice them into squares. They’re ready to serve! These bars are rich and indulgent, so you’ll want to cut them into small squares (about 16 to 20) for the perfect portion size.
Tips and Tricks for Perfect Easy Turtle Bars
Now that you’ve got the basics down, let’s talk about how to make these Easy Turtle Bars even better. While the recipe is simple, there are a few extra tips and tricks that will ensure your bars come out perfectly every time. Whether you’re a seasoned baker or a beginner, these steps will help you get the most out of this delicious treat.
Customize the Nuts
One of the great things about this recipe is how easily it adapts to your preferences. The traditional turtle candy uses pecans, but you can switch things up and use different nuts based on your tastes. Walnuts are a fantastic alternative if you prefer a slightly milder flavor, or even almonds if you want a bit of extra crunch. You can also toast the nuts before adding them for an extra layer of flavor. Just spread them out on a baking sheet and toast them in a preheated oven at 350°F for 5-7 minutes until they’re fragrant. Be sure to let them cool before chopping them up and sprinkling them on top of your bars.
If you’re looking for a shortcut or want to avoid melting caramels yourself, you can substitute the caramels and heavy cream with pre-made caramel sauce. However, make sure to reduce the amount of heavy cream in the recipe to about 2 tablespoons, as caramel sauce is usually thinner than melted caramels and might make your topping a bit runny. This is a quick solution that still gives you that gooey caramel layer without the fuss of melting candies.
Perfecting the Shortbread Base
While the shortbread base is simple, it’s important to get the right texture. You want it to bake up golden and firm, but not too hard. If you find that your base is a bit too soft after baking, don’t worry. The caramel layer will help it firm up once everything cools. Just be sure to press the dough evenly into the pan to prevent uneven baking. If you like your shortbread on the buttery side, you can even increase the butter by a tablespoon for an extra rich flavor.
Chilling for the Perfect Texture
The chilling step is crucial to ensure your bars set up nicely. If you try to cut the bars too soon, the caramel and chocolate layers will still be soft and messy, and you’ll end up with a gooey mess (though, admittedly, a delicious one!). Allowing the bars to cool in the fridge for at least 1-2 hours gives the caramel and chocolate time to firm up, making the bars easy to slice and serve. If you’re in a rush, you can speed up the chilling process by placing the pan in the freezer for about 30 minutes. Just keep an eye on them to make sure they don’t freeze too hard.
Chocolate Layer Variations
For a fun twist, you can try different types of chocolate for the topping. Dark chocolate, milk chocolate, or even white chocolate could all be great options depending on your flavor preferences. If you choose a different chocolate, make sure to adjust the amount based on how sweet you like your bars. Dark chocolate, for example, will give a richer flavor with a slightly less sweet finish, while milk chocolate will give a creamier, sweeter bite.
Steps to Make Easy Turtle Bars (Continued)
Check the Texture of the Caramel
When you melt the caramels with the cream, make sure the mixture is smooth and completely melted before pouring it over the shortbread. This will ensure that you get a smooth, even layer of caramel. If the caramel seems too thick or lumpy, continue microwaving it in 30-second intervals, stirring well after each, until you achieve a silky consistency.
Spreading the Chocolate Layer
When you add the chocolate chips and return the pan to the oven for a minute or two, the goal is just to soften the chocolate enough to spread it easily. You don’t want the chocolate to fully melt and become too runny. Once softened, use a spatula to spread the chocolate evenly over the caramel layer. Be gentle while spreading so you don’t disturb the caramel and pecans underneath.
Cutting the Bars
Once the bars have chilled and are firm, it’s time to slice them up! You can use a sharp knife to cut them into squares or rectangles, depending on your preferred size. To get the cleanest cuts, make sure your knife is sharp, and wipe it clean between each cut to prevent any chocolate from sticking to the blade. The parchment paper overhang makes lifting the bars out of the pan a breeze, so you won’t have to worry about them sticking to the sides.
FAQ Section: Answering Your Turtle Bar Questions
Can I use store-bought caramel sauce instead of unwrapped caramels?
Yes! You can substitute store-bought caramel sauce for the melted caramels. Just reduce the amount of heavy cream to about 2 tablespoons to maintain the right consistency. While the texture may be slightly different, it will still be delicious!
Can I make these bars ahead of time?
Absolutely! These bars can be made a day or two in advance. Just store them in an airtight container in the refrigerator, and they’ll stay fresh and tasty. The chilling time also makes them a great make-ahead treat for parties or gatherings.
What if I don’t like pecans?
No worries! You can easily swap the pecans for another nut, such as walnuts or almonds. You can even leave the nuts out entirely if you prefer. The bars will still taste amazing without them.
How do I store leftovers?
To store leftovers, simply keep them in an airtight container at room temperature for up to 3-4 days. If you want them to last longer, you can store them in the refrigerator for up to a week. Just be sure to let them come to room temperature before serving if they’ve been chilled.
Can I freeze these turtle bars?
Yes, these bars freeze beautifully! After they’ve cooled and set, cut them into squares and place them in a single layer on a baking sheet. Freeze for 1-2 hours until firm, then transfer the bars to an airtight container or freezer bag. They’ll stay good for up to 3 months. Just thaw them in the fridge or at room temperature before enjoying.
Conclusion: Enjoy Your Easy Turtle Bars!
Now that you’ve got all the tips and tricks for making these Easy Turtle Bars, it’s time to get baking! These bars are perfect for any occasion, from family dinners to holiday parties, and they’re sure to be a hit with everyone who tries them. The buttery shortbread, rich caramel, crunchy nuts, and smooth chocolate come together in the most delicious way possible.
FAQ Section: Your Easy Turtle Bars Questions Answered
Now that we’ve covered the recipe, tips, and tricks, I’m sure you might have a few questions left about making these Easy Turtle Bars. No worries! I’ve gathered answers to some of the most common questions I’ve received, so you can make sure your bars turn out perfect every time.
Can I use a different size pan for this recipe?
Yes, you can use a different size pan, but it will affect the thickness of the bars. If you use a larger pan, like a 9×13-inch, your bars will be thinner, and you’ll likely need to reduce the baking time for the shortbread base. If you go smaller, like a 6×6-inch pan, the bars will be thicker, and you may need to increase the baking time slightly. Keep an eye on the shortbread base, and make sure to check it for doneness by looking for a golden color around the edges.
Can I make the shortbread dough in advance?
Absolutely! If you want to save time, you can make the shortbread dough ahead of time. Simply wrap it tightly in plastic wrap and store it in the refrigerator for up to 2 days before using it. When you’re ready to bake, let it come to room temperature for about 10 minutes to make it easier to press into the pan.
What’s the best way to cut the bars into neat squares?
To cut these turtle bars into neat squares, make sure your knife is sharp, and wipe it clean between each cut. This will help prevent the caramel and chocolate from sticking to the blade. I also recommend cutting the bars while they’re fully chilled to ensure the caramel and chocolate layers are firm enough to cut through without getting messy. If the bars are too soft, the layers might squish together.
Do these bars need to be refrigerated after baking?
Yes, to get the best texture and prevent the bars from becoming too soft, it’s essential to refrigerate them after baking. Once you add the caramel and chocolate layers, chill the bars in the fridge for 1-2 hours, or until they are firm. This will help set the layers and make them easier to slice. If you’re planning to store them for a longer period, refrigeration will help keep them fresh.
Can I make these bars gluten-free?
Yes, you can easily make these Easy Turtle Bars gluten-free by swapping the all-purpose flour for a gluten-free flour blend. Look for a blend that includes xanthan gum or guar gum, which will help the shortbread dough hold together. The rest of the ingredients, like the butter, caramel, and chocolate, are naturally gluten-free, so you’re good to go!
What’s the best way to store leftover Turtle Bars?
To store any leftovers, place the bars in an airtight container and store them at room temperature for up to 3-4 days. If you want to extend their shelf life, you can refrigerate them for up to a week. Just make sure to let the bars come to room temperature before serving, as they are best enjoyed when the caramel and chocolate layers are soft and gooey.
Can I freeze these bars for later?
Yes, you can freeze these bars for future enjoyment! Once they’ve cooled and set, cut them into squares and place them in a single layer on a baking sheet. Freeze the bars for 1-2 hours until they’re firm, then transfer them to an airtight container or freezer bag. You can store them in the freezer for up to 3 months. When you’re ready to eat them, let them thaw in the fridge or at room temperature, and they’ll taste just as good as when they were freshly made.
Conclusion: Enjoy Every Bite of Your Easy Turtle Bars!
If you’ve made it this far, you’re ready to bake up a batch of these irresistible Easy Turtle Bars! The combination of buttery shortbread, gooey caramel, crunchy nuts, and smooth chocolate is a winning one every time, and I hope you enjoy every bite. The beauty of this recipe is how simple it is to make yet how impressive it looks and tastes. Whether you’re treating yourself or serving them at a special event, these bars are sure to wow your family and friends.
Don’t forget to try out the tips I’ve shared for customizing the bars to your liking. Whether you stick to the classic pecans or switch it up with walnuts or almonds, there’s always room for a little creativity. And remember, if you have any questions or want to share your own twist on this recipe, I’d love to hear from you. Leave a comment below and let me know how your bars turned out!
Happy baking, and enjoy your Easy Turtle Bars!
Print
Easy Turtle Bars
- Author: David
Description
These Easy Turtle Bars are the perfect combination of a buttery shortbread base, gooey caramel, crunchy pecans, and smooth chocolate—everything you love about turtle candies, transformed into a simple bar. With just a few steps, you can make a delicious, decadent treat that’s perfect for any occasion.
Ingredients
For the Shortbread Base:
- 1 cup unsalted butter, softened
- ½ cup granulated sugar
- 2 cups all-purpose flour
- ¼ tsp salt
For the Topping:
- 14 oz caramels (soft, unwrapped)
- ¼ cup heavy cream
- 1 cup semi-sweet chocolate chips
- 1 cup chopped pecans (or walnuts, if preferred)
Instructions
Preheat & Prep
Preheat your oven to 350°F (175°C). Line an 8×8-inch baking pan with parchment paper, leaving an overhang on the sides for easy removal.
Make the Shortbread Base
In a mixing bowl, cream the softened butter and sugar until light and fluffy. Gradually add the flour and salt, mixing until a soft dough forms.
Press the dough evenly into the bottom of the prepared pan.
Bake for 20 minutes, or until lightly golden. Let cool slightly.
Add the Caramel Layer
In a microwave-safe bowl, combine the unwrapped caramels and heavy cream. Microwave in 30-second intervals, stirring after each, until smooth and melted.
Pour the caramel over the baked shortbread layer, spreading evenly.
Sprinkle the chopped pecans on top.
Add the Chocolate Layer
Evenly sprinkle the chocolate chips over the caramel layer.
Return the pan to the oven for 1-2 minutes, just until the chocolate softens.
Use a spatula to spread the melted chocolate into an even layer.
Chill & Slice
Refrigerate the bars for 1-2 hours, until fully set.
Once set, lift the bars out of the pan using the parchment paper overhang and cut into squares.
Notes
Caramel Shortcut: If you don’t want to melt the caramels yourself, you can use pre-made caramel sauce, but be sure to reduce the amount of cream to maintain the right consistency.
Chill for Firmness: Make sure to refrigerate the bars long enough to allow the chocolate and caramel to firm up before cutting.
Customize Toppings: You can switch up the nuts—walnuts or even almonds can give these bars a slightly different twist!


")

")


")
