

If you’ve ever found yourself hovering over the elote cart at your local fair or food truck, you already know how downright addictive Mexican street corn can be. That mix of sweet, smoky corn, creamy sauce, tangy cheese, a little kick of spice, and bright lime? It’s magic. Now imagine all of that flavor… in DIP form. Yep—this Irresistible Street Corn Dip is basically elote’s cooler, party-ready cousin, and trust me, it disappears fast.
I made this for a family barbecue last summer and not only did it get wiped clean in record time, but everyone also asked for the recipe before the day was over. It’s one of those dishes that feels a little fancy, a little indulgent, but is secretly super easy to throw together. You can serve it warm or cold, it travels well, and it pairs perfectly with tortilla chips, pita wedges, or even crunchy veggie sticks if you want to lighten things up.
In this first part, I’m going to walk you through what makes this dip so special and how to get it started with just a few simple ingredients. Let’s dig in!
Why You’ll Love This Street Corn Dip
Quick and Easy: It takes just 20 minutes start to finish.
Customizable: Like it spicier? Creamier? More lime? You’ve got options.
Versatile: Serve it warm and bubbly or chilled and refreshing.
Crowd-Pleaser: This is the kind of dip people stand around, scooping until the bowl is empty.
Ingredients You’ll Need
This recipe comes together with pantry staples and a few fresh ingredients. Here’s what to gather:
Corn Kernels (4 cups): Fresh off the cob is best during summer, but frozen or canned works just as well.
Butter or Olive Oil (1 tbsp): For sautéing the corn and bringing out its natural sweetness.
Mayonnaise & Sour Cream (½ cup each): These form the creamy base—rich, tangy, and perfect for blending flavors.
Cotija Cheese (1 cup, crumbled): Salty and crumbly, it adds the classic elote flavor. Feta or Parmesan can be swapped in a pinch.
Jalapeño (1, finely chopped): Adds heat and crunch. Remove seeds if you prefer it milder.
Garlic (1 clove, minced): Just a little goes a long way for flavor depth.
Chili Powder & Smoked Paprika (1 tsp + ½ tsp): These bring the smokiness and that unmistakable street corn flavor.
Lime Juice (from 1 lime): Adds brightness and tang.
Salt & Pepper: To taste.
Fresh Cilantro (2 tbsp, chopped): For that fresh finish.
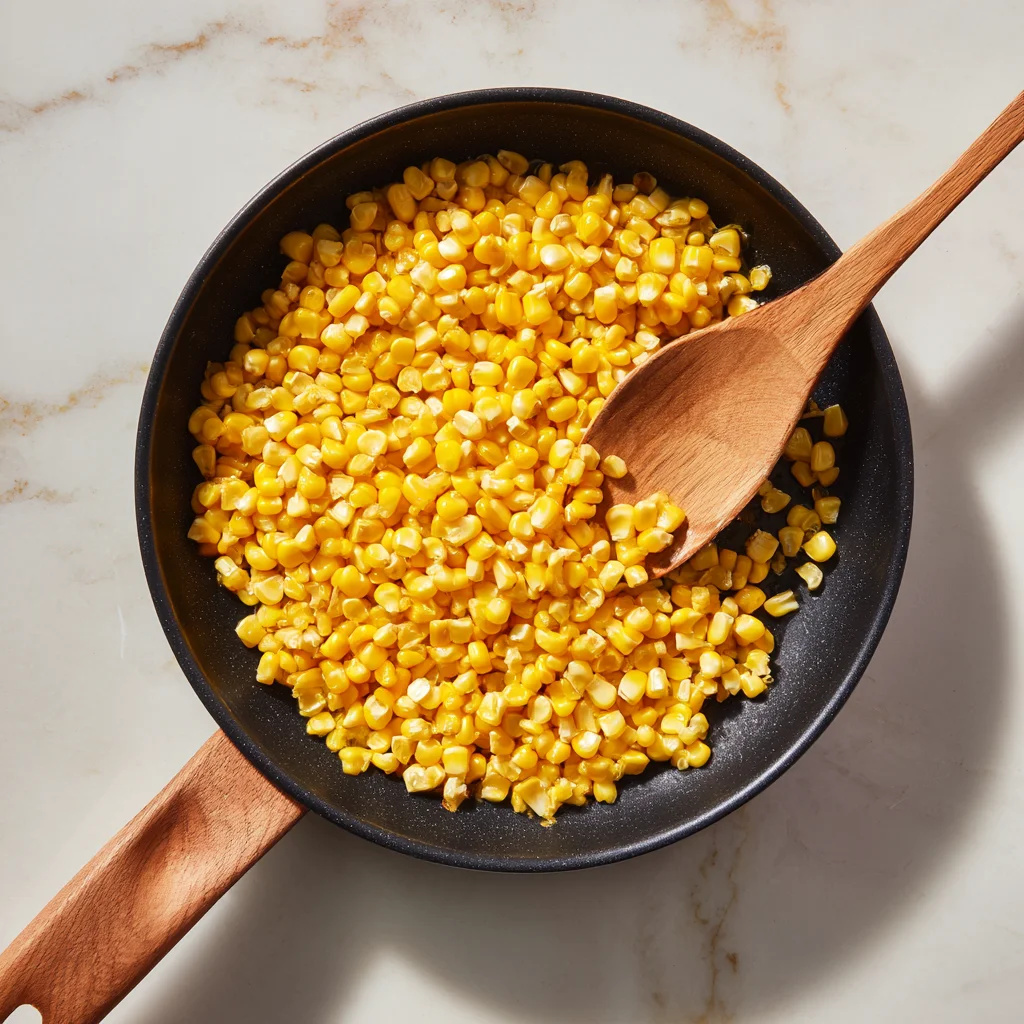
STEP 1: Char the Corn
Start by heating a large skillet over medium-high heat. Add your butter or olive oil and toss in the corn. If you’re using frozen corn, there’s no need to thaw—just toss it in straight from the bag. Sauté for 6 to 8 minutes, stirring occasionally, until the corn starts to get those golden brown, slightly charred bits.
Why this step matters: That little bit of char adds a smoky depth that really mimics traditional grilled street corn. If you want to go the extra mile, you could grill fresh corn on the cob and slice it off, but the skillet method totally does the trick when you’re in a pinch.
Once the corn is golden and toasty, take it off the heat and let it cool for a few minutes. You don’t want it scorching hot when you mix it with the creamy ingredients—you’re going for dip, not soup.

STEP 2: Make the Creamy Base
While the corn is cooling, grab a large mixing bowl. Add the mayonnaise, sour cream, lime juice, minced garlic, chili powder, smoked paprika, and a little salt and pepper. Stir it all together until it’s smooth and well combined.
Pro tip: Don’t skip the lime juice—it cuts through the richness of the mayo and sour cream and brings everything to life.
This creamy base is really the heart of the dip. It’s tangy, smoky, and just spicy enough. You could honestly stop right here and slather this on tacos, grilled veggies, or pretty much anything, but we’re going even bigger.
STEP 3: Combine and Fold
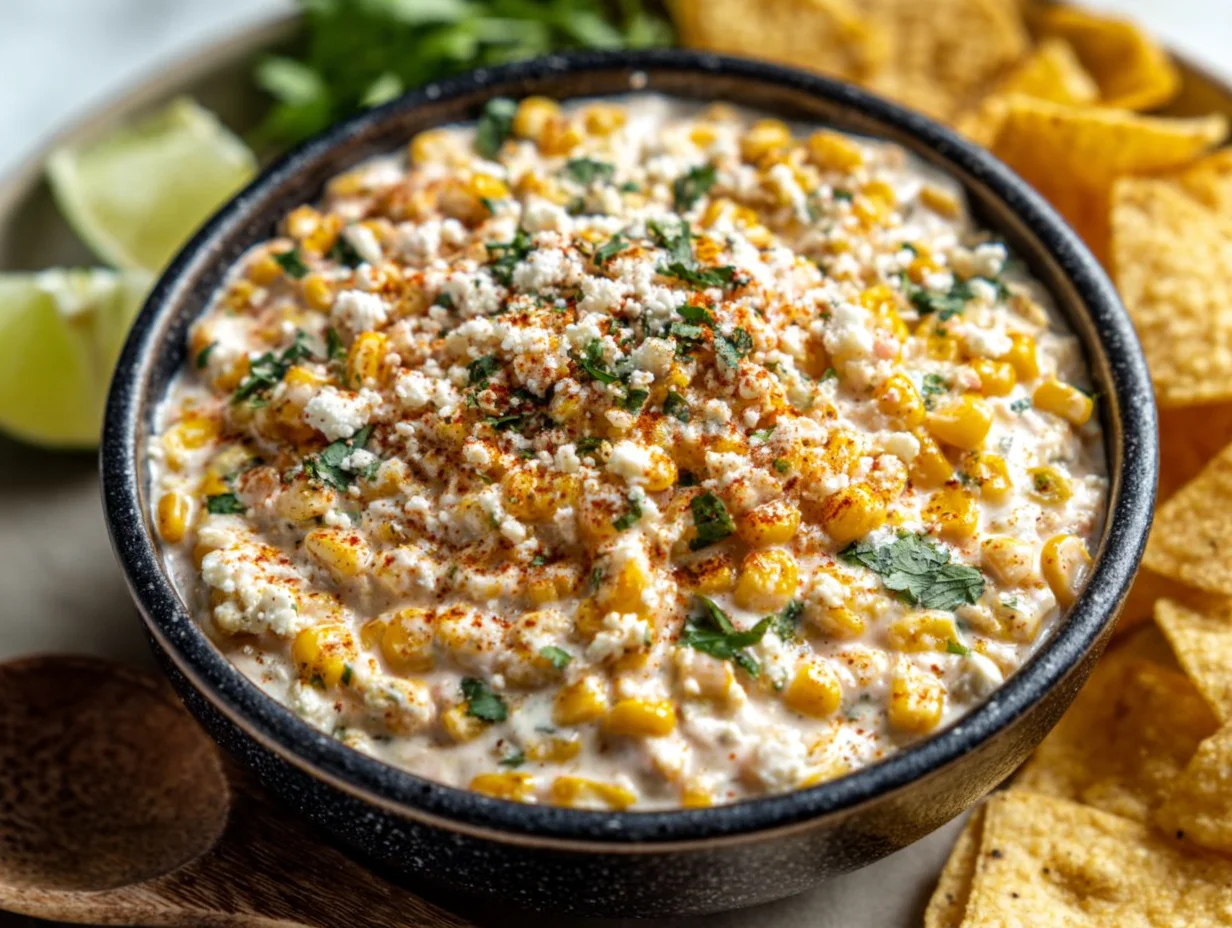
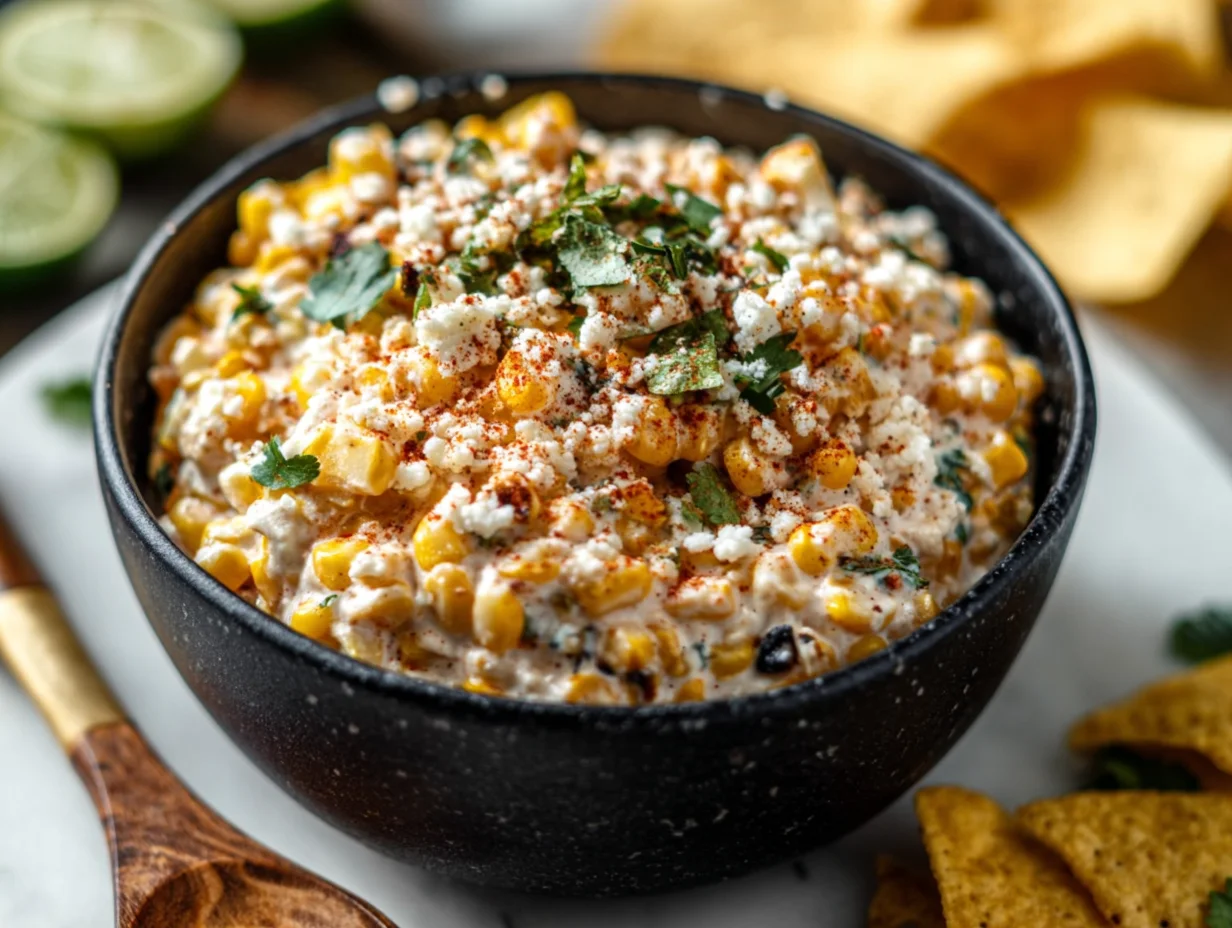
Now it’s time to bring it all together. Gently fold the cooled corn into the creamy mixture. Add the chopped jalapeño and most of the crumbled cotija cheese, saving a little for garnish.
Stir everything until it’s evenly coated. It should be thick, scoopable, and bursting with texture—crunchy corn, creamy sauce, little pops of salty cheese, and that fresh kick from the jalapeño.
Taste and adjust your seasoning here. Want more heat? Add a few dashes of hot sauce or a pinch of cayenne. More tang? Squeeze in a bit more lime.
How to Serve This Street Corn Dip (Warm or Cold!) + Flavor Variations You’ll Love
Now that we’ve mixed together our creamy, flavor-packed base and sweet, smoky corn, it’s time to bring this dip to the table—literally. What I love most about this Irresistible Street Corn Dip is how flexible it is. You can serve it warm or cold, make it ahead for parties, tweak the spice level, or even use leftovers creatively. It’s a no-fuss appetizer that’s practically guaranteed to be a hit.
Whether you’re feeding a crowd on game day or just want something different for taco night, this dip fits the bill. Let’s get into the finishing touches, serving options, and some of my favorite variations that can really take this dish to the next level.
STEP 4: Add Finishing Touches
Once your corn and creamy mixture are fully combined and seasoned to your liking, it’s time to add the final layer of flavor.
Sprinkle the top with:
The remaining crumbled cotija cheese
A handful of freshly chopped cilantro
These two simple toppings not only make the dip look extra inviting, but they also add that punch of flavor and freshness that balances out the richness underneath.

STEP 5: Serve It Your Way (Warm or Cold)
This dip is amazing straight out of the fridge or baked until bubbly and golden, depending on your mood—or your guests!
To Serve Cold:
Perfect for warmer days or if you’re prepping ahead for a party. Just transfer the finished dip to a serving bowl, cover it, and chill it for 30 minutes (or up to 24 hours). When you’re ready to serve, give it a quick stir and top with cheese and cilantro.
To Serve Warm:
Want that cozy, cheesy, baked-dip vibe? Preheat your oven to 375°F (190°C) and transfer the dip to a small baking dish. Bake for about 15 minutes, or until the edges are bubbly and the top is just starting to brown.
Tip: A light sprinkle of extra cheese on top before baking takes it over the top.
What to Serve With It
This street corn dip is scoopable, dippable, and totally versatile when it comes to pairings. Here are some great options:
Tortilla chips: Classic and always a win.
Pita wedges or naan chips: A soft, chewy option that works well with the creamy texture.
Cucumber slices or bell pepper strips: For a fresh, crunchy contrast.
Mini tostadas or taco shells: For a fun presentation twist—serve it like a mini taco bar!
Flavor Variations and Add-Ins
Feel like getting creative? Here are a few fun ideas to switch things up based on what you’ve got in your fridge or pantry:
1. Make It Extra Spicy
Add a few dashes of hot sauce, or stir in a bit of cayenne pepper.
Use two jalapeños instead of one, or swap for a serrano pepper if you want more heat.
2. Add a Crunchy Twist
Stir in some finely diced red onion or bell pepper.
Toss in toasted pepitas (pumpkin seeds) for a nutty bite.
3. Go Smoky and Savory
Use grilled corn instead of sautéed for deeper flavor.
Add a spoonful of chipotle in adobo to the cream base for a smoky kick.
4. Add Protein for a Hearty Dip
Mix in crumbled bacon or even shredded rotisserie chicken to make it more filling.
5. Make It Lighter
Use Greek yogurt in place of sour cream or mayo for a tangy, protein-rich twist.
Cut back slightly on the cheese if you’re watching sodium.
Make-Ahead and Storage Tips
One of the best things about this recipe? It’s super make-ahead friendly, which is a total lifesaver during party prep.
To Make Ahead: You can fully prepare the dip (except for the toppings) up to 24 hours in advance. Just store it in an airtight container in the fridge and give it a good stir before serving.
To Store Leftovers: Store in the fridge for up to 3 days in a sealed container. Just note that the texture will change slightly if you’ve already baked it, but it’s still delicious.
To Reheat: If you’ve served it warm and have leftovers, pop it in the microwave or oven to bring it back to life. Add a sprinkle of fresh cheese and cilantro before serving again.
Street Corn Dip FAQ + Final Thoughts
You’re almost ready to whip up a big bowl of this Irresistible Street Corn Dip and wow your guests (or just treat yourself—you deserve it). But before you dive in, let’s go over a few common questions I get about this recipe. Whether you’re making it for the first time or looking to perfect your version, these quick answers will help you feel more confident in the kitchen.
FAQ: Your Street Corn Dip Questions Answered
1. Can I use canned corn instead of fresh or frozen?
Yes, absolutely. Canned corn works great here—just make sure to drain it well before sautéing. You might also want to pat it dry with paper towels to avoid excess moisture, which can prevent proper charring.
2. Is cotija cheese necessary? What are some substitutes?
Cotija adds that signature salty, crumbly finish, but if you can’t find it, feta is a great stand-in. Parmesan also works in a pinch, though it has a slightly different texture and flavor. Even queso fresco can be used for a milder taste.
3. How spicy is this dip, really?
It’s mild to medium as written—just enough to add warmth without overpowering the other flavors. If you’re spice-sensitive, remove the seeds from the jalapeño or leave it out altogether. For spice lovers, feel free to add hot sauce, cayenne, or even a second jalapeño.
4. Can I make this ahead for a party?
Definitely! You can prep the dip up to 24 hours ahead of time and store it in the fridge. Just hold off on the cilantro and final cheese topping until just before serving for the freshest flavor.
5. What’s the best way to reheat the dip if I bake it?
Reheat it in a 350°F oven for about 10–15 minutes or microwave individual portions for about 30–60 seconds, depending on your microwave. Stir halfway through for even warming.
6. How long does this dip keep in the fridge?
Leftovers will stay fresh for up to 3 days when stored in an airtight container in the refrigerator. The texture may soften slightly, but the flavor remains delicious.
7. Can I freeze this dip?
Freezing isn’t recommended. The creamy ingredients (especially the mayo and sour cream) tend to separate and become watery when thawed, which can change the texture of the dip.
Final Thoughts: Why This Street Corn Dip Deserves a Spot at Your Next Party
There’s a reason this Irresistible Street Corn Dip has become a go-to recipe in my kitchen—it’s easy, quick, and consistently a crowd favorite. Whether you’re making it for a potluck, game day, backyard cookout, or even just a laid-back Friday night at home, it’s one of those dips that never disappoints.
What I love most is how versatile it is. You can serve it warm or cold, dial the heat up or down, and get creative with add-ins based on what you have on hand. Plus, it’s simple enough that you don’t need to spend hours in the kitchen but flavorful enough that everyone will think you did.
I’d love to hear how you made this dip your own! Did you add bacon? Go extra spicy? Try a different cheese? Drop a comment below and share your twist—I’m always looking for new ways to enjoy this favorite.
Print
Irresistible Street Corn Dip You Need to Try
- Author: David
Description
Crazy Good Pizza Burger Pie is a family-friendly dinner mashup that combines all the bold, cheesy flavors of pizza with the hearty satisfaction of a cheeseburger, baked into a pie-style dish. With a savory ground beef filling, gooey melted cheese, pepperoni, and a golden biscuit or crescent crust, this comfort food classic is easy to throw together and guaranteed to disappear fast at the dinner table.
Ingredients
1 pound ground beef
½ cup chopped onion
1 cup pizza sauce or marinara
1 teaspoon Italian seasoning
Salt and black pepper to taste
1½ cups shredded mozzarella cheese
½ cup shredded cheddar cheese
10 slices pepperoni (or more as desired)
1 can refrigerated crescent roll dough or biscuit dough
1 tablespoon grated Parmesan cheese (optional)
Instructions
Preheat the oven to 375°F (190°C). Grease a 9-inch pie dish or round baking dish.
In a skillet over medium heat, cook the ground beef and chopped onion until browned and cooked through. Drain any excess grease.
Stir in the pizza sauce and Italian seasoning. Let the mixture simmer for 2 to 3 minutes to blend the flavors. Season with salt and pepper as needed.
Unroll the crescent dough and press it into the bottom and up the sides of the pie dish, sealing any seams. If using biscuit dough, flatten and press into the dish evenly to create a crust base.
Spoon the beef mixture into the crust. Sprinkle with mozzarella and cheddar cheeses. Top with slices of pepperoni and sprinkle with Parmesan if using.
Bake for 18 to 22 minutes or until the crust is golden and the cheese is bubbly and melted.
Let the pie cool for 5 minutes before slicing and serving.
Notes
Customize the filling with your favorite pizza toppings like bell peppers, mushrooms, olives, or sausage. For a crispier crust, prebake the dough for 5 minutes before adding the filling. Leftovers reheat well and make a great next-day lunch. This dish is especially popular with kids and picky eaters thanks to its fun, familiar flavors.


")

")


")
