

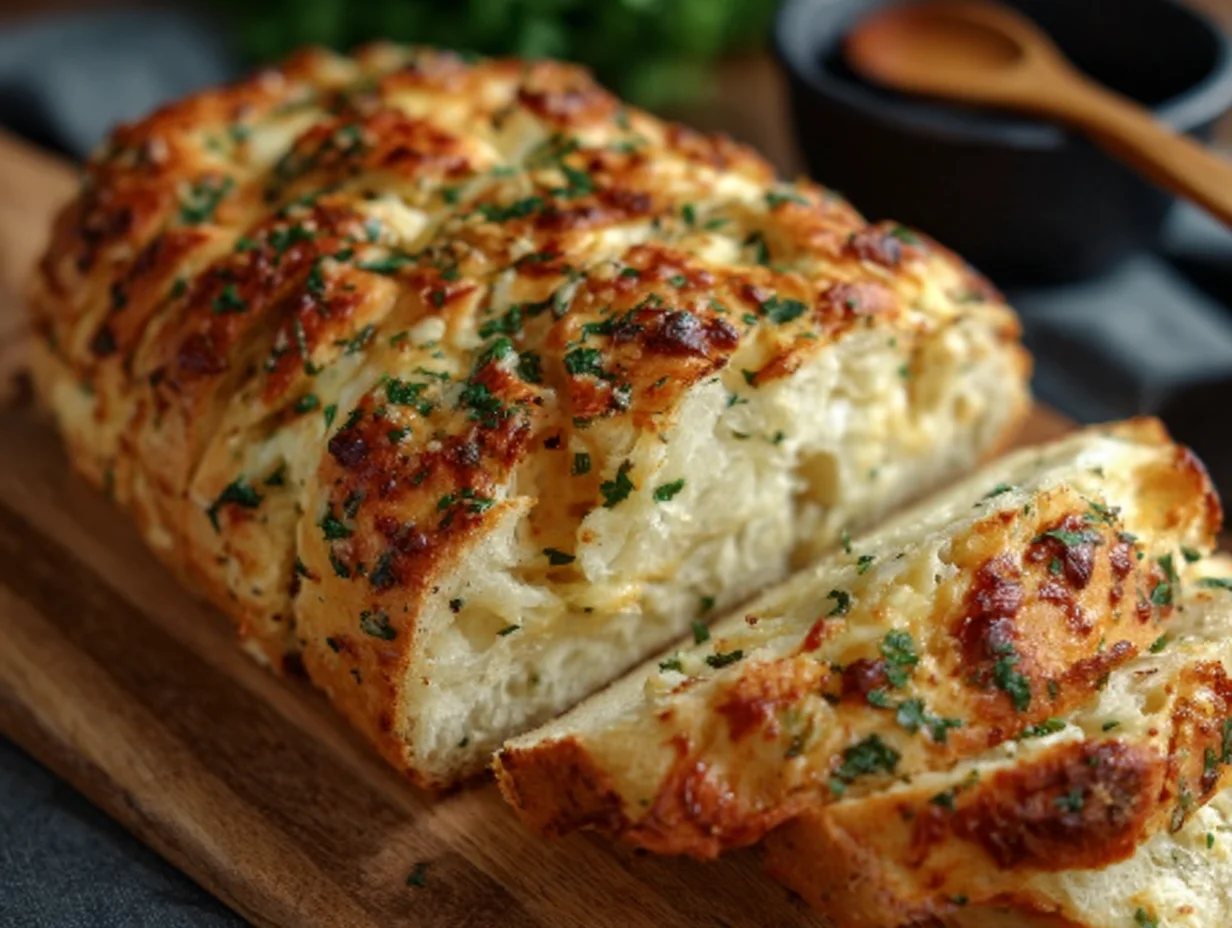
There’s something undeniably comforting about the aroma of freshly baked bread wafting through your kitchen — especially when that bread is infused with herbs and covered in golden, melted cheese. If you’ve ever been obsessed with that soft, cheesy bread from your local sandwich shop (you know the one), you’re going to fall in love with this Homemade Italian Herbs and Cheese Bread. It’s everything you love about deli-style bread, but made right in your own oven.
This bread is soft on the inside, slightly chewy on the outside, and absolutely loaded with flavor from dried herbs like oregano, basil, parsley, and a touch of garlic and onion. But the real showstopper? That melty mozzarella and Parmesan cheese crust on top. I mean, it doesn’t get more crave-worthy than that.
I started making this recipe on a whim one Sunday afternoon when I wanted something extra to go with a big pot of tomato basil soup. The first loaf disappeared before the soup even hit the table. Since then, it’s become a staple in my kitchen — perfect for subs, dipping into marinara, or just tearing apart and eating warm with olive oil.
Let’s get into how to make it step by step!
Ingredients You’ll Need
3 cups all-purpose flour
2¼ teaspoons active dry yeast (1 packet)
1 tablespoon sugar
1 teaspoon salt
1 tablespoon olive oil
1 cup warm water (about 110°F)
1 teaspoon dried oregano
1 teaspoon dried basil
½ teaspoon garlic powder
½ teaspoon onion powder
1 teaspoon dried parsley
1 cup shredded mozzarella cheese
¼ cup grated Parmesan cheese
Olive oil for brushing
STEP 1: Activate Your Yeast
In a large mixing bowl, pour in the warm water (it should feel like a warm bath, not hot), and stir in the sugar and yeast. Let it sit for about 5 to 10 minutes, until the top starts to look foamy. That’s how you know your yeast is alive and ready to do its thing.
Pro Tip: If you don’t see any foam after 10 minutes, your yeast may be expired or your water was too hot. Try again with fresh yeast and lukewarm water.

STEP 2: Make the Dough
Once your yeast is bubbly and ready, stir in the olive oil, salt, and your dried herbs — oregano, basil, garlic powder, onion powder, and parsley. Then, gradually add the flour, mixing as you go, until a dough forms.
At this point, transfer the dough to a floured surface and start kneading. Knead for about 6 to 8 minutes, until the dough becomes smooth and elastic. It should bounce back slightly when you press it with your finger.
This part takes a little effort, but trust me, it’s worth it. Plus, it’s a great arm workout!

STEP 3: Let It Rise
Place the kneaded dough into a lightly oiled bowl, turning it once so the top gets a thin coating of oil too. This keeps it from drying out while it rises.
Cover the bowl with a clean towel or plastic wrap, and set it in a warm, draft-free spot. Let it rise for about 1 hour, or until it doubles in size.
Tip: If your kitchen is chilly, you can place the bowl in a turned-off oven with the light on — the gentle heat helps the dough rise beautifully
Cheesy Herb Bread That’s Better Than Takeout – Finishing the Loaf
By now, your kitchen should be smelling a little like an Italian bakery, and if your dough has doubled in size, we’re on the home stretch. This is where the magic really kicks in — shaping the dough, loading it up with cheese, and baking it until golden and bubbly.
I’ve made this bread so many times now that I’ve started to play around with toppings and variations (more on that in a bit), but even the basic version is outrageously good. You don’t need to be a seasoned bread maker to pull this off — just follow these next steps, and you’ll be slicing into bakery-style bread in no time.
STEP 4: Shape the Dough
Once your dough has risen and doubled in size (you can test this by gently pressing a finger into it — if the indentation stays, it’s ready), go ahead and punch it down gently to release some of the air.
Turn the dough out onto a lightly floured surface and shape it into a loaf. You can go for a traditional loaf shape or stretch it out into a sub-style roll, especially if you’re planning to make sandwiches. Either way works — just keep it about 2–3 inches thick so it bakes evenly.
Place the shaped dough on a parchment-lined baking sheet. If you don’t have parchment, lightly oil the sheet to prevent sticking.

STEP 5: Add the Cheese Topping
This step is where it really starts looking like that classic Italian Herbs and Cheese bread we all love.
Using a pastry brush or the back of a spoon, gently brush the top of the dough with a little olive oil. This helps the cheese stick and also gives the crust a beautiful golden color.
Then, sprinkle 1 cup of shredded mozzarella and ¼ cup of grated Parmesan cheese evenly over the top. Don’t worry if a little spills onto the baking sheet — those bits turn into crispy, cheesy edges that are seriously delicious.
You can also add a pinch more parsley or oregano on top if you want to punch up the herb flavor even more.
STEP 6: Bake It
Preheat your oven to 375°F (190°C) while you finish up the toppings. Once it’s ready, place the baking sheet in the center rack of your oven.
Bake for 25 to 30 minutes, or until the bread is golden brown, the cheese is melted and lightly toasted, and the loaf sounds hollow when tapped on the bottom.
Depending on your oven, the cheese might start browning a bit earlier — if it looks too dark, you can loosely tent the top with foil during the last 5 minutes to prevent burning.
Once baked, let the bread cool slightly on a wire rack or cutting board. It’s tempting to slice into it right away (and honestly, I usually sneak a piece), but letting it sit for 10 minutes helps it slice better without squishing the soft interior.
Optional Add-Ins and Variations
Want to mix things up a bit? Here are a few easy ways to change the flavor or make this bread work for different meals:
Add chopped sun-dried tomatoes or minced fresh garlic to the dough for a bolder taste.
Use a cheese blend like provolone, asiago, or cheddar for a different cheesy topping.
Turn it into garlic bread: After baking, slice the loaf and brush each piece with garlic butter. Toast in the oven for 5 minutes.
Make mini sub rolls: Instead of one loaf, divide the dough into 4 smaller portions and shape them into rolls. Bake for slightly less time (around 18–22 minutes).
Storage Tips
This bread holds up really well for a few days at room temperature. Just wrap it tightly in foil or store in a zip-top bag. If you want to keep it longer, slice it and freeze the pieces individually. When you’re ready to enjoy, pop a slice in the toaster oven for a few minutes and it’s as good as fresh.
Personally, I like to reheat it in the oven at 350°F for about 5–7 minutes to bring back that crisp top. You can also wrap it in foil if you want it softer.
Italian Herbs and Cheese Bread – FAQs & Final Thoughts
If you’ve made it this far, you’re probably already dreaming about that first warm slice of herby, cheesy goodness. Before we wrap things up, I want to cover a few of the most common questions I get about this recipe. Whether you’re new to baking or just want to make sure your loaf turns out perfect every time, this section should help you feel confident and ready to bake.
Frequently Asked Questions
1. Can I use instant yeast instead of active dry yeast?
Yes! If you’re using instant yeast, you can skip the activation step with warm water and sugar. Just mix it directly into the dry ingredients. However, I still recommend using warm water to help the dough rise faster and more evenly.
2. How do I know when my dough has risen enough?
A good rule of thumb is that it should double in size. Press your finger gently into the dough — if the indentation stays and doesn’t spring back quickly, it’s ready to shape.
3. What’s the best way to store leftovers?
Store your cooled bread in an airtight bag or container at room temperature for up to 3 days. For longer storage, slice and freeze individual pieces. Reheat in the oven or toaster oven to get that fresh-baked texture back.
4. Can I make the dough ahead of time?
Yes, you can make the dough and let it rise overnight in the refrigerator. Just cover it tightly and bring it to room temperature before shaping and baking. It may need an extra 30–60 minutes to fully rise if it’s cold.
5. Is it possible to make this gluten-free?
This recipe was developed using all-purpose flour, so results will vary with gluten-free alternatives. That said, there are some high-quality gluten-free flour blends that may work — look for one designed for yeast baking.
6. Can I use fresh herbs instead of dried?
Definitely! If using fresh herbs, you’ll want to triple the amount since fresh herbs are less concentrated than dried. Just chop them finely and mix them in with the dough.
7. What kind of cheese can I substitute for mozzarella?
You can use provolone, asiago, cheddar, Monterey Jack, or a blend. Mozzarella gives that classic melty texture, but feel free to experiment with what you have on hand.
Final Thoughts – Give It a Try!
Homemade bread doesn’t have to be complicated, and this Italian Herbs and Cheese Bread proves it. With just a handful of pantry staples and a little bit of time, you can create a bakery-quality loaf that’s packed with flavor and absolutely perfect for sandwiches, soups, or snacking straight from the cutting board.
What I love most about this recipe is how versatile it is. You can keep it simple and classic or go wild with mix-ins like roasted garlic or spicy pepper flakes. Either way, once you try it, you’ll find yourself making it again and again — and probably never looking at store-bought bread the same way.
Print
Italian Herbs and Cheese Bread
- Author: David
Description
Apple Dapple Cake is a classic old-fashioned dessert known for its incredibly moist texture, chunks of fresh apples, and rich brown sugar glaze that soaks into the cake while it’s still warm. This cozy, spiced cake is perfect for fall baking but delicious any time of year. It’s simple, rustic, and full of warm apple flavor with a sweet, buttery finish that makes it hard to stop at just one slice.
Ingredients
For the cake:
3 cups peeled and chopped apples (such as Granny Smith or Honeycrisp)
2 cups all-purpose flour
1 teaspoon baking soda
1 teaspoon ground cinnamon
½ teaspoon salt
1½ cups granulated sugar
½ cup light brown sugar, packed
1 cup vegetable oil
2 large eggs
1 teaspoon vanilla extract
1 cup chopped pecans or walnuts (optional)
For the glaze:
½ cup packed brown sugar
¼ cup butter
2 tablespoons milk
½ teaspoon vanilla extract
Instructions
Preheat the oven to 350°F (175°C). Grease and flour a 9×13-inch baking pan or a bundt pan.
In a medium bowl, whisk together the flour, baking soda, cinnamon, and salt.
In a large mixing bowl, combine the granulated sugar, brown sugar, and oil. Mix in the eggs one at a time, then add the vanilla extract.
Gradually stir the dry ingredients into the wet mixture until just combined. Fold in the chopped apples and nuts if using. The batter will be thick.
Spoon the batter into the prepared pan and spread it evenly.
Bake for 45 to 50 minutes, or until a toothpick inserted into the center comes out clean.
While the cake is baking, prepare the glaze. In a small saucepan, combine the brown sugar, butter, and milk. Bring to a simmer over medium heat, stirring constantly until the sugar is dissolved and the glaze is smooth. Remove from heat and stir in vanilla extract.
As soon as the cake comes out of the oven, poke small holes over the top using a skewer or fork and slowly pour the warm glaze over the hot cake, allowing it to soak in.
Let the cake cool in the pan before serving.
Notes
This cake stores well and often tastes even better the next day as the glaze continues to absorb into the crumb. For best results, use tart apples to balance the sweetness. Serve warm or at room temperature, plain or with a scoop of vanilla ice cream or dollop of whipped cream for an extra indulgent treat.


")

")


")
