

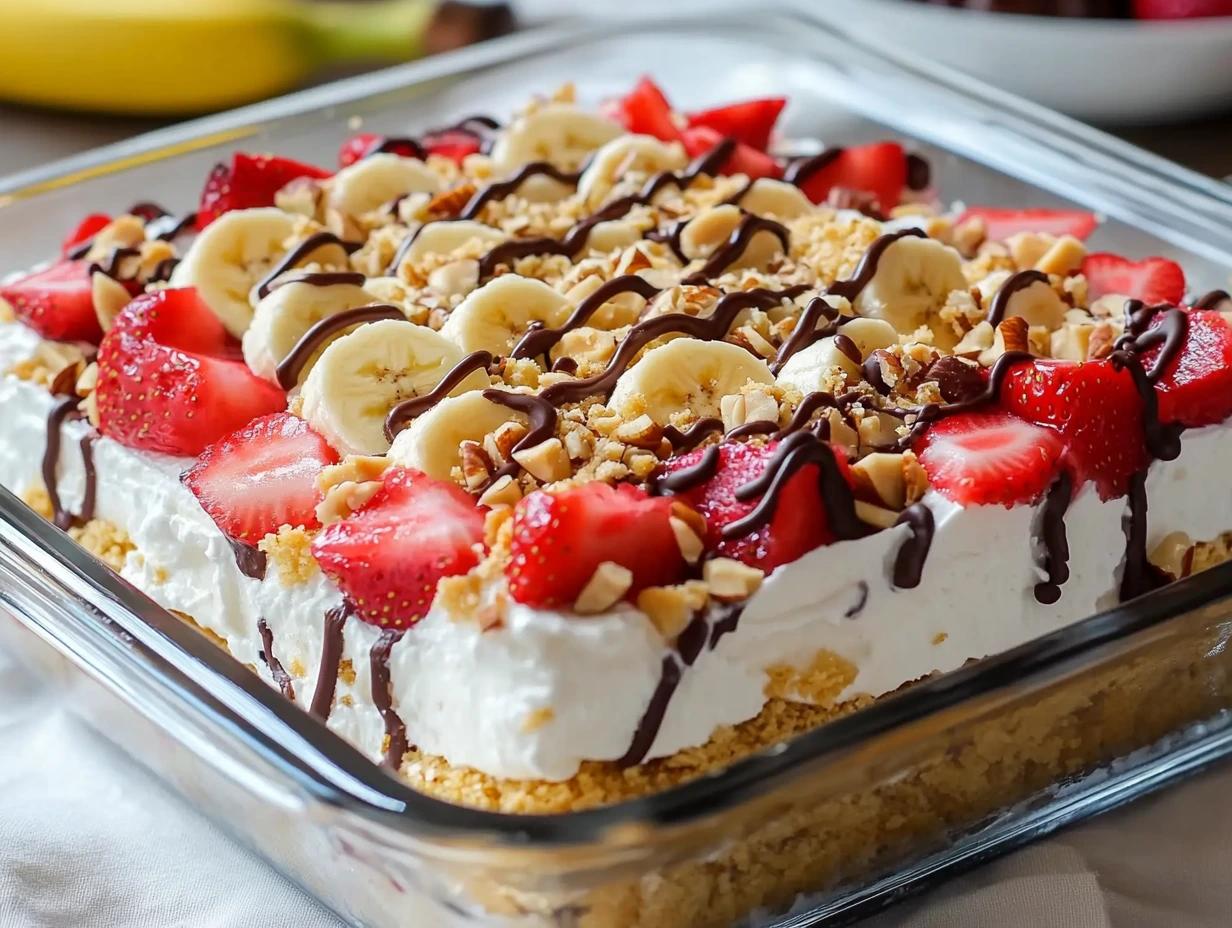
If there’s one dessert that screams summer fun, effortless indulgence, and pure delight, it’s the No-Bake Banana Split Cake. Imagine layers of creamy goodness, fresh fruits, and a buttery graham cracker crust coming together in a dessert that’s as beautiful as it is delicious. Whether you’re hosting a backyard barbecue, a family gathering, or just treating yourself to something sweet, this cake is a showstopper that requires zero time in the oven. Let’s dive into this recipe and create some kitchen magic!
Why You’ll Love This Recipe
This no-bake dessert is perfect for hot days when turning on the oven feels like a chore. Plus, it’s packed with nostalgic flavors reminiscent of a classic banana split – but in cake form! It’s the kind of treat that brings smiles to everyone’s faces and keeps them coming back for more.
How to Make the Perfect No-Bake Banana Split Cake
Let’s start with the foundation of this dessert: the crust. A great crust is the backbone of any no-bake dessert, and this one is buttery, crunchy, and oh-so-easy to make.
Step 1: Crafting the Crust
To create that irresistible base, you’ll need just three simple ingredients: graham cracker crumbs, melted butter, and a pinch of salt. Here’s how to do it:
- Combine the Ingredients
In a medium bowl, mix 2 cups of graham cracker crumbs, ⅓ cup of melted unsalted butter, and 1 teaspoon of salt. The mixture should have a texture like damp sand—perfect for pressing into your dish. - Press It In
Grab a greased 9×13-inch baking dish, and press the crumb mixture firmly and evenly into the bottom. The trick is to use the back of a spoon or a flat-bottomed glass to create a smooth, compact layer. - Chill the Crust
Pop the crust into the refrigerator to set while you prepare the filling. This step is essential to keep the crust firm and sturdy when you add the layers.

Building the Creamy Filling
Next comes the heart of this dessert: a velvety, creamy layer that pairs perfectly with the fruity toppings.
Step 2: Whipping Up the Filling
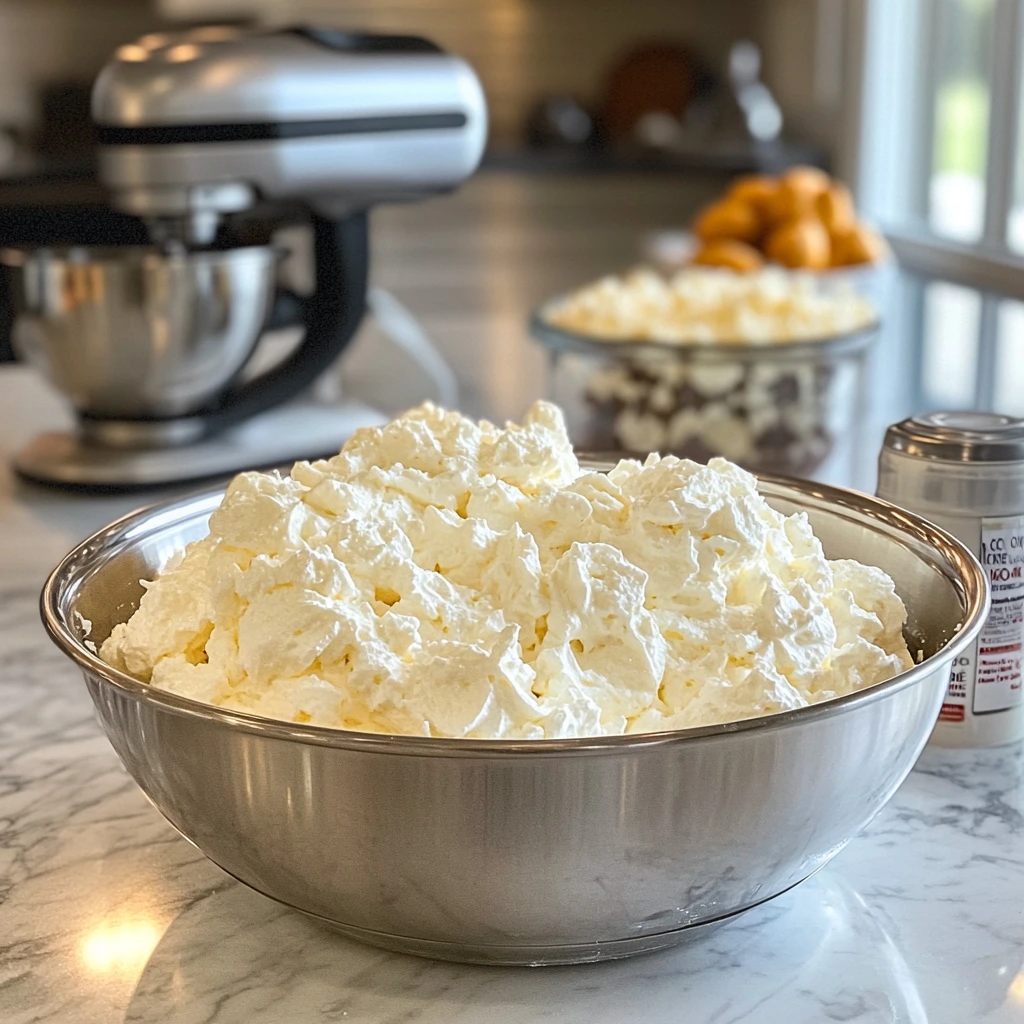
- Cream It Together
In a large mixing bowl, beat 16 ounces of softened cream cheese with ½ cup of granulated sugar and 1 teaspoon of vanilla extract. The goal is to create a smooth, lump-free mixture. - Fold in the Fluffiness
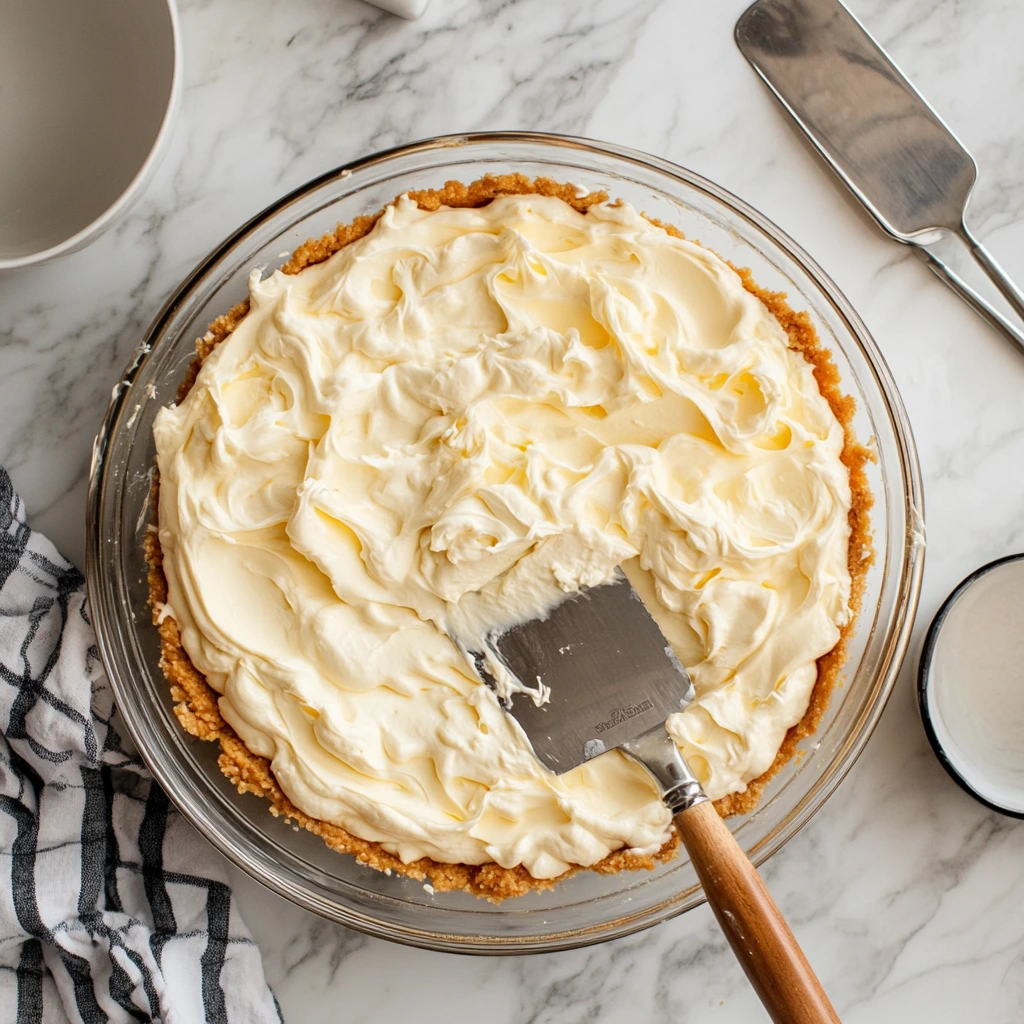
Gently fold in 8 ounces of whipped topping (like Cool Whip) until it’s fully incorporated. Be careful not to overmix; you want the filling to stay light and airy. - Spread It Evenly
Retrieve the chilled crust from the fridge and spread the cream cheese filling over it in an even layer. A spatula works wonders here for smooth application.
Tips for a Perfect Filling
- Softened Cream Cheese is Key
Make sure your cream cheese is softened before beating. This ensures a silky, lump-free texture. - Chill for Stability
If your kitchen is warm, consider chilling the filling briefly before spreading it over the crust.
The Magic of Layers: Adding Fruits and Toppings
Now that we have the perfect crust and creamy filling in place, it’s time to take your No-Bake Banana Split Cake to the next level. This is where the magic happens—layering fresh fruits and finishing with decadent toppings. Each step builds the flavors and textures that make this dessert a showstopper.
Step 3: The Fruity Layers
The fruity layers are what transform this cake from simple to spectacular. Bananas, crushed pineapple, and strawberries come together to create a refreshing, vibrant middle section that bursts with flavor.
Adding the Bananas
- Slice the Bananas
Peel and slice 3 to 4 ripe bananas into evenly sized rounds. The bananas should be just ripe—firm enough to hold their shape but sweet enough to add that signature banana flavor. - Layer Evenly
Arrange the banana slices in a single, even layer over the cream cheese filling. This ensures every bite delivers that unmistakable banana taste.
The Pineapple Layer
- Drain Thoroughly
Open a 20-ounce can of crushed pineapple and drain it well. Press out as much liquid as possible with a spoon or use a fine-mesh sieve to avoid excess moisture in the cake. - Spread with Care
Spoon the pineapple over the banana layer, spreading it out evenly. The sweet and tangy pineapple adds a bright, tropical contrast to the creamy filling.
Strawberry Sensation
- Prep the Strawberries
Wash and slice 20 ounces of fresh strawberries. Thin, uniform slices work best for an even layer. - Layer On Top
Place the sliced strawberries over the pineapple. Arrange them slightly overlapping to create a beautiful, colorful layer.
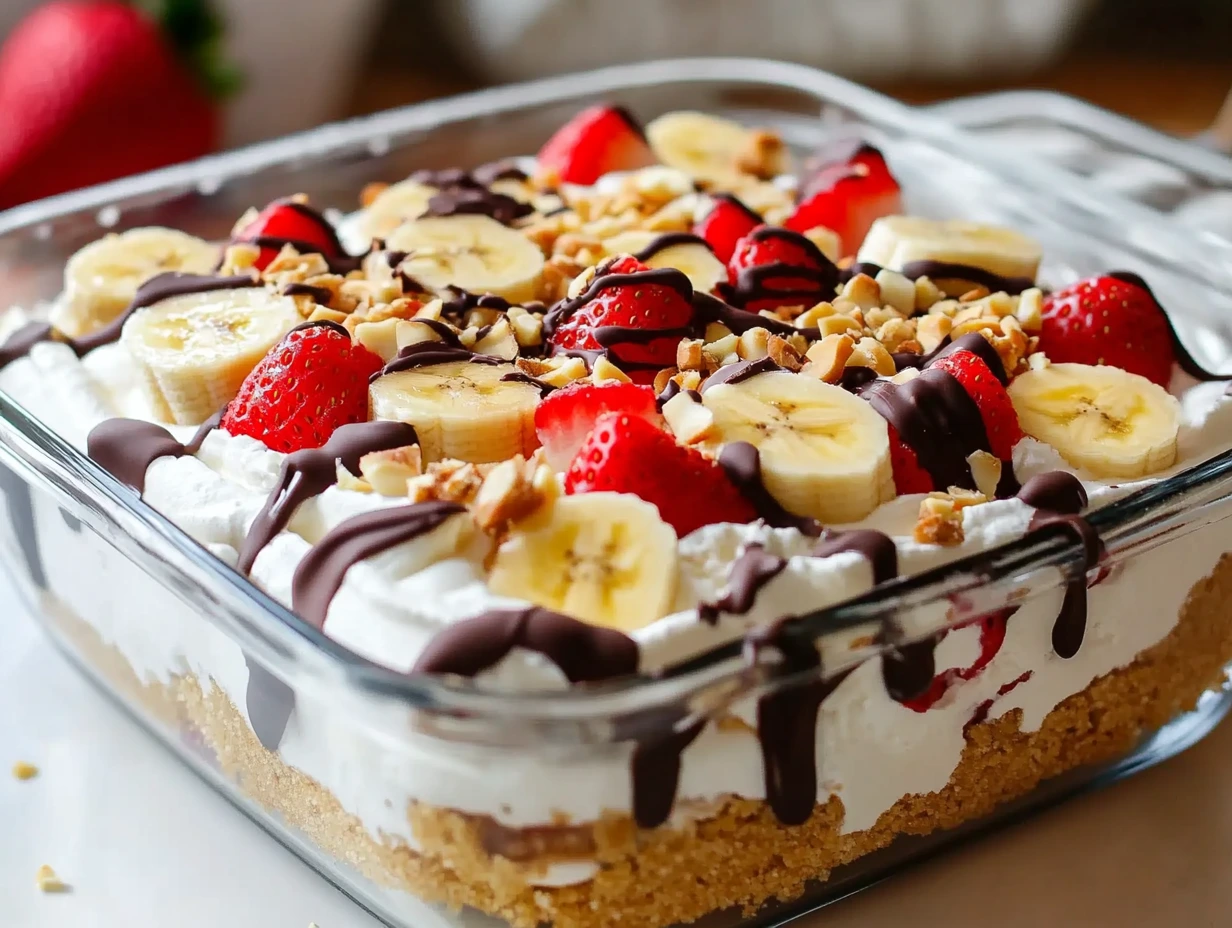
Step 4: Toppings That Wow
No banana split is complete without a decadent finish, and this cake is no exception. Whipped topping, chocolate sauce, and chopped nuts take this dessert to the next level.

Adding the Final Whipped Topping
- Spread It Smooth
Take another 8-ounce container of whipped topping and gently spread it over the strawberry layer. Use a spatula to create a smooth, even top. - Pro Tip for Fluffiness
For an extra-fluffy look, try swirling the whipped topping slightly with the back of a spoon for a decorative touch.
Drizzle and Sprinkle
- Drizzle Chocolate Sauce
Grab your favorite chocolate sauce and drizzle it generously over the whipped topping. You can create zigzags, swirls, or whatever design speaks to you! - Add the Crunch
Sprinkle ½ cup of chopped hazelnuts (or your favorite nuts) evenly across the top. The nuts add a delightful crunch and a nutty flavor that balances the sweetness.
Step 5: The Chill Factor
Before you can dig in, this dessert needs time to chill. This step is essential for setting the layers and melding the flavors.
- Cover and Refrigerate
Cover the dish tightly with plastic wrap to prevent it from absorbing any fridge odors. - Chill for Perfection
Refrigerate the cake for at least 4 hours, but overnight is even better. The wait is tough, but trust me—it’s worth it!
Pro Tips for Success
- Banana Browning
To prevent bananas from browning, you can toss the slices in a little lemon juice before layering them. This keeps them fresh and bright. - Customize Your Nuts
Not a fan of hazelnuts? Swap them out for chopped peanuts, walnuts, or pecans—whatever suits your taste.
Your No-Bake Banana Split Cake has been assembled, chilled, and is now ready to shine at your next gathering. Before you dig in, let’s address some common questions about this recipe to help you achieve the best results every time.
FAQ: Your No-Bake Banana Split Cake Questions Answered
1. Can I make this dessert ahead of time?
Absolutely! In fact, this dessert tastes even better when made a day in advance. The extra chilling time allows the flavors to meld together beautifully.
2. How can I prevent the bananas from turning brown?
Toss the banana slices in a bit of lemon or pineapple juice before layering them onto the filling. This trick keeps the bananas fresh-looking and prevents oxidation.
3. Can I use fresh whipped cream instead of Cool Whip?
Yes, you can substitute fresh whipped cream if you prefer a homemade touch. Just make sure it’s whipped to stiff peaks for stability and spreadability.
4. Can I use different fruits for the layers?
Definitely! While the classic banana, pineapple, and strawberry combination is a winner, feel free to get creative. Blueberries, raspberries, or even mango slices make excellent substitutions.
5. Is there a way to make this dessert nut-free?
Yes! Simply skip the chopped hazelnuts, or replace them with a nut-free crunch like crushed pretzels or graham cracker crumbs for texture.
6. How should I store leftovers?
Cover any leftovers tightly with plastic wrap or transfer them to an airtight container. Store in the refrigerator for up to three days for the freshest taste.
7. Can this dessert be frozen?
While freezing isn’t ideal due to the fresh fruits, you can freeze individual portions if necessary. Wrap them tightly and thaw in the fridge before serving.
Conclusion: Slice, Serve, and Enjoy!
Congratulations! You’ve just created a No-Bake Banana Split Cake that’s as stunning as it is scrumptious. From the buttery graham cracker crust to the creamy filling and fruity layers, every bite is a celebration of flavor and texture. This dessert is sure to become a favorite for summer parties, family gatherings, and any occasion where you want to impress without breaking a sweat.
Print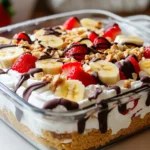
No-Bake Banana Split Cake
- Author: David
- Total Time: 4 hours 20 minutes
Description
This delightful no-bake dessert combines the classic flavors of a banana split into a creamy, fruity, and chocolatey treat. Perfect for summer gatherings, parties, or any time you want a refreshing and indulgent dessert without turning on the oven.
Ingredients
For the Crust:
- 2 cups graham cracker crumbs
- ⅓ cup unsalted butter, melted
- 1 tsp salt
For the Filling:
- 16 oz cream cheese, softened
- ½ cup granulated sugar
- 8 oz whipped topping (like Cool Whip)
- 1 tsp vanilla extract
For the Toppings:
- 3 to 4 bananas, sliced
- 20 oz can crushed pineapple, well-drained
- 20 oz strawberries, sliced
- 8 oz whipped topping (like Cool Whip)
- ½ cup chopped hazelnuts (or nuts of choice)
- Chocolate sauce
Instructions
1️⃣ Prepare the crust:
In a medium bowl, combine the graham cracker crumbs, melted butter, and salt.
Press the mixture firmly into the bottom of a greased 9×13-inch baking dish to form an even crust.
Refrigerate the crust while preparing the filling.
2️⃣ Make the filling:
In a large mixing bowl, beat the softened cream cheese with the granulated sugar and vanilla extract until smooth and creamy.
Gently fold in the whipped topping until fully combined.
Spread the filling evenly over the chilled crust.
3️⃣ Add the layers:
Arrange the banana slices evenly over the cream cheese filling.
Spread the well-drained crushed pineapple over the banana layer.
Add a layer of sliced strawberries on top of the pineapple.
4️⃣ Top and chill:
Spread another layer of whipped topping over the strawberries.
Drizzle the top with chocolate sauce and sprinkle with chopped hazelnuts for a nutty crunch.
Cover the dish tightly with plastic wrap and refrigerate for at least 4 hours, or preferably overnight, to allow the flavors to meld.
5️⃣ Serve:
Slice the cake into squares and serve it chilled. Enjoy the creamy, fruity, and indulgent layers of this no-bake banana split cake!
Notes
- Nut-free option: Skip the hazelnuts if needed, or replace them with shredded coconut for added texture.
- Fruit variations: Swap strawberries for raspberries or cherries for a twist.
- Chocolate drizzle hack: Microwave chocolate chips with a splash of milk for a quick and easy homemade chocolate sauce.
- Storage: Cover leftovers and store in the refrigerator for up to 3 days.
- Prep Time: 20 minutes
- Cook Time: 4+ hours
Nutrition
- Serving Size: 12-16


")

")


")
