

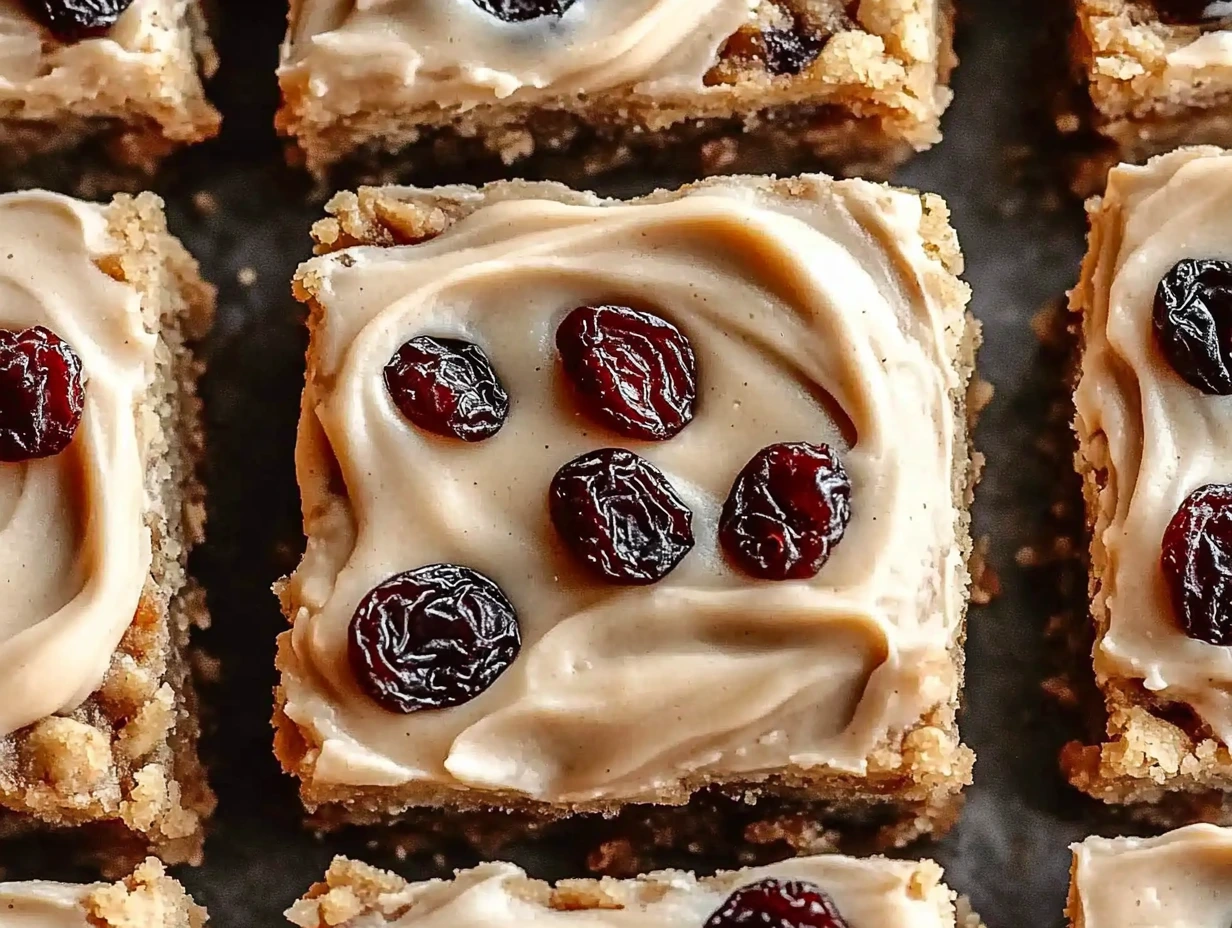
Nothing screams comfort and nostalgia quite like a batch of oatmeal raisin treats—but have you tried turning them into cookie bars? These oatmeal raisin cookie bars take all the cozy, spiced flavors you love in traditional cookies and transform them into a chewy, buttery square that’s impossible to resist. Plus, they’re topped with a decadent maple-cinnamon frosting for a little extra indulgence. Trust me, this recipe is about to become your new go-to for bake sales, potlucks, or lazy afternoons at home.
So, grab your apron, preheat your oven, and let’s bake up some magic together!
Why You’ll Love These Cookie Bars
When life gets hectic, I love recipes that are as easy as they are satisfying, and this one hits all the marks. Here’s why these oatmeal raisin cookie bars are a must-bake:
- Easy to Make: With just one pan and minimal cleanup, you’ll have dessert ready in no time.
- Perfectly Chewy: Thanks to the oats and raisins, these bars have the ultimate chewy texture.
- Family-Friendly: Kids and adults alike adore them—good luck stopping at just one!
- Frosted to Perfection: The maple-cinnamon frosting is a game-changer that elevates this humble treat into something truly special.
Getting Started: Your Ingredients
Before we dive into the kitchen, gather your ingredients. You’ll need pantry staples for the bars and a few extras for the frosting.
For the Cookie Bars:
- 1 ½ cups all-purpose flour
- 1 teaspoon baking soda
- ¾ teaspoon ground cinnamon
- ½ teaspoon fine salt
- ¾ cup unsalted butter, room temperature
- ¾ cup packed light brown sugar
- 2 large eggs, room temperature
- 2 teaspoons vanilla extract
- 2 cups quick-cooking oats
- 1 cup raisins
For the Frosting:
- ½ cup unsalted butter, room temperature
- 1 ½ cups powdered sugar
- 1 tablespoon maple syrup
- 1–2 tablespoons heavy cream, room temperature
- ½ teaspoon ground cinnamon
- ¼ teaspoon maple extract (optional, but highly recommended!)
Step 1: Prepping for Success
First things first: preheat your oven to 350°F (175°C). You’ll also want to grease a 9×9-inch baking pan with baking spray and line it with parchment paper. Trust me, this little step makes removing the bars a breeze—and there’s nothing worse than leaving half your dessert stuck to the pan.
While the oven heats up, whisk together the flour, baking soda, cinnamon, and salt in a medium-sized bowl. Set that aside because we’re moving on to the stars of the show: butter and sugar!
Step 2: Creaming Butter and Sugar
This step is where the magic begins. In a large mixing bowl, beat the butter and brown sugar together until it’s light and fluffy. This takes about 2–3 minutes with a hand or stand mixer. Be sure to scrape down the sides of the bowl so that everything is evenly mixed.
Next, add in the eggs, one at a time, beating well after each addition. Stir in the vanilla extract. If you sneak a little taste at this point (don’t worry, I won’t tell!), you’ll already get a hint of that sweet, buttery flavor.

Step 3: Mixing It All Together
Now it’s time to combine everything. Gradually add the dry ingredients to the wet mixture, mixing just until everything is combined. You don’t want to overdo it here—overmixing can lead to tougher bars, and we want these to stay soft and chewy.
Gently fold in the oats and raisins. At this point, the dough will be thick and irresistible. You might find yourself tempted to eat it by the spoonful, but hang tight—the baked version is even better!

Step 4: Baking the Bars
Spread the dough evenly into your prepared baking pan. Use the back of a spatula or your hands (lightly greased, if needed) to press it down into an even layer. Pop the pan into your preheated oven and bake for 18–20 minutes, or until the edges are golden and a toothpick inserted in the center comes out clean.
While your kitchen fills with the warm, comforting aroma of cinnamon and oats, take a moment to prepare for the frosting phase. Once baked, let the bars cool in the pan for 5–10 minutes before transferring them to a wire rack to cool completely.
Making the Maple-Cinnamon Frosting and Assembling the Bars
Now that your oatmeal raisin cookie bars have cooled, it’s time to take them to the next level with a rich and creamy maple-cinnamon frosting. This step might seem simple, but it’s where all the magic happens. Trust me, once you spread this velvety frosting over your cookie bars, they’ll go from delicious to downright irresistible.
Step 5: Preparing the Frosting
The secret to a good frosting lies in the balance of flavor and texture. You want it smooth, spreadable, and full of complementary flavors. Here’s how to do it:
- Cream the Butter: In a medium mixing bowl, beat the butter with a hand mixer until it’s smooth and fluffy. This step is key to achieving a silky texture.
- Add the Sugar: Gradually mix in the powdered sugar, a little at a time, to avoid a sugar cloud in your kitchen. Keep mixing until it’s fully combined.
- Incorporate the Flavor: Stir in the maple syrup, ground cinnamon, and, if you’re feeling fancy, a touch of maple extract. This last ingredient adds an extra pop of maple flavor, but it’s totally optional.
- Adjust the Consistency: Add the heavy cream, one tablespoon at a time, until the frosting reaches your desired consistency. It should be thick but spreadable. If it feels too thick, a little more cream will do the trick.
- Whip It Good: Beat the frosting for another 1–2 minutes until it’s light, fluffy, and ready to elevate your cookie bars.
Step 6: Assembling the Bars
Here comes the fun part—putting it all together. Make sure your cookie bars are completely cooled before frosting. If they’re even a little warm, the frosting will melt and slide right off, and no one wants that.
- Spread the Frosting: Using an offset spatula or the back of a spoon, spread the frosting evenly over the surface of the cooled cookie bars. Don’t worry about perfection; a little swirl here and there adds a rustic touch.
- Add a Finishing Touch: If you’re feeling creative, sprinkle a pinch of cinnamon over the frosting or add a drizzle of maple syrup for an extra-special presentation.
- Slice and Serve: For clean slices, use a sharp knife, and wipe it clean between cuts. You can cut the bars into squares, rectangles, or even triangles—whatever suits your style. Then, serve them up on a pretty platter and watch them disappear!

Pro Tips for Perfect Cookie Bars
Before you take a bite, here are some quick tips to make sure your oatmeal raisin cookie bars turn out perfect every time:
- Don’t Skip the Parchment Paper: Lining your baking pan makes it easy to lift the bars out once they’re cool. No sticking, no mess, just flawless bars every time.
- Customize the Frosting: Not a fan of maple? Swap it for a splash of vanilla extract or add a little orange zest for a citrusy twist. You can also adjust the cinnamon to suit your taste.
- Add Extra Texture: Mix in chopped nuts, like pecans or walnuts, for a little crunch. Or toss in a handful of chocolate chips if you’re craving something extra indulgent.
- Chill Before Slicing: If you’re having trouble cutting clean slices, pop the frosted bars into the fridge for about 10–15 minutes. This firms up the frosting and makes slicing a breeze.
Variations to Try
Once you’ve mastered the classic version, why not experiment with some fun twists? Here are a few ideas to inspire you:
- Cranberry Bliss Bars: Swap raisins for dried cranberries and top the frosting with white chocolate shavings for a festive flair.
- Trail Mix Bars: Add chopped almonds, dried cherries, and sunflower seeds to the batter for a wholesome snack.
- Pumpkin Spice Bars: Replace the cinnamon in both the batter and frosting with pumpkin pie spice for a seasonal treat.
FAQ Section and Conclusion
Congratulations! You’ve made it to the final stretch, and by now, your oatmeal raisin cookie bars are frosted, sliced, and ready to enjoy. But before you grab your first bite, let’s dive into some frequently asked questions to make sure you have all the tips and tricks for perfecting this recipe.
FAQ Section
1. Can I use old-fashioned oats instead of quick-cooking oats?
Yes, you can! Just note that old-fashioned oats will give your bars a slightly chewier texture. If you prefer a smoother, more uniform bite, stick with quick-cooking oats.
2. Can I make these cookie bars ahead of time?
Absolutely. These bars store well, making them a great make-ahead treat. You can bake and frost them a day in advance. Just keep them in an airtight container to maintain freshness.
3. How do I store leftover bars?
Store your bars in an airtight container at room temperature for up to 3 days. For longer storage, refrigerate them for up to a week. Just let them come to room temperature before serving for the best texture.
4. Can I freeze these cookie bars?
Yes! To freeze, slice the bars (without frosting, if possible) and wrap them tightly in plastic wrap or aluminum foil. Place the wrapped bars in a freezer-safe container or zip-top bag. They’ll stay fresh for up to 3 months. Thaw in the fridge overnight before frosting and serving.
5. What can I substitute for raisins?
If raisins aren’t your thing, try dried cranberries, chopped dates, or even mini chocolate chips for a fun twist. You can also leave them out entirely if you prefer.
6. How do I prevent my bars from being too dry?
Make sure you don’t overbake the bars. They should be golden around the edges and just set in the center. Overmixing the batter can also make them denser and less moist, so mix until just combined.
7. Can I make these bars gluten-free?
Yes! Substitute the all-purpose flour with a 1:1 gluten-free baking blend, and ensure your oats are certified gluten-free. The texture and flavor should still be deliciously chewy and satisfying.
Conclusion: Bake, Frost, and Enjoy!
There you have it—a recipe for oatmeal raisin cookie bars that will not only satisfy your sweet tooth but also warm your heart. Whether you’re making these for a family gathering, a cozy weekend treat, or simply because you deserve something delicious, these bars are sure to impress.
Print
Oatmeal Raisin Cookie Bars
- Author: David
- Total Time: 40 minutes
Description
These soft, chewy oatmeal raisin cookie bars are a delightful twist on the classic cookie, topped with a rich cinnamon-maple frosting for a sweet finishing touch. Perfect for sharing or indulging solo, these bars are an easy-to-make treat with comforting flavors.
Ingredients
For the Cookie Bars:
- 1 ½ cups all-purpose flour
- 1 teaspoon baking soda
- ¾ teaspoon ground cinnamon
- ½ teaspoon fine salt
- ¾ cup unsalted butter, room temperature
- ¾ cup packed light brown sugar
- 2 large eggs, room temperature
- 2 teaspoons vanilla extract
- 2 cups quick-cooking oats
- 1 cup raisins
For the Frosting:
- ½ cup unsalted butter, room temperature
- 1 ½ cups powdered sugar
- 1 tablespoon maple syrup
- 1–2 tablespoons heavy cream, room temperature
- ½ teaspoon ground cinnamon
- ¼ teaspoon maple extract (optional)
Instructions
1️⃣ Preheat the Oven: Set your oven to 350°F (175°C). Grease a 9×9-inch baking pan with baking spray, line it with parchment paper for easy removal, and set it aside.
2️⃣ Mix the Dry Ingredients: In a medium bowl, whisk together the flour, baking soda, cinnamon, and salt. Set aside.
3️⃣ Cream Butter and Sugar: In a large mixing bowl, use a hand or stand mixer to beat the butter and brown sugar together until light and fluffy, about 2–3 minutes. Scrape down the sides of the bowl as needed.
4️⃣ Add Wet Ingredients: Beat in the eggs, one at a time, ensuring each is fully incorporated before adding the next. Stir in the vanilla extract.
5️⃣ Combine Dry and Wet Ingredients: Gradually add the dry ingredients to the wet mixture, mixing until just combined. Gently fold in the oats and raisins.
6️⃣ Bake the Bars: Spread the dough evenly in the prepared pan. Bake for 18–20 minutes, or until the edges are golden and a toothpick inserted in the center comes out clean.
7️⃣ Cool: Let the bars cool in the pan for 5–10 minutes, then transfer them to a wire rack to cool completely.
Prepare the Frosting:
8️⃣ Cream the Butter: In a medium bowl, beat the butter until smooth. Gradually mix in the powdered sugar until fully combined.
9️⃣ Flavor and Thicken: Stir in the maple syrup, heavy cream, cinnamon, and optional maple extract. Beat until the frosting is light, fluffy, and spreadable. Add more cream if needed to reach your desired consistency.
Assemble and Serve:
🔟 Spread the frosting over the completely cooled bars. Slice into squares or rectangles, and enjoy this delicious treat!
Notes
- Substitutions: Swap raisins with chocolate chips, dried cranberries, or chopped nuts for variety.
- Storage: Store in an airtight container at room temperature for up to 3 days, or refrigerate for up to a week.
- Make Ahead: The bars (without frosting) can be frozen for up to 2 months. Frost once thawed.
- Prep Time: 20 minutes
- Cook Time: 20 minutes
Nutrition
- Serving Size: 12 bars


")

")


")
