


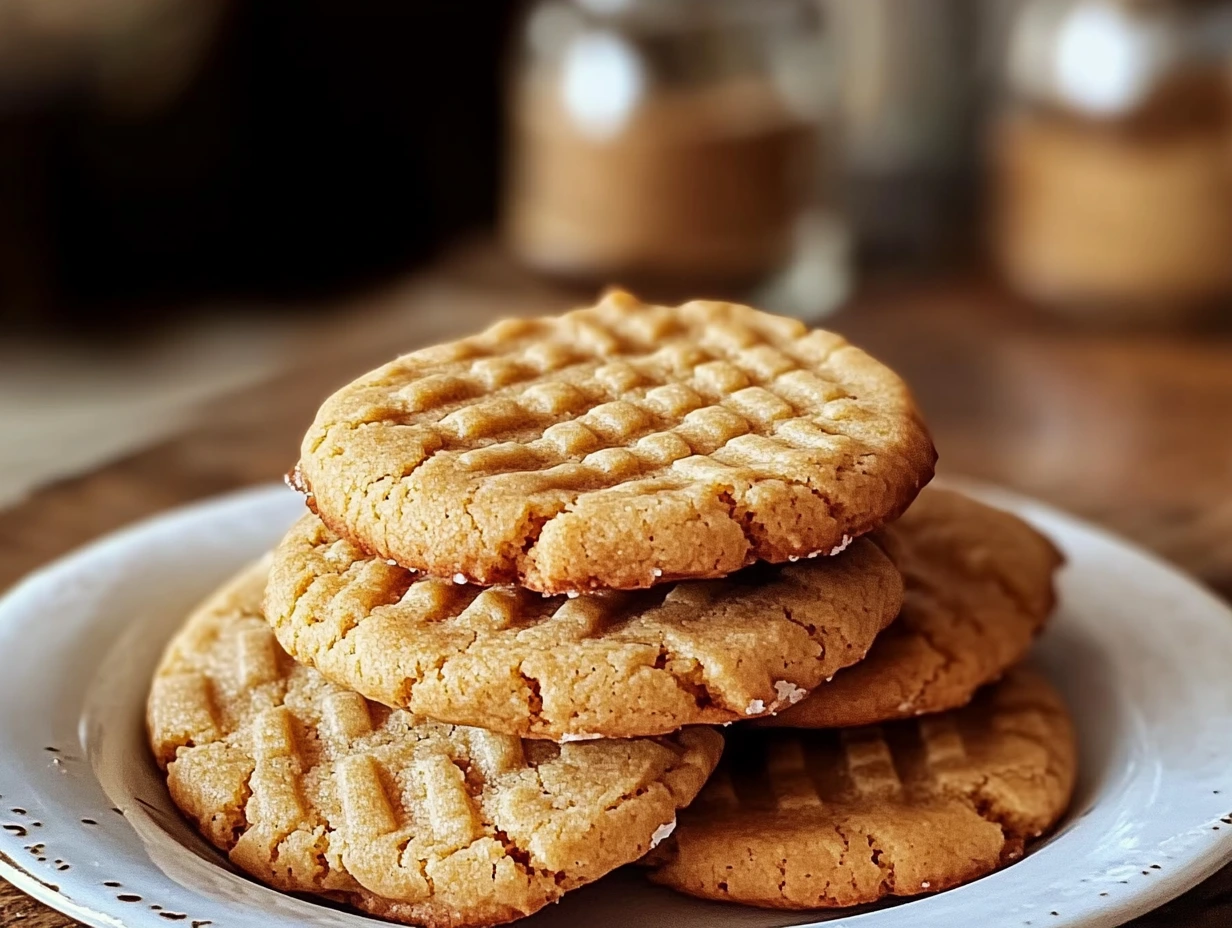
There’s just something about peanut butter cookies that instantly takes me back to childhood. The smell of them baking in the oven, the way the fork leaves that perfect crisscross pattern on top, and that first warm, chewy bite—pure comfort in cookie form. Whether you’re baking for a family gathering or just craving a nostalgic treat, these classic peanut butter cookies never go out of style.
I first made this recipe during a quiet Sunday afternoon, when I was in the mood for something simple but delicious. I had all the ingredients on hand (which is honestly one of the best things about this recipe), and within 30 minutes, my kitchen smelled like the inside of an old-fashioned bakery. These cookies turned out soft in the center with lightly golden edges—and they didn’t last more than a day in our house.
This is the kind of cookie recipe you’ll come back to again and again. It’s straightforward, requires no chilling, and is totally customizable based on your peanut butter preference. Creamy or chunky? You can’t go wrong either way.
Let’s dive into how to make these delicious peanut butter cookies from scratch.
Ingredients You’ll Need
½ cup unsalted butter, softened
½ cup granulated sugar
½ cup brown sugar, packed
1 cup creamy peanut butter (or crunchy, if preferred)
1 large egg
1 teaspoon vanilla extract
1¼ cups all-purpose flour
½ teaspoon baking soda
¼ teaspoon salt
STEP 1: Preheat and Prep
Preheat your oven to 350°F (175°C). This is the sweet spot that helps the cookies bake evenly—no burnt bottoms or undercooked centers. While your oven warms up, line a baking sheet with parchment paper or a silicone baking mat. This not only keeps the cookies from sticking but also makes cleanup so much easier.

STEP 2: Cream the Butter and Sugars
In a large mixing bowl, combine the softened butter, granulated sugar, and brown sugar. Use a hand mixer or stand mixer to beat the mixture until it’s light and fluffy. This step is important—it creates that soft texture we all love in peanut butter cookies. The brown sugar adds just the right amount of moisture and a hint of caramel-like sweetness.
STEP 3: Add Peanut Butter, Egg, and Vanilla
Next, add in your peanut butter of choice. Creamy will give you a smooth texture, while crunchy adds a little extra bite (and if you’re anything like me, you might be tempted to sneak a spoonful right out of the jar!). Then mix in the egg and vanilla extract. Beat everything together until it’s completely combined and smooth. At this point, it should already smell amazing.
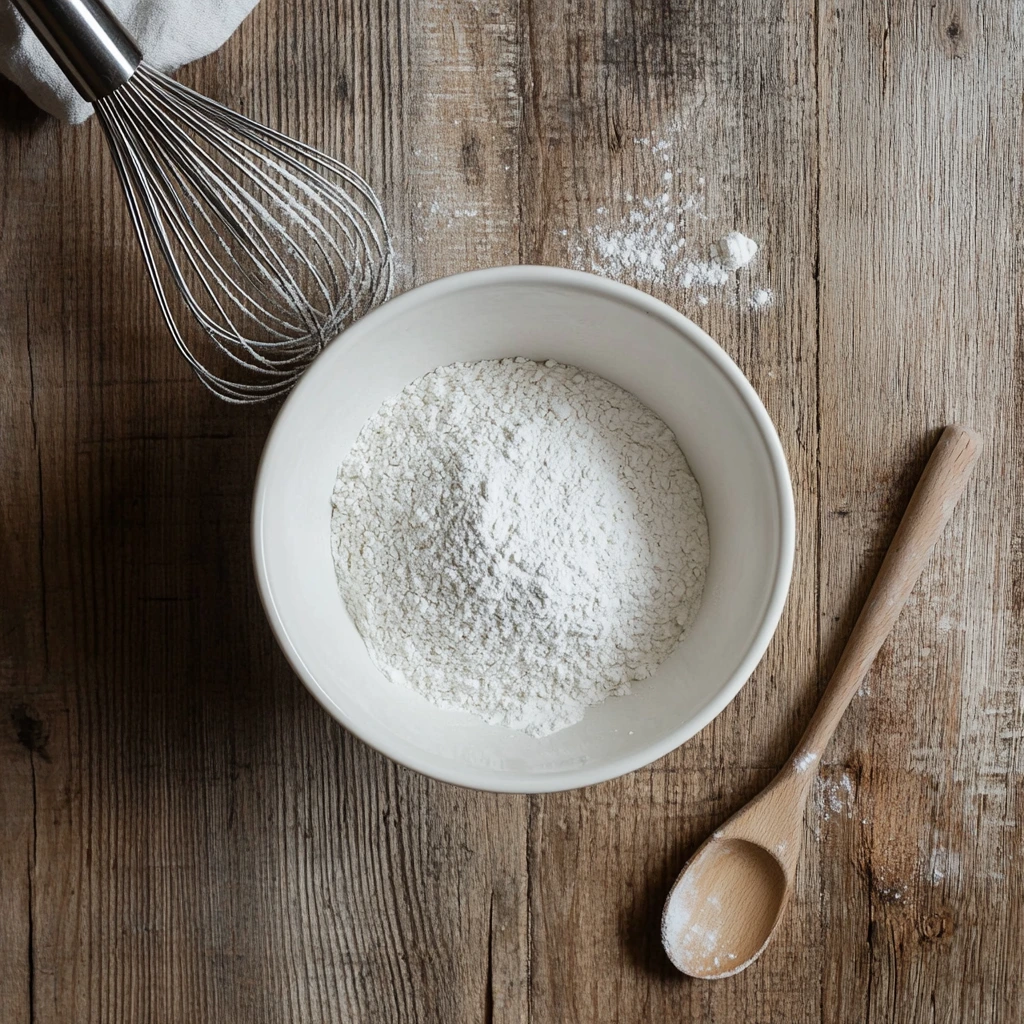
STEP 4: Combine the Dry Ingredients
In a separate bowl, whisk together the all-purpose flour, baking soda, and salt. Gradually add this dry mixture to the wet ingredients, stirring just until everything comes together into a soft, slightly sticky dough. Don’t overmix—just fold until no more flour is visible. Overmixing can lead to tougher cookies, and we’re going for soft and chewy.
STEP 5: Roll and Shape the Cookies
Now comes the fun part—shaping the cookies! Scoop out about 1 tablespoon of dough and roll it into a ball using your hands. Place each dough ball about 2 inches apart on your prepared baking sheet to give them room to spread.
Then, using a fork, gently press down on each dough ball twice—once horizontally, and once vertically—to create that signature crisscross pattern. Not only is it nostalgic, but it also helps the cookies bake more evenly. It’s a simple detail that really makes these cookies look homemade in the best way.

How to Bake the Perfect Peanut Butter Cookies (Plus Tips & Variations!)
Alright, now that your cookie dough is all rolled out and looking picture-perfect with that classic crisscross top, it’s time to bake these babies! This is the part where the magic happens—the warm peanut butter aroma fills your kitchen, and you know something delicious is on the way.
If you’ve ever had peanut butter cookies come out too hard or too crumbly, don’t worry. I’ve got a few tricks that’ll help you nail that soft and chewy texture every time. Let’s get back into it.
STEP 6: Bake to Golden Perfection
Pop your tray of cookies into the preheated oven and bake for 10 to 12 minutes. Now, this step is key: you want to remove them when the edges are just barely golden. The centers will still look soft, and that’s exactly what you want.
It might be tempting to bake them a little longer, especially if they look underdone, but trust me—those cookies will firm up as they cool. Overbaking is one of the biggest reasons cookies end up dry and hard.
If your oven tends to run hot or cold, keep a close eye around the 9-minute mark. You’re looking for a slightly puffed center with a light golden ring around the edge.
STEP 7: Let Them Cool (If You Can Wait!)
Once they’re out of the oven, let the cookies cool directly on the baking sheet for about 5 minutes. This step gives them a chance to set up and makes them easier to transfer without falling apart.
After that, move them to a wire rack to cool completely—or at least until they’re cool enough to pick up without crumbling. (Confession: I’ve definitely eaten one or two straight off the tray while still warm, and they’re so good.)
Tips for the Best Peanut Butter Cookies
You’ve got the steps down, but let’s talk about what makes these cookies truly exceptional. Here are a few tried-and-true tips that make a big difference:
Use room temperature butter. Softened butter creams better with sugar and gives the cookies their light texture.
Don’t skip the vanilla. Even though it’s a small amount, vanilla adds depth and balances the nutty flavor of the peanut butter.
Watch the baking time. Err on the side of underbaking. They’ll continue to cook as they cool on the tray.
Mix the dough just until combined. Overmixing can toughen your cookies. Fold the flour mixture in gently until it just comes together.
Customize the texture. If you like your cookies a little crunchier, go for chunky peanut butter or toss in a handful of chopped roasted peanuts for some added texture.
Fun Variations to Try
One of the best things about this recipe is how adaptable it is. If you want to shake things up, here are a few simple twists:
Chocolate Drizzle: Melt some semi-sweet chocolate and drizzle it over the cooled cookies for a chocolate-peanut butter combo that’s always a hit.
Peanut Butter & Jelly Thumbprints: Press a thumbprint into the center before baking and add a small spoonful of your favorite jam. Bake as directed.
Double Peanut Butter: Fold in peanut butter chips before baking for extra flavor and texture.
Gluten-Free Option: Substitute a 1:1 gluten-free all-purpose flour blend, and you’ve got a cookie everyone can enjoy.
Peanut Butter Cookie FAQs and Final Thoughts
Before you head into the kitchen and start baking (or maybe you’re already halfway through), let’s take a moment to answer some of the most common questions that come up with peanut butter cookies. Whether you’re wondering about substitutions, storage, or how to keep them soft, this FAQ section has you covered.
Frequently Asked Questions
1. Can I use natural peanut butter in this recipe?
Yes, but with caution. Natural peanut butter (the kind with just peanuts and salt, and usually some oil separation) can work, but the texture of the cookies may be more crumbly. If you do use it, stir it really well before measuring, and you may need to chill the dough for 20–30 minutes before baking to help it hold together.
2. How should I store these cookies to keep them soft?
Store your peanut butter cookies in an airtight container at room temperature. They’ll stay soft and chewy for up to a week. To keep them extra moist, you can add a slice of bread to the container—the cookies will absorb a little of the moisture from the bread, which helps keep them from drying out.
3. Can I freeze the cookie dough?
Absolutely. Roll the dough into balls, place them on a baking sheet, and freeze until solid. Then transfer them to a freezer-safe bag or container. When you’re ready to bake, you can go straight from freezer to oven—just add an extra 1–2 minutes to the baking time.
4. Can I make these cookies gluten-free?
Yes! Just substitute a 1:1 gluten-free all-purpose flour blend for the regular flour. Most blends work well, especially those that include xanthan gum. The rest of the ingredients are naturally gluten-free.
5. Why do I need to press the cookies with a fork?
Peanut butter cookie dough doesn’t spread as much as other types of cookie dough. Pressing them down with a fork helps flatten them for even baking and gives them that classic crisscross look we all recognize and love.
6. Can I double this recipe?
Definitely. This recipe doubles beautifully. Just be sure to use a large enough mixing bowl, and you may need to bake in batches depending on the size of your oven and baking sheets.
7. What’s the best way to reheat cookies to make them soft again?
A quick 8–10 seconds in the microwave will warm up a cookie and bring back that soft, just-baked texture. Don’t overdo it—they can turn hard if overheated.
Wrapping It Up: A Cookie Worth Keeping on Repeat
If you’re like me, you’ll find yourself coming back to this peanut butter cookie recipe again and again. It’s one of those classics that hits all the right notes—simple ingredients, fast prep time, and that comforting, familiar flavor that just makes everything better.
Whether you’re baking them for a cozy night in, a family gathering, or just because you’ve got a jar of peanut butter calling your name, these cookies are always a win. They come out soft, chewy, and loaded with that rich, nutty flavor we all love.
I’d love to hear how yours turn out! Did you go creamy or crunchy? Add chocolate chips? Try the PB&J twist? Leave a comment and let me know how you made this recipe your own. There’s nothing better than swapping tips and stories from the kitchen.
Print
Peanut Butter Cookies
- Author: David
Description
These classic Peanut Butter Cookies are soft, chewy, and full of rich, nutty flavor. Whether you use creamy or crunchy peanut butter, they’re a comforting treat that’s easy to whip up and always a hit. The signature crisscross pattern adds a nostalgic touch to this timeless cookie.
Ingredients
½ cup unsalted butter, softened
½ cup granulated sugar
½ cup brown sugar, packed
1 cup creamy peanut butter (or crunchy, if preferred)
1 large egg
1 teaspoon vanilla extract
1¼ cups all-purpose flour
½ teaspoon baking soda
¼ teaspoon salt
Instructions
1️⃣ Preheat your oven to 350°F (175°C). Line a baking sheet with parchment paper or a silicone baking mat.
2️⃣ In a large mixing bowl, cream the softened butter, granulated sugar, and brown sugar until light and fluffy.
3️⃣ Add the peanut butter, egg, and vanilla extract to the creamed mixture. Beat until the mixture is smooth and fully combined.
4️⃣ In a separate bowl, whisk together the flour, baking soda, and salt. Gradually mix the dry ingredients into the wet ingredients until a soft dough forms.
5️⃣ Roll the dough into balls, using about 1 tablespoon per cookie. Place them 2 inches apart on the prepared baking sheet.
6️⃣ Flatten each ball gently with a fork, pressing twice to form a crisscross pattern on top.
7️⃣ Bake for 10–12 minutes, or until the edges are just lightly golden. The centers will still be soft but will firm up as they cool.
8️⃣ Allow the cookies to cool on the baking sheet for 5 minutes before transferring them to a wire rack to cool completely.
Notes
For extra texture and crunch, you can use chunky peanut butter or mix in chopped peanuts. If you prefer a sweeter cookie, add an extra tablespoon of brown sugar. These cookies store well in an airtight container for up to a week and can be frozen for longer storage.


")

")


")
