

There’s just something magical about the combination of chocolate and peanut butter. Whether you grew up sneaking peanut butter cups from your Halloween stash or just love the sweet and salty contrast, this Peanut Butter Cup Dump Cake is about to become your new dessert obsession. It’s rich, gooey, and unbelievably easy to make. Seriously—no mixing bowls, no electric mixers, just a few layers and a whole lot of flavor.
I first made this dump cake on a lazy Saturday afternoon when I wanted something sweet but didn’t want to pull out every dish in my kitchen. I had a box of chocolate cake mix, a jar of peanut butter, and a bag of peanut butter cups just sitting in the pantry, practically begging to be turned into dessert. What came out of the oven was nothing short of magic—melty, chocolatey, peanut buttery magic.
This dessert is perfect for just about any occasion—potlucks, birthdays, movie nights, or even just a Tuesday night when your sweet tooth strikes. And the best part? It takes about 10 minutes to throw together and uses simple ingredients you probably already have on hand.
Whether you serve it on its own or with a scoop of vanilla ice cream (highly recommended), you’re in for a treat. Let’s dive into how to make this ultra-easy, totally indulgent dessert.

Ingredients You’ll Need
1 box chocolate cake mix (about 15.25 oz)
1 cup peanut butter, melted
1 cup milk chocolate chips
1 bag mini peanut butter cups (about 12 oz), unwrapped and halved
1 stick unsalted butter (½ cup), sliced
STEP-BY-STEP INSTRUCTIONS
Step 1: Preheat and Prep
Start by preheating your oven to 350°F. Lightly grease a 9×13-inch baking dish. This helps make cleanup easier later and ensures the cake doesn’t stick to the pan. You can use cooking spray, butter, or a light coating of oil—whatever works best for you.
Step 2: Pour in the Melted Peanut Butter
Melt your peanut butter in the microwave or on the stovetop just until smooth and pourable (not boiling!). Then, pour it directly into the bottom of your greased baking dish. Spread it out evenly with a spatula. This will create that gooey, nutty base that holds everything together.
Step 3: Add Chocolate Chips and Peanut Butter Cups
Next, sprinkle 1 cup of milk chocolate chips right on top of the melted peanut butter. Then, take your halved mini peanut butter cups and scatter them across the top. Don’t worry about perfection here—just try to get a good even spread so every bite has a bit of chocolate and peanut butter heaven.
Step 4: Add the Dry Cake Mix
Here’s where the “dump” in dump cake really shines. Grab your box of chocolate cake mix and pour it straight out of the box over your layers. Do not mix—just gently spread the dry mix evenly across the top using a spatula or your hands. You want to fully cover the peanut butter and chocolate layers without stirring it all together.
How to Finish and Bake the Perfect Peanut Butter Cup Dump Cake
Alright, so your dish is already layered with peanut butter, chocolate chips, peanut butter cups, and cake mix—it’s looking pretty amazing, right? Now we’re down to the final steps that bring all those flavors together into one warm, gooey masterpiece.
This is one of those desserts that requires very little effort for a huge payoff. And if you’ve never made a dump cake before, this part will feel a little strange at first (putting butter slices on dry cake mix?), but trust me—it works like a dream.
Let’s pick up right where we left off.
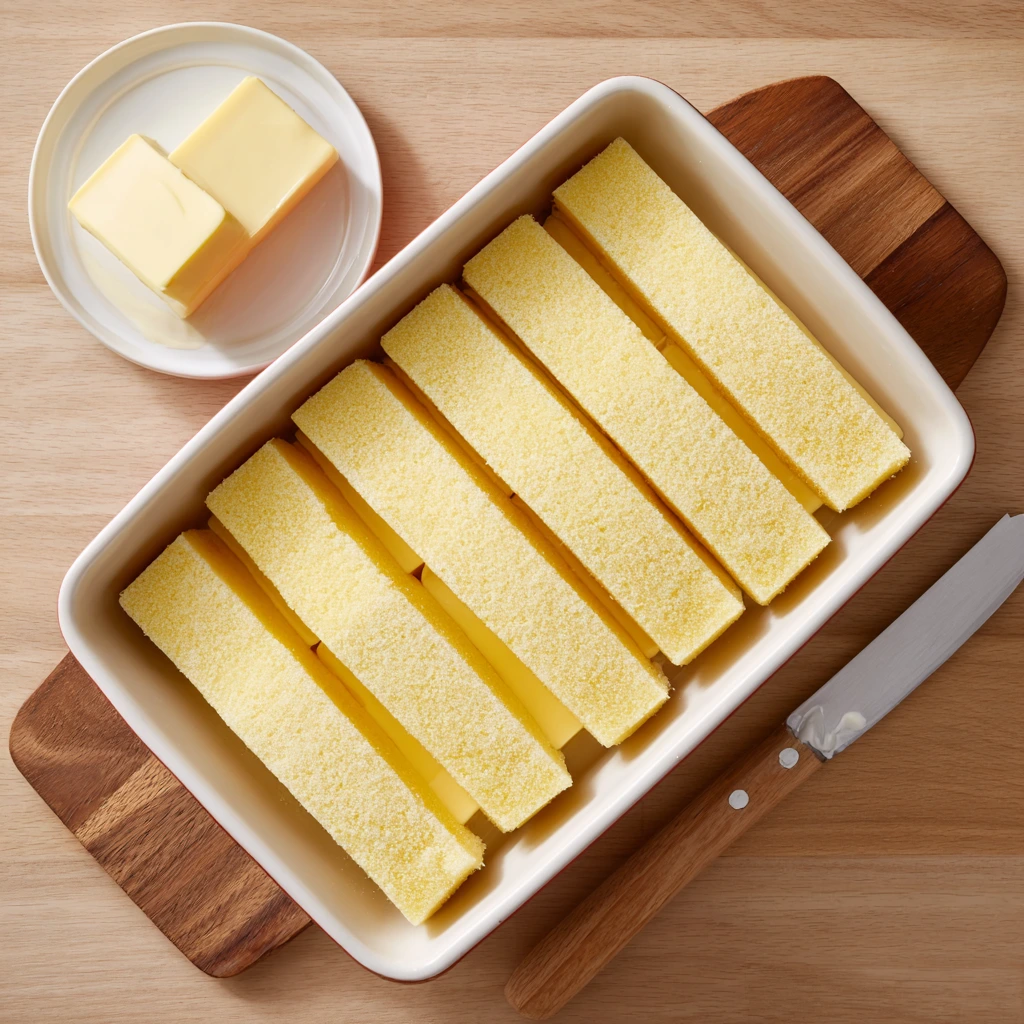
Step 5: Add the Butter
Take your unsalted butter and slice it into thin pats. You’ll want to use about a half cup, or one stick of butter. Now, distribute the slices evenly across the surface of the dry cake mix.
This might look a little odd, but those butter slices will melt into the cake mix during baking, creating a rich, moist topping with golden edges and a slightly crisp finish. Try to space them out evenly so every part of the cake gets a little buttery love.
Tip: If you want to go the extra mile, you can melt the butter and drizzle it over the top instead of placing slices. Either method works; it just depends on your preference and how quickly you want to get this baby into the oven!
Step 6: Bake It to Gooey Perfection
Now that your butter is in place, it’s time to bake. Slide your baking dish into the preheated 350°F oven and bake for 35–40 minutes.
You’ll know it’s ready when the top is bubbly, the edges are crispy, and the center looks mostly set (a little gooeyness in the middle is totally okay—it’s part of the charm!). The aroma at this point? Absolutely irresistible. That blend of melted peanut butter, chocolate, and cake mix is enough to make the whole house smell like a bakery.
Tip: Oven times can vary a bit, so keep an eye on it after 35 minutes. If your oven runs hot, you might be done closer to the 35-minute mark.
Step 7: Cool (Just a Little!) and Serve
Once the cake is baked to perfection, pull it out of the oven and let it cool for about 10 minutes. This gives the layers a little time to set, making it easier to scoop and serve.
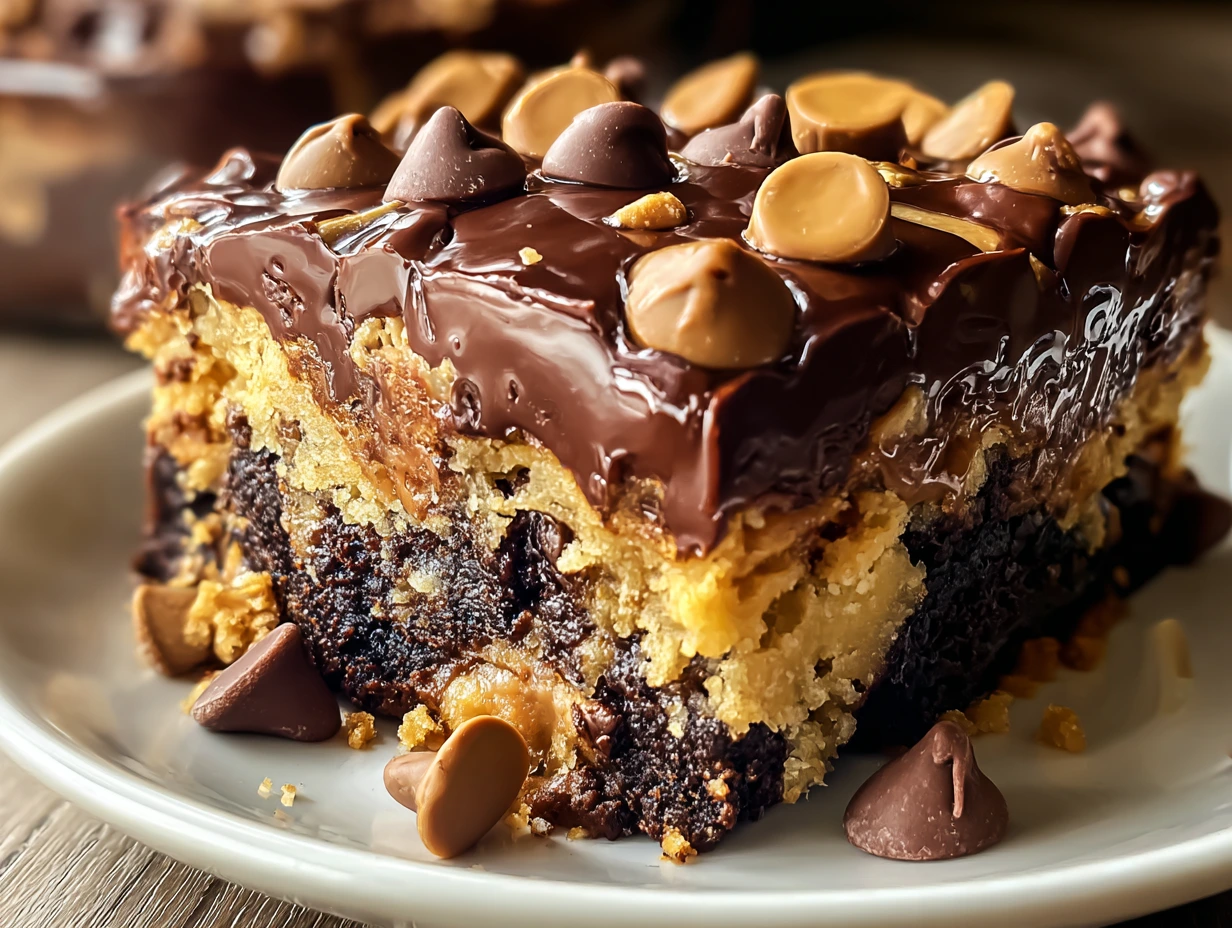
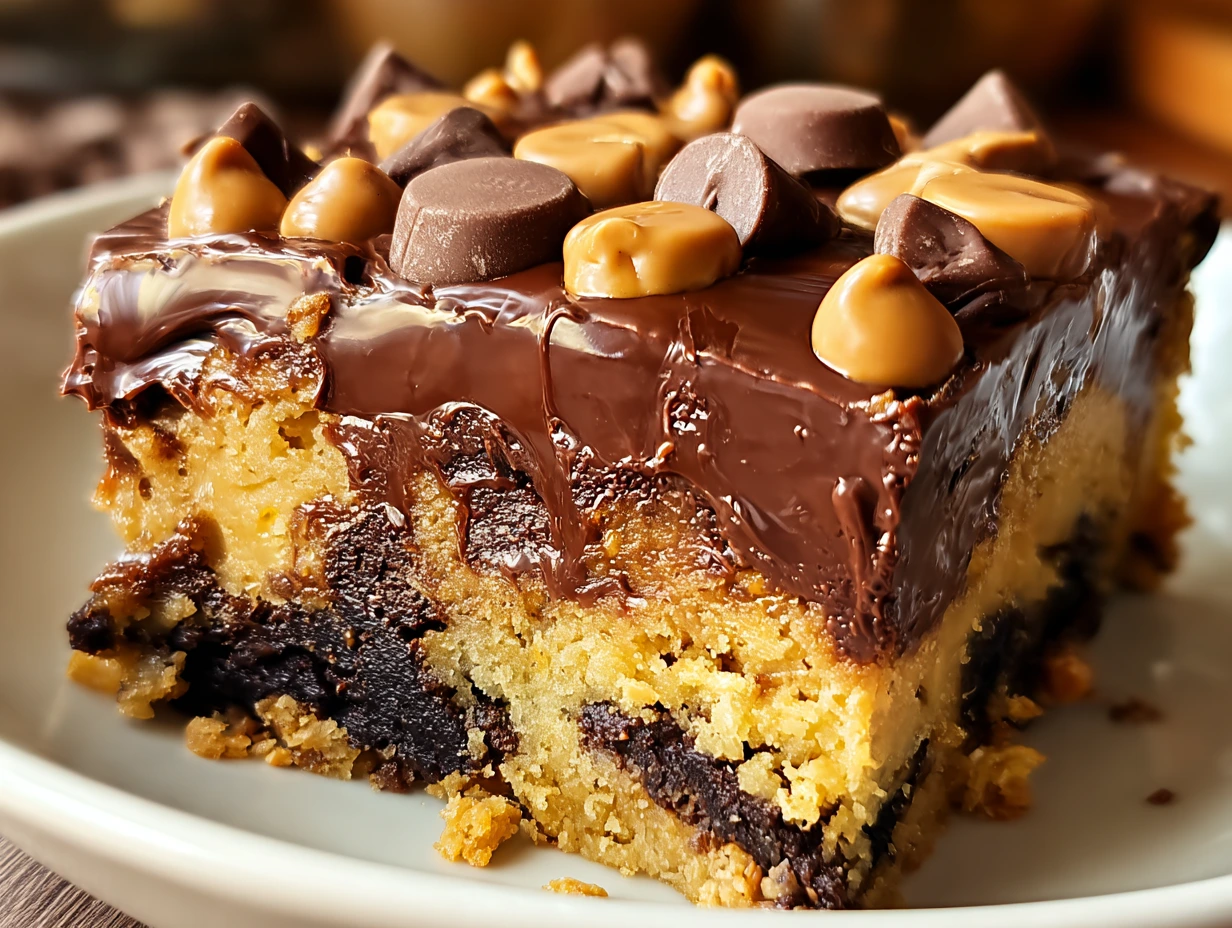
You can definitely enjoy this dump cake warm straight from the dish—it’s actually best that way. The peanut butter is still melty, the chocolate is gooey, and the cake has a rich, decadent texture that’s hard to resist.
Serving suggestion: Top it with a scoop of vanilla ice cream or a drizzle of chocolate syrup for an extra indulgent dessert. You can even sprinkle a few extra chopped peanut butter cups on top if you’re feeling fancy.
Extra Tips and Variations
Once you’ve made this recipe once, you might find yourself tempted to try a few twists. Here are a few fun ideas to change it up:
Add a swirl: Before baking, dollop a few spoonfuls of peanut butter on top of the cake mix and use a butter knife to gently swirl it through the dry layer. It adds an extra pop of flavor and a pretty marbled look.
Use different chips: Don’t have milk chocolate chips on hand? You can sub in semi-sweet or even white chocolate chips. They’ll all work beautifully with the peanut butter base.
Mix in nuts: Chopped peanuts or pecans make a great crunchy addition. Sprinkle them in with the chocolate chips for added texture.
Make it a brownie base: Want an extra fudgy variation? Use a brownie mix instead of chocolate cake mix for an even richer dessert.
Peanut Butter Cup Dump Cake FAQs + Final Thoughts
We’ve gone through the full recipe, step by step, and you’re probably already dreaming of warm spoonfuls of gooey peanut butter and chocolate goodness. Before you head off to bake it yourself, let’s cover a few common questions that tend to pop up when making this kind of dessert. Whether you’re wondering how to store it, reheat it, or customize it even further, I’ve got you covered.
FREQUENTLY ASKED QUESTIONS
1. Can I use a different type of cake mix?
Absolutely. While chocolate cake mix gives you that rich, indulgent flavor, you can swap in a yellow cake mix or even a brownie mix for something slightly different. Just keep the rest of the ingredients the same, and you’ll still end up with a delicious dessert.
2. Do I need to prepare the cake mix according to the box instructions?
Nope! That’s the beauty of a dump cake—you’re using the dry mix straight from the box. The moisture from the melted butter and peanut butter melts into the cake mix as it bakes, creating a soft, slightly crisp topping without any extra work.
3. Can I make this ahead of time?
Yes, you can make it a few hours in advance and keep it covered at room temperature. It’s best served warm, though, so if you’re making it ahead, plan to reheat individual servings in the microwave for 15–30 seconds just before serving.
4. How do I store leftovers?
Store any leftovers covered at room temperature for up to 3 days. You can also refrigerate it if your kitchen is warm, though that may firm up the texture a bit. Either way, a quick microwave reheat will bring back the gooey texture.
5. Can I freeze Peanut Butter Cup Dump Cake?
Technically yes, but it’s not ideal. The texture of the peanut butter cups and chocolate chips can change when frozen and reheated. If you do freeze it, wrap it tightly and use it within a month. Let it thaw in the fridge overnight and reheat before serving.
6. Is it okay to use crunchy peanut butter instead of creamy?
Yes! Crunchy peanut butter will add a little extra texture and some nutty bits throughout the bottom layer. It’s a great way to change things up if you’re a fan of a little crunch in your dessert.
7. Can I use full-size peanut butter cups?
You can, but I recommend chopping them into smaller pieces so they melt more evenly and spread throughout the cake. Mini peanut butter cups are just the right size and melt down beautifully without becoming overpowering.
Final Thoughts: A Dump Cake Worth Making Again and Again
This Peanut Butter Cup Dump Cake checks all the boxes for an easy, crowd-pleasing dessert. It’s rich, gooey, full of flavor, and doesn’t require a single mixing bowl. Whether you’re baking for a group or just want to treat yourself (no judgment here), this recipe is a winner every time.
One of my favorite things about dump cakes like this is how customizable they are. After you’ve made it once, you can start playing with different chips, candy, or even nut butters. But even if you stick to the classic version, you’re guaranteed a dessert that’ll disappear fast—especially if there’s ice cream involved.
Print
Peanut Butter Cup Dump Cake
- Author: David
Description
Peanut Butter Cup Dump Cake is a rich, indulgent dessert that layers the classic combo of chocolate and peanut butter into a gooey, satisfying bake. With minimal prep and maximum flavor, this crowd-pleaser is perfect for birthdays, potlucks, or whenever you’re craving something sweet and effortless.
Ingredients
1 box chocolate cake mix (about 15.25 oz)
1 cup peanut butter, melted
1 cup milk chocolate chips
1 bag mini peanut butter cups (about 12 oz), unwrapped and halved
1 stick unsalted butter (½ cup), sliced
Instructions
1 Preheat your oven to 350°F. Lightly grease a 9×13-inch baking dish.
2 Pour the melted peanut butter evenly into the bottom of the baking dish.
3 Sprinkle the chocolate chips and halved mini peanut butter cups over the peanut butter layer.
4 Evenly pour the dry chocolate cake mix over the top, spreading it out without mixing.
5 Distribute the slices of butter across the entire surface of the cake mix.
6 Bake for 35-40 minutes, or until the top is bubbly and the edges are crisp.
7 Let cool for 10 minutes before serving. Enjoy warm on its own or topped with vanilla ice cream.
Notes
For an extra peanut butter punch, swirl a few dollops of peanut butter into the cake mix layer before baking. This dessert is best served warm but can also be reheated. Store leftovers covered at room temperature for up to 3 days.


")

")


")
