

There’s just something magical about the desserts we grew up with. You know, the ones served on beige plastic trays in school cafeterias by smiling lunch ladies with hairnets and warm hearts. These Peanut Butter Lunch Lady Cookie Bars take me straight back to those days. Thick, chewy, perfectly peanut buttery, and topped with a dreamy layer of frosting that melts into the bars while they’re still warm… oh yes, it’s every bit as good as you remember (maybe even better!).
I’ll never forget the first time I recreated this recipe at home. My kids came barreling into the kitchen, drawn in by that unmistakable scent of warm peanut butter and sugar. “What is that smell?!” they asked, wide-eyed. One bite later, and I knew we had a new family favorite on our hands. I mean, is there any better combination than a gooey cookie bar topped with melty peanut butter frosting?
Whether you’re craving a throwback treat for yourself or you want to introduce the next generation to this cafeteria classic, you’re going to love how simple and satisfying these bars are. Let’s get right into it!

Ingredients You’ll Need
For the Cookie Bars:
1 cup unsalted butter, melted
1 cup creamy peanut butter
1 cup granulated sugar
1 cup brown sugar, packed
2 large eggs
2 teaspoons vanilla extract
2 cups all-purpose flour
1 teaspoon baking soda
½ teaspoon salt
For the Frosting:
½ cup creamy peanut butter
¼ cup unsalted butter, softened
2 cups powdered sugar
¼ cup milk (add more as needed for your desired consistency)
1 teaspoon vanilla extract
STEP 1: Preheat and Prep Your Pan
First things first—set your oven to 350°F and get your baking pan ready. I recommend a 9×13-inch pan, either lightly greased or lined with parchment paper. (Parchment makes for easier lifting and slicing later.)
STEP 2: Mix the Buttery Peanut Butter Base
In a large mixing bowl, whisk together the melted butter and creamy peanut butter until it’s smooth and fully combined. You want it to look glossy and unified, with no streaks of either.
Then, add both your granulated sugar and packed brown sugar to the bowl. Mix it all together until everything is well combined and the sugars have dissolved a bit into the peanut butter mixture.
STEP 3: Add the Eggs and Vanilla
Now it’s time to stir in the eggs and vanilla extract. This is what’s going to help bind everything together and add that rich, bakery-style flavor. Make sure to beat everything until it’s fully incorporated and smooth.
STEP 4: Add Dry Ingredients and Form Dough
In the same bowl, add your flour, baking soda, and salt. Stir gently, just until everything is mixed. Don’t overmix! You’ll end up with a thick, sticky cookie dough—that’s exactly what you want.
STEP 5: Spread and Bake
Scoop the dough into your prepared pan and spread it out evenly. This part can take a minute because the dough is thick, but try to get an even layer all across the pan so the bars bake uniformly.
Slide the pan into the oven and bake for 20 to 25 minutes, or until the top is golden brown and a toothpick inserted in the center comes out with just a few moist crumbs. Be careful not to overbake—you want these bars soft and chewy, not dry!
How to Make the Dreamiest Peanut Butter Frosting (and Finish These Bars Like a Pro)
Alright, now that your cookie bars are in the oven and your kitchen smells like a peanut butter wonderland, it’s time to move on to what I think might be the best part—the frosting.
This isn’t just any peanut butter frosting, either. It’s thick, creamy, just sweet enough, and melts beautifully over the warm bars to create a silky, luscious topping. That contrast between the soft, chewy cookie base and the smooth frosting? Chef’s kiss. Let’s dive into the second half of the recipe and bring it all together.
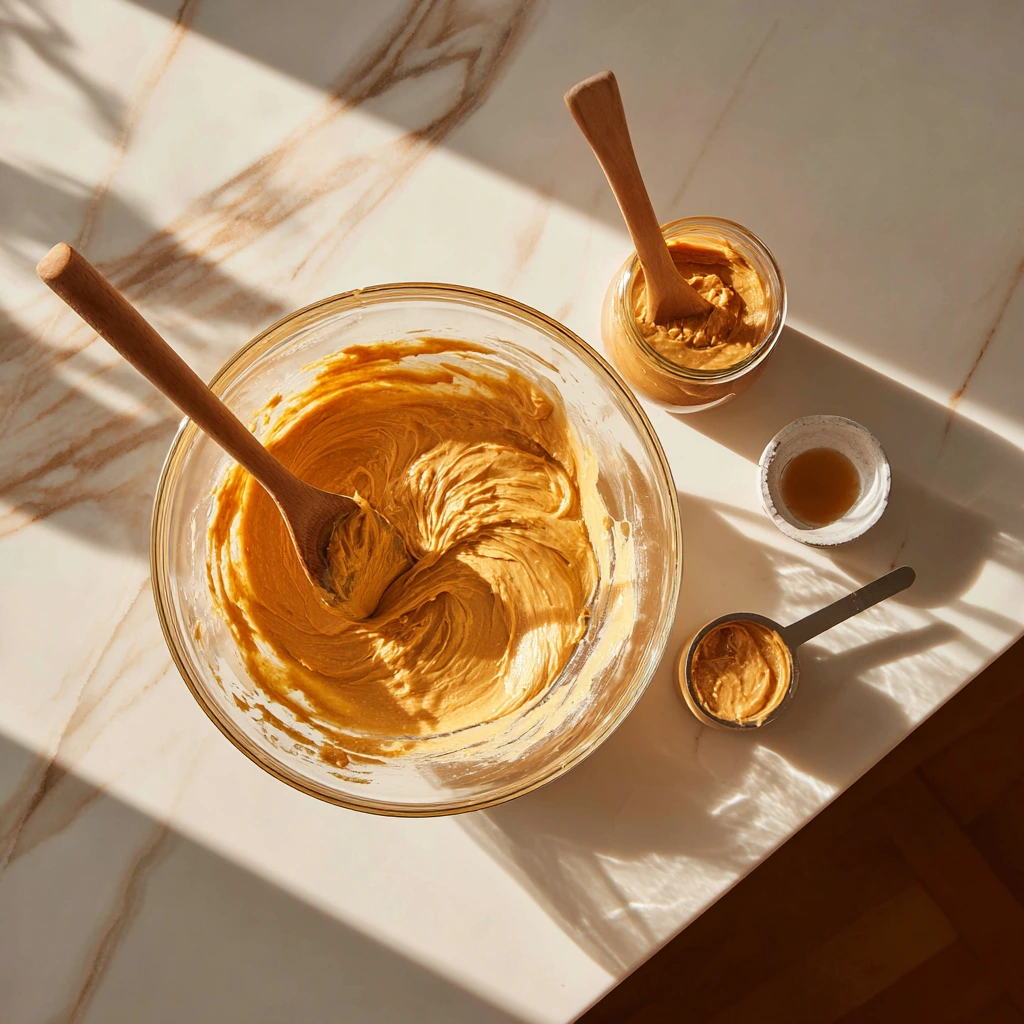
STEP 6: Make the Peanut Butter Frosting
While your bars are baking, grab a medium bowl and start making the frosting. Begin by combining ½ cup creamy peanut butter with ¼ cup softened unsalted butter. You’ll want to cream these together until smooth—no lumps, no streaks.
Once that’s nice and fluffy, slowly add in 2 cups of powdered sugar, mixing it in gradually so it doesn’t puff up everywhere. As it starts to come together, pour in ¼ cup milk (you can add more later if needed) and 1 teaspoon vanilla extract. Give it a good stir until the frosting is smooth and spreadable.
Pro Tip: If your frosting feels a little too thick, add a splash more milk. Too thin? Add a little more powdered sugar. You’re aiming for a spreadable consistency that’s soft enough to melt a bit when it hits the warm bars, but not so runny that it drips off the edges.
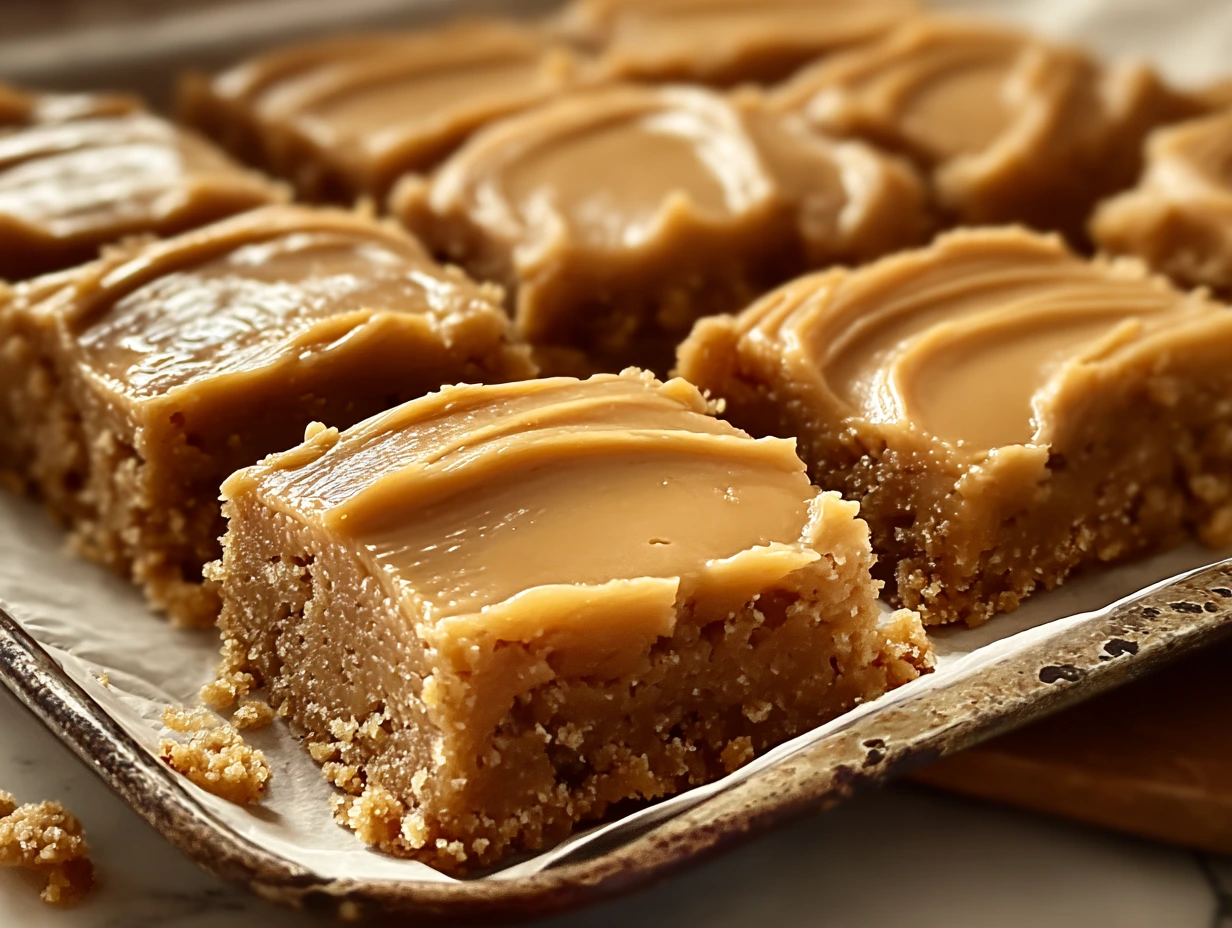
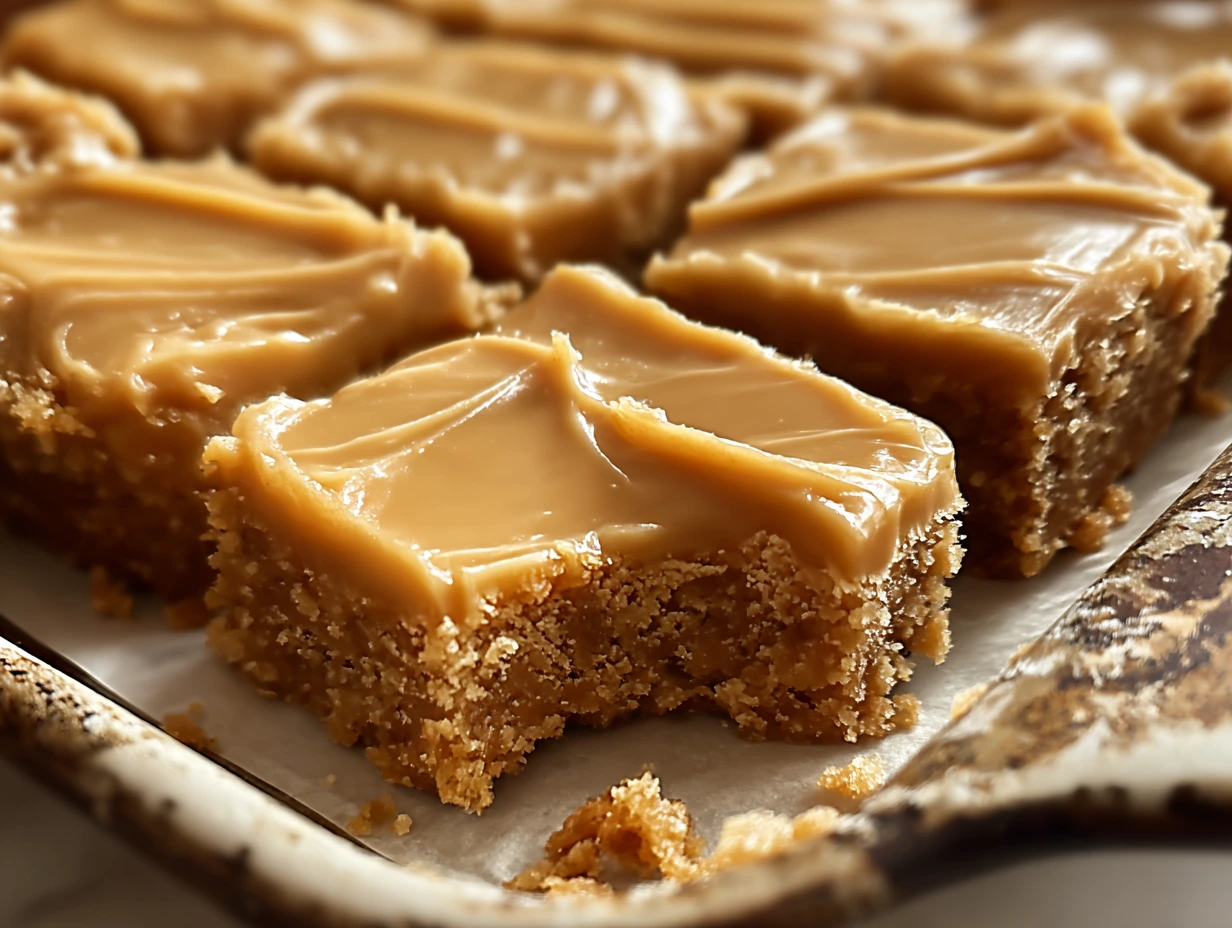
STEP 7: Frost the Bars While They’re Warm
This step is where the magic happens. Once your bars are done baking, take them out of the oven and let them sit for about 5 minutes. Don’t wait too long, though—you want them still warm so the frosting can gently melt into the top.
Scoop the frosting over the bars and spread it evenly across the surface. The warmth of the bars will help the frosting glide on like butter and create that signature, slightly-melted finish we all love.
STEP 8: Cool Completely and Slice
Now for the hardest part—waiting. Let the frosted bars cool completely before you cut into them. If you slice them too soon, the frosting might slide off or smear.
Once they’re cool, cut into 24 squares and serve. These bars are rich, so a little goes a long way—but don’t be surprised if folks come back for seconds.
Optional Toppings and Variations
Want to dress them up a bit? Here are a few fun ways to add a little flair:
Chopped peanuts sprinkled over the frosting add a bit of crunch and saltiness.
Mini chocolate chips make these taste like a peanut butter cup cookie bar.
A light drizzle of melted chocolate over the top adds extra richness.
These additions aren’t necessary, but they can add a special touch, especially if you’re making these for a party or gifting them.
Make-Ahead and Storage Tips
These bars are fantastic for making ahead. Just let them cool completely, cut them, and store them in an airtight container:
At room temperature: Up to 3 days
In the fridge: Up to a week
In the freezer: Wrap individually and freeze for up to 2 months
If you’re freezing them, I recommend placing a sheet of wax paper between layers to keep them from sticking.
FAQ: Your Peanut Butter Lunch Lady Cookie Bar Questions Answered
Before we wrap things up, let’s tackle some of the most common questions I get about these Peanut Butter Lunch Lady Cookie Bars. Whether you’re new to baking or just want to make sure they turn out perfect every time, I’ve got you covered.
Can I use natural peanut butter in this recipe?
It’s best to stick with a classic creamy peanut butter like Jif or Skippy for this recipe. Natural peanut butter tends to separate and has a runnier texture, which can affect how the bars bake and how the frosting sets.
Can I make these gluten-free?
Yes! Just substitute the all-purpose flour with a 1:1 gluten-free flour blend that includes xanthan gum. The texture might be slightly different—maybe a touch more crumbly—but they’ll still be delicious.
Do I have to frost the bars while they’re warm?
Technically, you could wait until the bars are cool, but I highly recommend frosting them while warm. That’s what gives you that perfect melty, almost-glazed layer that so many people love about this recipe.
How do I know when the bars are done baking?
Look for a golden brown top and the edges starting to pull slightly away from the sides of the pan. A toothpick inserted in the center should come out with just a few moist crumbs (not wet batter). Remember, they’ll continue to set a bit as they cool.
Can I freeze these cookie bars?
Absolutely! Let them cool completely, then cut and store in an airtight container or freezer-safe bag. They freeze beautifully for up to 2 months. Just let them thaw at room temp when you’re ready to enjoy.
What size pan should I use if I want thicker or thinner bars?
The recipe is written for a 9×13-inch pan, which gives you thick, chewy bars. If you want them even thicker, you could use a slightly smaller pan (like 8×11), but increase the bake time slightly and keep a close eye on them. For thinner bars, a larger pan will work—but reduce the bake time so they don’t overcook.
Can I double the recipe for a crowd?
Yes! You can double the ingredients and bake them in a sheet pan (about 13×18 inches). Just keep an eye on the baking time—it may need an extra 5–10 minutes depending on your oven and pan depth.
Conclusion: The Cookie Bar Everyone Will Love
There’s a reason these Peanut Butter Lunch Lady Cookie Bars have stood the test of time. They’re soft, chewy, easy to make, and absolutely packed with nostalgic flavor. That warm peanut butter frosting takes them to a whole new level—rich without being overpowering, sweet but balanced.
They’re the kind of treat that works for just about any occasion: school lunches, bake sales, potlucks, or just a weekend craving for something homemade and comforting. I’ve brought these to more than a few gatherings, and they disappear every single time.
Print
Peanut Butter Lunch Lady Cookie Bars
- Author: David
Description
Peanut Butter Lunch Lady Cookie Bars are a nostalgic, chewy treat inspired by the classic cafeteria favorite. Thick, soft, and loaded with peanut butter flavor, these bars are topped with a creamy peanut butter frosting that melts into the warm cookie base, making them utterly irresistible.
Ingredients
For the cookie bars:
1 cup unsalted butter, melted
1 cup creamy peanut butter
1 cup granulated sugar
1 cup brown sugar, packed
2 large eggs
2 teaspoons vanilla extract
2 cups all-purpose flour
1 teaspoon baking soda
½ teaspoon salt
For the frosting:
½ cup creamy peanut butter
¼ cup unsalted butter, softened
2 cups powdered sugar
¼ cup milk (more as needed for desired consistency)
1 teaspoon vanilla extract
Instructions
1 Preheat your oven to 350°F. Grease a 9×13-inch baking pan or line it with parchment paper.
2 In a large bowl, whisk together the melted butter and peanut butter until smooth. Add the granulated sugar and brown sugar, mixing until combined.
3 Beat in the eggs and vanilla extract until fully incorporated.
4 Add the flour, baking soda, and salt. Stir just until combined to form a thick dough.
5 Spread the dough evenly in the prepared pan and bake for 20-25 minutes, or until golden brown and a toothpick inserted comes out with just a few moist crumbs.
6 While the bars are baking, prepare the frosting by creaming together the peanut butter and softened butter. Gradually add powdered sugar, then stir in the milk and vanilla extract until smooth and spreadable.
7 Once the bars come out of the oven, let them sit for 5 minutes, then spread the frosting over the warm bars. The heat will help the frosting melt into a silky layer.
8 Cool completely before cutting into squares.
Notes
For an extra touch, sprinkle chopped peanuts or mini chocolate chips on top of the frosting. These bars freeze well and make great lunchbox treats or party snacks.


")

")


")
