

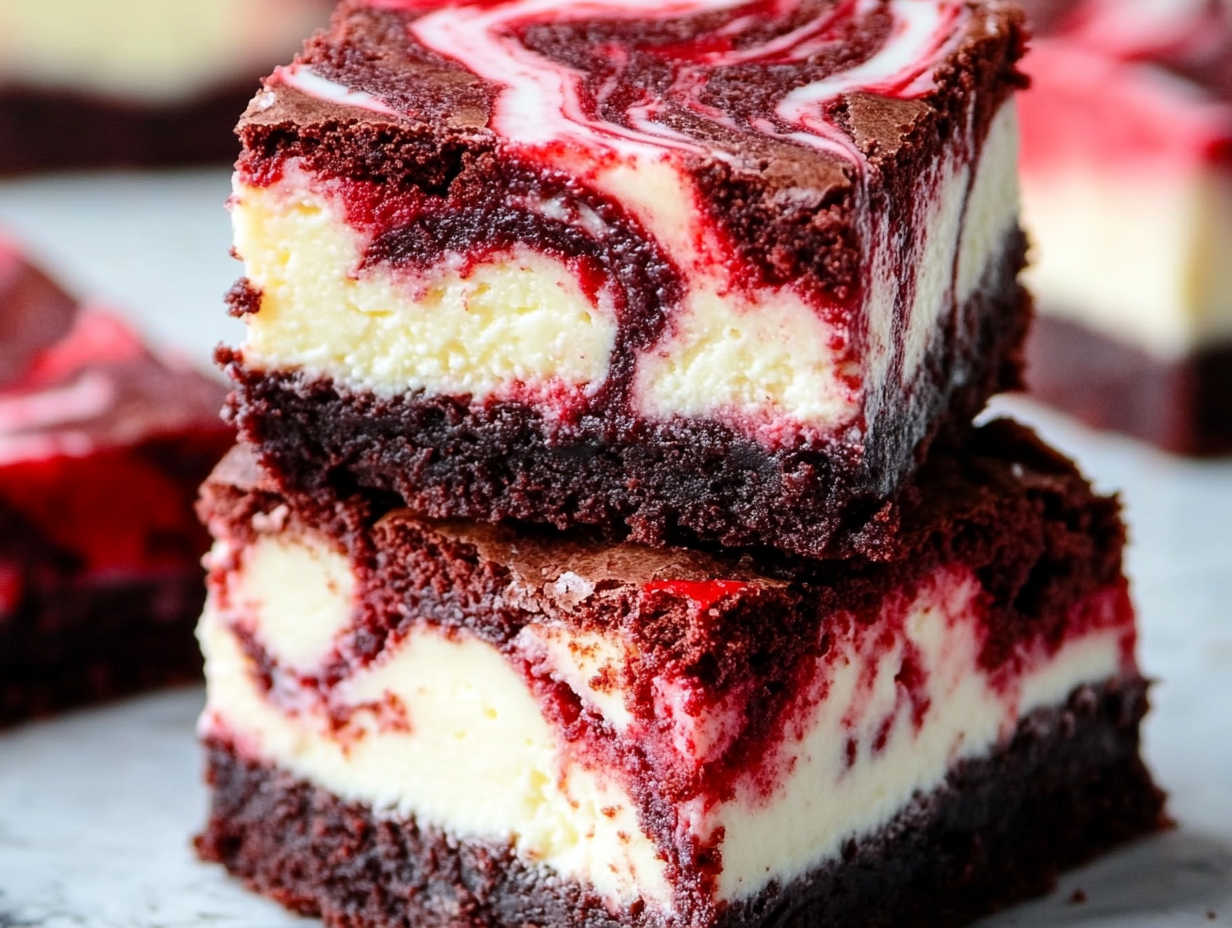
Red Velvet Cheesecake Swirl Brownies are a visually stunning and delicious dessert that offers the perfect fusion of two favorite treats: brownies and cheesecake. With a rich, chocolatey red velvet base and a creamy, tangy cheesecake swirl, these brownies bring an elegant twist to traditional flavors. The dessert combines the smooth and sweet tang of cheesecake with the unique cocoa depth of red velvet, creating a balance of flavors that is both comforting and luxurious. The red and white swirled layers make them an eye-catching addition to any dessert table, ideal for celebrations, holidays, and especially Valentine’s Day. Whether you’re treating yourself or impressing guests, Red Velvet Cheesecake Swirl Brownies offer both flavor and aesthetic appeal.
What Makes Red Velvet Cheesecake Swirl Brownies Unique?
Red Velvet Cheesecake Swirl Brownies stand out due to their remarkable combination of flavors and textures. The base is a classic red velvet brownie layer, which features the subtle cocoa richness distinctive of red velvet, enhanced with a hint of tanginess from a small amount of vinegar. The cheesecake swirl adds a smooth, creamy texture with a hint of sweetness, complementing the denser brownie layer. This interplay of textures – dense and moist brownies against the soft, creamy cheesecake – elevates the sensory experience of each bite.
Another unique aspect is the dessert’s visual appeal. The striking red and white swirls give these brownies an eye-catching marbled effect, making them as beautiful as they are delicious. The aesthetic appeal enhances their value as a dessert for special occasions, from holiday gatherings to elegant dinners. This combination of flavors, textures, and visual charm makes Red Velvet Cheesecake Swirl Brownies an extraordinary dessert option, bringing together the best of red velvet and cheesecake in a single, delightful bite.

Key Ingredients in Red Velvet Cheesecake Swirl Brownies
- Red Velvet Brownie Layer Ingredients
- Butter: Butter adds richness and moisture, creating a soft and tender brownie base. It also contributes to the rich flavor that balances the cocoa.
- Sugar: Granulated sugar provides sweetness and helps achieve the desirable fudgy texture in the brownies.
- Eggs: Eggs give structure and stability to the brownies, ensuring they hold together well while staying moist.
- Flour: All-purpose flour adds the necessary structure to the brownies, balancing moisture and density for a chewy texture.
- Cocoa Powder: Cocoa powder is the primary chocolate component, giving a mild, nuanced chocolate flavor typical of red velvet.
- Red Food Coloring & Vinegar: Red food coloring is key to achieving the classic red velvet color, while a touch of white vinegar enhances the color and provides a slight tang, essential to the authentic red velvet taste.
- Cheesecake Swirl Ingredients
- Cream Cheese: Cream cheese is the heart of the cheesecake layer, giving a smooth, creamy texture and a tangy flavor that contrasts beautifully with the sweet red velvet.
- Sugar: A small amount of granulated sugar sweetens the cheesecake layer without overpowering its tangy flavor.
- Egg: The egg helps bind the cheesecake mixture, giving it a smooth, cohesive texture.
- Vanilla Extract: Vanilla extract enhances the sweetness and aroma, adding warmth and depth to the cheesecake layer, balancing the tang of cream cheese while complementing the cocoa in the brownie base.
This combination of ingredients creates a harmonious balance of flavor and texture, making Red Velvet Cheesecake Swirl Brownies a truly indulgent treat.
Step-by-Step Guide to Making Red Velvet Cheesecake Swirl Brownies
Step 1: Preparing Your Ingredients and Tools
To make Red Velvet Cheesecake Swirl Brownies, start by gathering and prepping all necessary tools and ingredients for a smooth baking process. Here’s a checklist of tools you’ll need:
- 8×8-inch baking pan: Ideal for achieving the right thickness and texture.
- Parchment paper: Lining the pan with parchment helps with easy removal.
- Mixing bowls: At least two bowls, one for the brownie batter and one for the cheesecake mixture.
- Whisk and spatula: Essential for mixing ingredients without overworking the batter.
- Toothpick or knife: For swirling the brownie and cheesecake layers.
Prepare ingredients by softening the cream cheese and melting the butter, ensuring everything is at the correct temperature for smooth blending. Set up your workspace by organizing each ingredient within reach to streamline the mixing process, saving time and ensuring consistent results.
Step 2: Making the Red Velvet Brownie Layer
Begin by creating the red velvet brownie batter. Follow these steps to ensure the perfect base:
- Melt the Butter and Add Sugar: In a mixing bowl, combine melted butter with granulated sugar, whisking until the mixture is smooth and fully combined. This step helps dissolve the sugar, contributing to a fudgy texture.
- Incorporate Wet Ingredients: Add the eggs one at a time, mixing thoroughly after each addition. Then, stir in the vanilla extract, red food coloring, and white vinegar. The vinegar enhances the red color and adds a slight tang, while the food coloring gives the iconic red hue. The vanilla extract adds warmth and balances the cocoa.
- Combine Dry Ingredients Separately: In another bowl, sift together the flour, cocoa powder, and salt. Sifting helps break up any clumps, making it easier to mix evenly into the wet ingredients.
- Fold Dry Ingredients into Wet Mixture: Gently fold the dry ingredients into the wet mixture, using a spatula. Avoid over-mixing; fold just until no streaks of flour remain. Over-mixing can lead to a tough brownie texture.
- Reserve Batter for Swirling: Pour most of the batter into the prepared baking pan, saving about ¼ cup for swirling on top of the cheesecake layer.
Following these steps ensures that the red velvet brownie layer is smooth, fudgy, and full of flavor without being overly dense or tough.
Step 3: Preparing the Cheesecake Swirl
For the cheesecake swirl, prepare a creamy mixture that contrasts perfectly with the red velvet layer:
- Soften the Cream Cheese: Make sure the cream cheese is softened before mixing. This helps achieve a smooth, lump-free texture in the cheesecake layer.
- Combine Ingredients: In a bowl, beat the softened cream cheese with the granulated sugar, egg, and vanilla extract. Whisk until smooth and creamy, free from lumps.
- Whisking Technique: Use a whisk or an electric mixer on low speed, taking care not to over-whip, as too much air can alter the texture of the cheesecake.
This creamy mixture will create the perfect, tangy contrast to the rich brownie base.
Step 4: Swirling and Assembling the Brownies
Assembling and swirling the layers is a key part of creating the visual appeal and flavor contrast:
- Layer the Cheesecake Mixture: Gently spread the cheesecake mixture evenly over the red velvet brownie batter in the pan.
- Add Reserved Brownie Batter for Swirling: Drop small spoonfuls of the reserved red velvet brownie batter on top of the cheesecake layer.
- Create the Swirl Pattern: Use a toothpick or a knife to swirl the brownie and cheesecake layers together. Move the tool in small, circular motions or figure-eight patterns to create a marbled effect, mixing the two layers just enough to create visual appeal without over-blending.
This step not only adds aesthetic appeal but also allows for bites that combine both flavors in a pleasing way.
Step 5: Baking and Checking for Doneness
Bake the brownies at 350°F (175°C) for 25-30 minutes. Follow these steps to ensure optimal results:
- Bake Until Set: Place the pan in the preheated oven and bake until the center is just set. Avoid over-baking, as this can lead to dry brownies and an overly firm cheesecake layer.
- Toothpick Test: Insert a toothpick into the center of the brownies. It should come out with only a few moist crumbs, not completely clean, which indicates a fudgy texture.
This baking method ensures the brownies are perfectly cooked without drying out.
Step 6: Cooling, Cutting, and Serving
After baking, let the brownies cool completely in the pan for best results:
- Cool in Pan: Cooling allows the flavors to meld and the texture to set, making it easier to achieve clean cuts when slicing.
- Slice and Serve: Once cool, use the parchment paper overhang to lift the brownies out of the pan. Place them on a cutting board and use a sharp knife to slice them into squares. For neat edges, wipe the knife between cuts.
- Storage Tips: Store leftovers in an airtight container in the refrigerator to maintain freshness. These brownies can be enjoyed chilled or at room temperature.
Cooling thoroughly and cutting carefully ensures that each brownie square is as visually appealing as it is delicious.
Tips and Tricks for the Best Red Velvet Cheesecake Swirl Brownies
Creating perfect Red Velvet Cheesecake Swirl Brownies involves a few tips to ensure the best color, texture, and flavor:
- Getting the Right Color:
- Use gel-based food coloring instead of liquid to achieve a vibrant red hue without thinning the batter.
- Start with a small amount of food coloring and adjust gradually until reaching your desired shade. Remember that the red will deepen slightly as it bakes, so it’s best to go slightly lighter than the final color you want.
- Perfecting the Swirl:
- Use a toothpick or skewer to create clean, intricate swirls. Try to avoid over-swiping, as too much swirling can muddy the colors.
- For a more controlled design, place small dollops of the reserved brownie batter evenly over the cheesecake layer, then swirl each dollop separately.
- Texture Tips:
- Avoid over-baking by removing the brownies from the oven when a toothpick comes out with a few moist crumbs. They’ll continue to set as they cool.
- Make sure to measure your flour accurately to avoid a dense, cakey texture; spoon and level flour into your measuring cup instead of scooping.
- Flavor Boosts:
- Add a pinch of espresso powder to the brownie batter. This deepens the chocolate flavor without overpowering the red velvet profile, creating a more complex and satisfying taste.
These tips will help you achieve brownies that are not only visually stunning but also rich and flavorful.
Frequently Asked Questions (FAQs)
1. Can I make these brownies ahead of time?
Yes, Red Velvet Cheesecake Swirl Brownies can be made a day or two in advance. Store them in an airtight container in the refrigerator, as the cheesecake layer benefits from a slight chill. Allow them to come to room temperature before serving, or enjoy them cold.
2. What can I use instead of red food coloring?
If you prefer not to use artificial food coloring, try using natural alternatives like beetroot powder, which adds a red hue without affecting the flavor. Alternatively, you can omit the food coloring entirely for a “chocolate velvet” version that’s equally delicious.
3. How do I store Red Velvet Cheesecake Swirl Brownies?
Store these brownies in an airtight container in the refrigerator for up to five days. To maintain moisture, place a sheet of parchment or wax paper between layers if stacking. They can also be frozen for up to two months; thaw in the fridge overnight before serving.
4. Can I double the recipe for a larger pan?
Yes, you can double the recipe for a 9×13-inch pan. Be mindful that baking time may vary slightly, so check for doneness with a toothpick starting around the 30-minute mark.
5. Is there a way to make these brownies without cream cheese?
For a dairy-free or cream cheese-free option, consider using a vegan cream cheese alternative or a coconut-based cream for a similar creamy texture. The flavor will differ slightly, but it will still provide a delicious swirl effect.
6. Can I use a different pan size?
If you don’t have an 8×8-inch pan, you can use a 9×9-inch pan, though the brownies will be slightly thinner. Adjust the baking time by checking for doneness a few minutes earlier. For thicker brownies, a smaller 7×7-inch pan can work, but keep an eye on baking time to avoid undercooking.
7. Can I use less sugar?
Yes, you can reduce the sugar slightly in both the brownie and cheesecake layers if you prefer a less sweet treat. However, reducing it too much may affect the texture, so start by reducing 1-2 tablespoons at most.
8. Can I make this recipe gluten-free?
Yes, substitute the all-purpose flour with a gluten-free flour blend that includes xanthan gum for best results. The brownies may be slightly more delicate, but they will still be delicious.
9. Why is vinegar used in red velvet brownies?
Vinegar enhances the red color when combined with cocoa and also adds a slight tang that is classic to red velvet. If you don’t have vinegar, you can substitute it with lemon juice for a similar effect.
Conclusion
Red Velvet Cheesecake Swirl Brownies offer a delightful blend of flavors and textures, combining the richness of red velvet with the tangy creaminess of cheesecake. By following each step—preparing the ingredients, creating the layers, and swirling them together—you’ll end up with a visually stunning, indulgent treat that’s sure to impress. These brownies are perfect for holidays, family gatherings, or any time you want to serve something special. Try this recipe to add a touch of elegance to your dessert table, and watch them quickly become a favorite among family and friends!
Print
Red Velvet Cheesecake Swirl Brownies
- Author: Christophe
Description
These Red Velvet Cheesecake Swirl Brownies are a perfect combination of rich, chocolatey red velvet and creamy cheesecake swirled together in each decadent bite. The deep red hue of the brownie layer is visually stunning, while the tangy cheesecake adds a smooth, creamy contrast that elevates this dessert to the next level. With a tender, fudgy brownie texture and a beautiful marbled top, these brownies are as delicious as they are gorgeous, making them a perfect treat for special occasions or whenever you’re craving something indulgent!
Ingredients
For the Red Velvet Brownie Layer:
- ¾ cup unsalted butter, melted
- 1 cup granulated sugar
- 2 large eggs
- 2 tsp vanilla extract
- 1 tbsp red food coloring
- 1 tsp white vinegar
- 1 ¼ cups all-purpose flour
- ¼ cup unsweetened cocoa powder
- ¼ tsp salt
For the Cheesecake Swirl:
- 8 oz cream cheese, softened
- ¼ cup granulated sugar
- 1 large egg
- ½ tsp vanilla extract
Instructions
1️⃣ Preheat the Oven: Preheat your oven to 350°F (175°C). Line an 8×8-inch baking pan with parchment paper, leaving an overhang for easy removal, or grease it well.
2️⃣ Prepare the Red Velvet Brownie Batter: In a large mixing bowl, whisk together the melted butter and sugar until combined. Add eggs, vanilla extract, red food coloring, and white vinegar, stirring until smooth. Sift in the flour, cocoa powder, and salt, folding until just combined. Pour most of the batter into the prepared baking pan, reserving about ¼ cup for swirling.
3️⃣ Make the Cheesecake Swirl: In a separate bowl, beat the softened cream cheese, sugar, egg, and vanilla extract until the mixture is smooth and creamy.
4️⃣ Assemble and Swirl: Spread the cheesecake mixture evenly over the red velvet brownie batter. Drop spoonfuls of the reserved red velvet batter on top of the cheesecake layer. Use a knife or toothpick to gently swirl the two layers together for a marbled effect.
5️⃣ Bake: Place the pan in the preheated oven and bake for 25-30 minutes or until the center is set and a toothpick inserted into the middle comes out with only a few moist crumbs.
6️⃣ Cool and Serve: Let the brownies cool completely in the pan. Once cool, lift them out using the parchment overhang, slice into squares, and enjoy!
Notes
- Serving: Makes about 9-12 brownies, depending on the cut size.
- Storage: Store leftovers in an airtight container in the refrigerator for up to 5 days.
- Calories: Approximately 290 kcal per brownie square


")

")


")
