

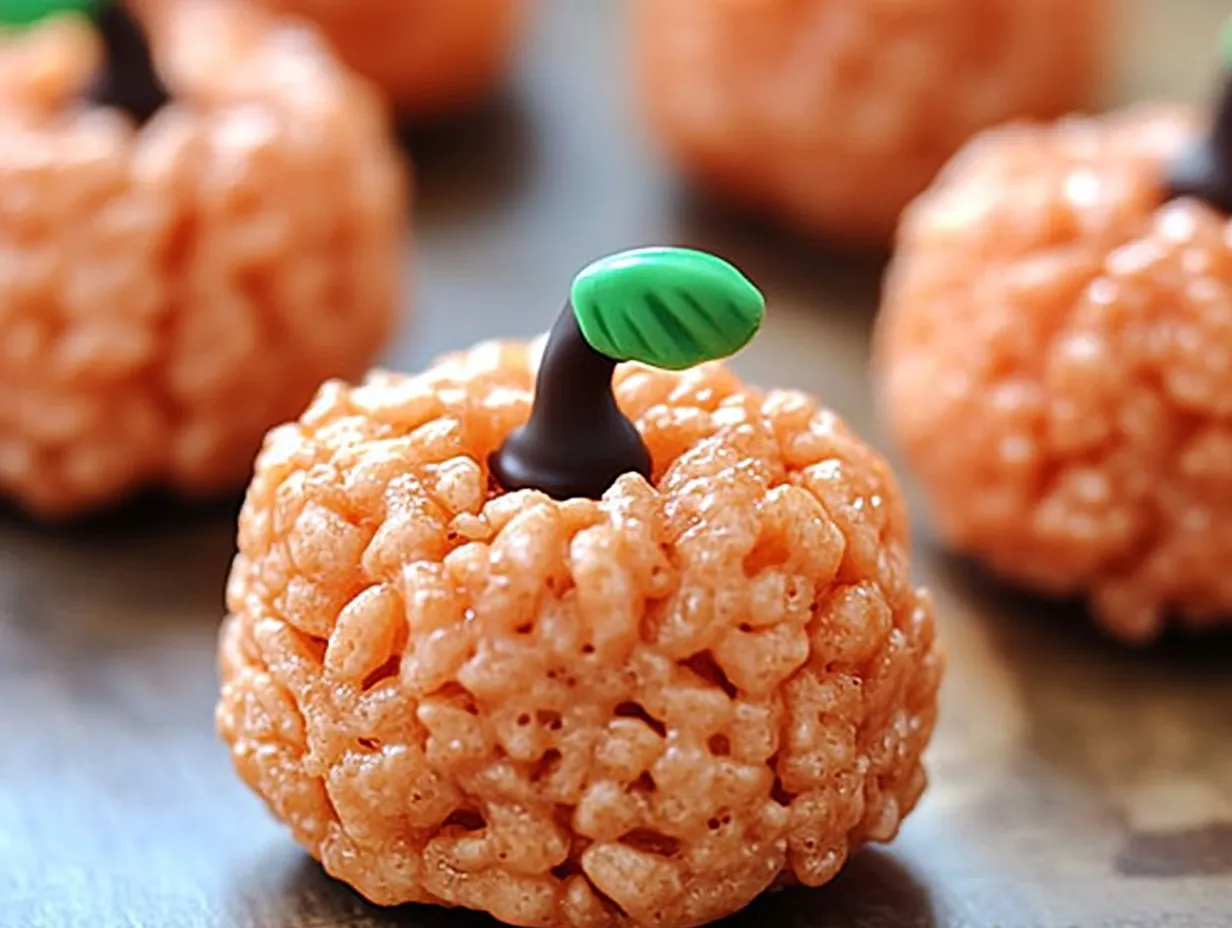
Rice Krispie Treat Pumpkins are a fun, festive twist on the classic Rice Krispie treats we all know and love. Shaped like mini pumpkins, these adorable, bite-sized snacks are perfect for fall and Halloween celebrations. Whether you’re hosting a spooky party, sending treats to school, or just looking for a creative kitchen activity to do with your family, these pumpkin-shaped treats are an ideal choice.
Not only are they delicious with their classic crispy, marshmallowy texture, but they also allow for endless creativity. With simple ingredients like food coloring, Mini Rolos for the stem, and green M&M’s as leaves, you can easily transform basic Rice Krispies into a playful, pumpkin-themed treat. Plus, they’re easy enough for kids to help with, making them a fun, hands-on project for families. From their bright orange color to their cute pumpkin shape, Rice Krispie Treat Pumpkins combine the perfect balance of fun and flavor, making them a hit at any autumn event.

Ingredients Overview
To make Rice Krispie Treat Pumpkins, you’ll need a few basic ingredients that come together to create this fun and festive treat:
- ¼ cup butter: This adds richness and smoothness to the marshmallow mixture, making it easier to work with and giving the treats a delicious flavor.
- 1 bag large marshmallows (about 40 marshmallows): Marshmallows act as the binding agent, holding the Rice Krispies together while adding that soft, chewy texture.
- 6 cups Rice Krispies cereal: The key ingredient that provides the iconic crispy texture in every bite.
- Red & yellow liquid food coloring: Essential for achieving the bright, pumpkin-orange color. A blend of both colors brings the perfect hue.
- Mini Rolos: These chocolate caramel candies serve as the “pumpkin stem,” adding both decoration and a sweet touch.
- Green M&M’s: These serve as the “leaf” for the pumpkins, adding a pop of color and fun.
- ¼ cup cooking oil or melted butter: Used to coat your hands, making it easier to handle the sticky mixture while shaping the pumpkins.
For substitutions, you can use vegan marshmallows and plant-based butter to make this recipe suitable for a plant-based diet without sacrificing flavor or texture.
Step 1: Melt the Butter
Start by melting ¼ cup of butter in a large pot over low heat. It’s important to use low heat to prevent the butter from burning or browning, as that could affect the flavor of the treats. Stir the butter occasionally to ensure it melts evenly and doesn’t stick to the bottom of the pot. Melting the butter slowly helps to create a smooth, rich base that will later combine seamlessly with the marshmallows.
Step 2: Melt the Marshmallows
Once the butter is melted, add 1 bag of large marshmallows (approximately 40) to the pot. Stir continuously to prevent clumping and to ensure that the marshmallows melt evenly. It’s essential to keep the heat low during this step to avoid scorching the marshmallows. As they melt, the mixture will become thick and sticky, which is exactly what you want. Keep stirring until the marshmallows are completely smooth and fully combined with the butter. Achieving a silky texture ensures that the Rice Krispies will mix in evenly later without any dry spots.
Step 3: Add Food Coloring
Remove the pot from the heat and immediately add several drops of yellow food coloring. Stir well to evenly distribute the color. Next, add red food coloring one drop at a time, stirring after each addition until you achieve the perfect pumpkin-orange shade. Typically, this takes about 12 drops of yellow and 4 drops of red, but you can adjust depending on the intensity of the color you desire. Mixing the colors slowly and thoroughly ensures the entire mixture turns a bright, uniform orange, making your pumpkins look vibrant and festive.
Step 4: Combine with Rice Krispies
Gradually add 6 cups of Rice Krispies cereal to the melted marshmallow mixture. It’s important to fold the cereal into the marshmallows gently to avoid crushing the crispy rice. Stir continuously to ensure each piece of cereal is fully coated with the marshmallow mixture. This process helps achieve a balanced texture, where every bite has the perfect ratio of crispy cereal to soft marshmallow. Take your time to evenly distribute the marshmallow mixture without over-mixing, as that can cause the Rice Krispies to break down.
Step 5: Form the Pumpkin Shapes
Once the mixture is ready, generously coat your hands with cooking oil or melted butter to prevent sticking. Scoop out a portion of the Rice Krispie mixture, roughly the size of a golf ball, and roll it between your hands to form a round shape. Work quickly while the mixture is still warm and malleable, as it becomes more difficult to shape as it cools. After forming the balls, place them on parchment paper to cool. To make your pumpkins look more realistic, gently press the tops to flatten them slightly, or pinch the sides to create subtle ridges. Reapply oil or butter to your hands as needed to keep the mixture from sticking while shaping.
Step 6: Add the Stem and Leaf
While the Rice Krispie balls are still warm, press a Mini Rolo into the top of each one to act as the pumpkin stem. Position the green M&M next to the Rolo to represent the leaf. If the pumpkins cool too quickly and become too firm to press the decorations in, you can create a small indent using the end of a thick marker or an apple corer, then place the chocolate and candy in the indent. This trick ensures that the decorations stay in place and adds to the pumpkin’s charming appearance.
Step 7: Cool and Serve
Allow the Rice Krispie pumpkins to cool for about 15-20 minutes. During this time, they will firm up and hold their shape. Once cooled, the pumpkins are ready to be served. You can arrange them on a decorative tray for a fun Halloween display or use them as a festive centerpiece for a fall gathering. These treats are not only delicious but also a playful way to bring the spirit of autumn to your party. Enjoy!
Tips for Success
When working with marshmallow-based recipes like Rice Krispie Treat Pumpkins, timing and temperature are key. Always melt the butter and marshmallows over low heat to avoid burning and ensure a smooth, lump-free mixture. Stir continuously to maintain an even texture, which will help the Rice Krispies mix in more easily.
If the mixture becomes too sticky, try lightly wetting your hands or using a bit more oil or butter to handle the mixture more easily. On the other hand, if the mixture is too firm, it may have cooled too much before shaping. In that case, reheat the mixture slightly on low heat to soften it enough for shaping.
To keep your Rice Krispie pumpkins fresh, store them in an airtight container at room temperature. They will stay soft and delicious for up to 2-3 days. If you’re making them ahead of time for an event, consider placing wax or parchment paper between layers to prevent sticking. Avoid refrigeration, as it can make the treats hard and less enjoyable to eat.
Customization Ideas
Rice Krispie Treat Pumpkins are highly customizable, allowing you to get creative with decorations and sizes. For an alternative twist, try using candy corn instead of Mini Rolos for the stem. The orange and yellow colors of candy corn complement the pumpkin theme perfectly. You can also add green licorice strings or green gummy candy to create vines, giving your pumpkins a whimsical, festive look.
If you’d like to experiment with different sizes, you can easily make larger or smaller pumpkins. For larger pumpkins, scoop out bigger portions of the Rice Krispie mixture (about the size of a tennis ball) and mold them into shape. For mini pumpkins, use smaller portions to create bite-sized treats perfect for individual servings.
To make your pumpkins look more natural, consider experimenting with color variations. Add a few drops of green or brown food coloring to give the pumpkins a more earthy or rustic appearance. You can even mix some brown into the orange for a more realistic, muted pumpkin color. These customizations not only enhance the visual appeal but also allow you to tailor the treats to different occasions or themes.
Serving Suggestions & Occasions
Rice Krispie Treat Pumpkins are a delightful addition to any fall or Halloween celebration. For Halloween parties, arrange them on a themed platter alongside other spooky treats like caramel apples, chocolate-covered pretzels, or pumpkin spice cookies. These pumpkins also make great individual snacks for school events—kids will love the colorful, fun shapes, and they’re easy to grab and eat. At fall-themed gatherings, consider creating a dessert table with a variety of autumn treats, such as apple cider donuts, spiced cupcakes, and your festive Rice Krispie pumpkins. You can even add extra decorations like edible glitter or candy eyes to make them stand out as playful centerpieces for your table.
Pairing these treats with other seasonal snacks, like pumpkin spice cookies, caramel apples, or cinnamon rolls, creates a cohesive fall-themed spread that’s sure to impress guests of all ages. Whether served as a fun snack for kids or a charming dessert for adults, these pumpkin treats are versatile and perfect for any autumn event.
Healthier Alternatives
To make Rice Krispie Treat Pumpkins a bit healthier, there are a few adjustments you can try. Low-sugar marshmallows are a great alternative to reduce the overall sweetness, while whole grain Rice Krispies can add some extra fiber and nutrition. Another option is to reduce the amount of butter by half, which can lower the fat content without compromising the flavor too much. You can also experiment with vegan marshmallows and plant-based butter to create a healthier, plant-based version of the treat.
For those looking to reduce calorie intake, consider making smaller portions—miniature pumpkins allow for better portion control while still giving everyone a sweet treat. Making these adjustments allows you to enjoy this fun, festive dessert with a slightly healthier twist, making them more suitable for those who want to indulge without overdoing it.
FAQ Section
Can I use mini marshmallows instead of large marshmallows?
Yes! If you don’t have large marshmallows, you can substitute with mini marshmallows. Use about 6 cups of mini marshmallows, which equals approximately one bag of large marshmallows. They’ll melt just as well and work perfectly for this recipe.
How do I keep the Rice Krispie mixture from sticking to my hands?
The sticky marshmallow mixture can make shaping tricky, but a simple solution is to coat your hands with oil or melted butter before working with it. This creates a barrier that prevents the mixture from sticking, making it easier to shape the pumpkins. You can reapply as needed while you work.
Can I make Rice Krispie Treat Pumpkins ahead of time?
Yes, these treats can easily be made 1-2 days ahead of time, making them perfect for parties and events. To keep them fresh, store the pumpkins in an airtight container at room temperature. This ensures they stay soft and chewy without hardening.
What can I use if I don’t have Mini Rolos or Green M&M’s?
No worries! If you don’t have Mini Rolos or Green M&M’s, you can get creative with other candies. Try using a pretzel stick as the stem, which adds a crunchy texture, and a small green gummy or jellybean as the leaf. These substitutes work just as well and can be fun alternatives.
How long do the Rice Krispie Treat Pumpkins last?
Stored properly in an airtight container, Rice Krispie Treat Pumpkins will stay fresh for up to 3-4 days. Be sure to keep them at room temperature to maintain their soft, marshmallowy texture. Avoid refrigerating them, as this can cause the treats to become hard and less enjoyable.
Conclusion
Making Rice Krispie Treat Pumpkins is a simple and enjoyable way to bring some festive fun into your kitchen. With just a few basic ingredients and easy-to-follow steps, you can create adorable, pumpkin-shaped treats that are perfect for any fall celebration. Whether you’re crafting them for a Halloween party, a school event, or just for fun at home, these treats are a hit with both kids and adults. Plus, the hands-on nature of shaping the pumpkins makes this recipe a great activity to do with family or friends.
Don’t hesitate to get creative! Try experimenting with different decorations, sizes, and even color variations to make each pumpkin unique. Whether you opt for candy corn stems or add licorice vines, the possibilities are endless. So gather your loved ones, embrace the autumn spirit, and have fun making these festive Rice Krispie Treat Pumpkins. It’s a delicious way to celebrate the season and create lasting memories!
Print
Rice Krispie Treat Pumpkins
- Author: Christophe
Description
These Rice Krispie Treat Pumpkins are a fun and festive Halloween snack that everyone will love! Shaped like mini pumpkins, these treats are made with the classic combination of marshmallows and Rice Krispies cereal, then colored a vibrant orange to resemble pumpkins. Topped with Mini Rolos as stems and green M&M’s as leaves, they’re easy to make and perfect for kids to help with. Whether for a Halloween party or a seasonal snack, these adorable pumpkin treats are both delicious and delightful!
Ingredients
- ¼ cup butter
- 1 bag large marshmallows (approximately 40 marshmallows)
- 6 cups Rice Krispies cereal
- Red & yellow liquid food coloring
- Mini Rolos (for the pumpkin stem)
- Green M&M’s (for the leaf)
- ¼ cup cooking oil or melted butter (for handling)
Instructions
1️⃣ Melt the butter: In a large pot, melt the ¼ cup of butter over low heat, stirring occasionally.
2️⃣ Melt the marshmallows: Add the marshmallows to the melted butter, stirring continuously until the marshmallows are completely melted and combined with the butter.
3️⃣ Add food coloring: Remove the pot from heat and add several drops of yellow food coloring. Stir well. Then, add red food coloring one drop at a time, stirring as you go, until you reach a bright pumpkin-orange color. (Typically about 4 drops of red and 12 drops of yellow.)
4️⃣ Mix with Rice Krispies: Gradually add the Rice Krispies cereal to the melted marshmallow mixture, stirring until the cereal is fully coated and combined.
5️⃣ Form the pumpkin shapes: Generously coat your hands with cooking oil or melted butter to prevent sticking. Scoop out portions of the Rice Krispie mixture and roll them into small balls (about the size of a golf ball). Set each ball on parchment paper as you go. Reapply oil/butter to your hands as needed to keep the mixture from sticking.
6️⃣ Add the stem and leaf: While the balls are still warm, press a Mini Rolo into the top of each one to create the pumpkin stem. Place a green M&M next to the Rolo to act as the pumpkin’s leaf.
Tip: If the pumpkins cool before you finish decorating, use the end of a thick marker or an apple corer to make a small indent in the top, allowing the chocolate to sit securely.
7️⃣ Cool and serve: Allow the Rice Krispie pumpkins to cool and firm up before serving.
Notes
- For a fun variation, you can add small chocolate chips or sprinkles into the Rice Krispie mixture before shaping the pumpkins for added texture and color.
- These treats are perfect for Halloween parties and can be stored in an airtight container for up to 2 days.


")

")


")
