

There’s something magical about cheesecake. Whether it’s the creamy tang, the melt-in-your-mouth texture, or just the fact that it feels extra special, it’s one of those desserts that always gets people excited. Now imagine taking all that goodness and turning it into bite-sized fudge squares you can whip up without even turning on the oven. Yep, that’s exactly what we’re doing today with this Rich and Creamy Cheesecake Fudge recipe!
Hi friends! If you’re anything like me, you love recipes that are both impressive and incredibly easy to pull off. This fudge hits both marks. I first made this around the holidays when I needed something quick but festive. One bite in and I knew it was going to be a repeat offender in our kitchen. My husband (who isn’t even a huge sweets guy) kept sneaking back into the fridge for “just one more piece.” That’s when I knew this one was a keeper!
This fudge is everything you want in a sweet treat—it’s rich from the white chocolate, creamy from the cream cheese, and just the right amount of sweet thanks to the condensed milk and powdered sugar. Plus, it’s ridiculously customizable. Want to go the classic route? Sprinkle crushed graham crackers on top. Feeling fruity? Swirl in your favorite berry preserves. It’s your fudge, your rules.
Alright, let’s dive into the delicious details and get this fudge party started!

Ingredients You’ll Need
Before we get into the step-by-step, here’s a quick look at what you’ll need to make this creamy cheesecake fudge:
2 ½ cups white chocolate chips
1 cup sweetened condensed milk
½ cup cream cheese, softened
1 teaspoon vanilla extract
¼ cup powdered sugar
Optional toppings: Graham cracker crumbs or a swirl of your favorite fruit preserves
This recipe makes about 36 small squares, which is perfect for sharing (or not—no judgment here).
STEP-BY-STEP INSTRUCTIONS
Step 1: Prep Your Pan
Start by lining an 8×8-inch square baking dish with either parchment paper or foil. Make sure to leave a bit of overhang on the sides—this will make it super easy to lift the fudge out once it’s set. Trust me, you’ll thank yourself later when cleanup takes 30 seconds.
Step 2: Melt the Chocolate
In a small saucepan, add your white chocolate chips and sweetened condensed milk. Set it over low heat and stir constantly. The key here is low and slow—you don’t want the chocolate to seize or burn. Keep stirring until the mixture is fully melted and silky smooth. Once it’s ready, take it off the heat.
Tip: If you’re using a nonstick saucepan, this step is even easier. Just be sure not to let the chocolate sit without stirring—it can scorch quickly!
Step 3: Cream the Cream Cheese
In a medium bowl, beat the softened cream cheese until it’s nice and smooth. No lumps here, please! Then add in the powdered sugar and vanilla extract, mixing until everything is creamy and well combined. The cream cheese mixture should be thick and fluffy at this point.
Easy Steps & Sweet Tips
Welcome back! In Part 1, we got started on our Rich and Creamy Cheesecake Fudge by prepping the pan, melting the white chocolate, and blending that luscious cream cheese mixture. Now it’s time to bring it all together and create those dreamy squares of fudge. This part comes together quickly, and if you’re like me, you might find it hard not to sneak a taste before it even sets.
Let’s keep the momentum going and finish strong with the final steps—and I’ve got a few bonus tips and fun flavor variations coming your way, too!
Step 4: Combine the Mixtures
With your melted white chocolate and your fluffy cream cheese mixture both ready to go, it’s time to unite these two into one rich, creamy batter. Pour the cream cheese mixture into the saucepan with the melted white chocolate and gently stir until fully combined.
You’ll want to keep mixing until everything is smooth, silky, and uniform. There shouldn’t be any streaks or lumps. The mixture will be thick, so don’t be afraid to use a rubber spatula to really fold it together.
Tip: If your chocolate mixture starts to cool down and feels a bit stiff, you can return it to low heat for just a few seconds to loosen it up before combining.
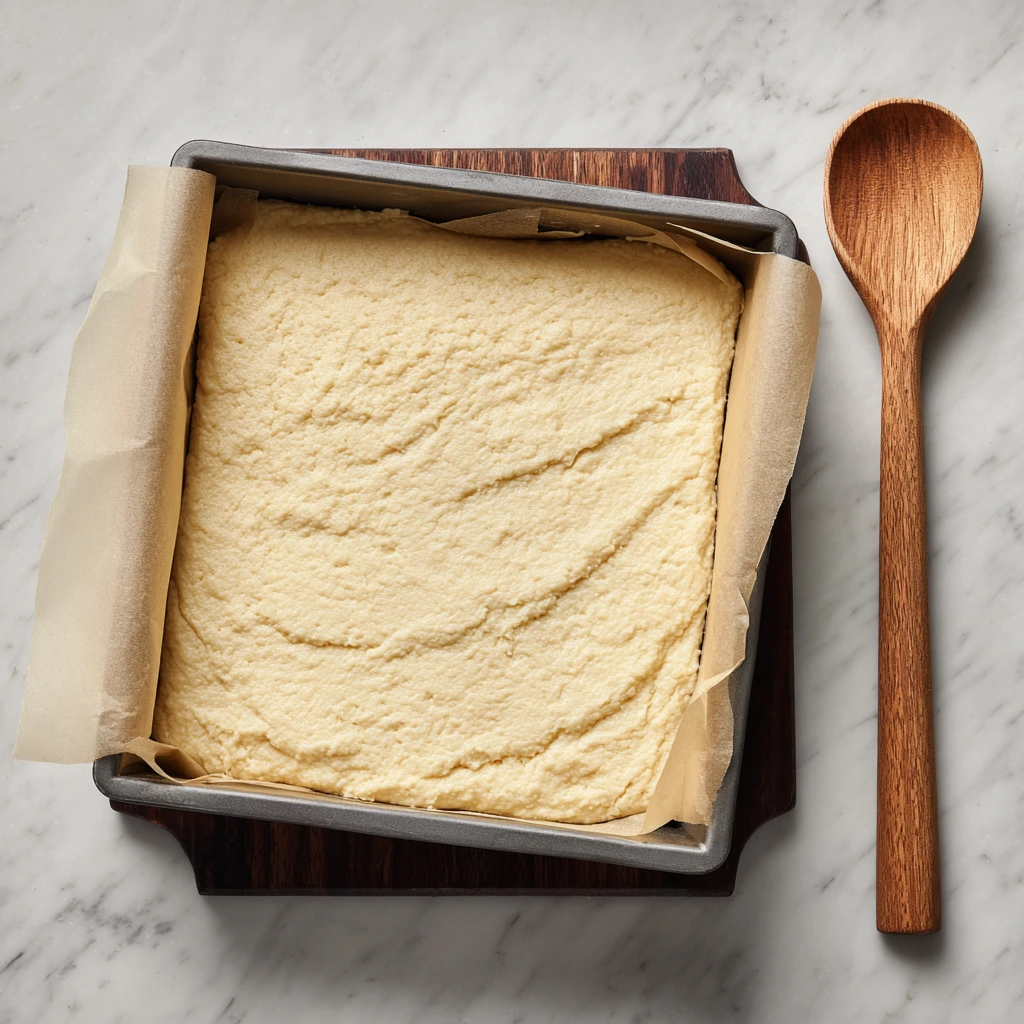
Step 5: Pour and Smooth
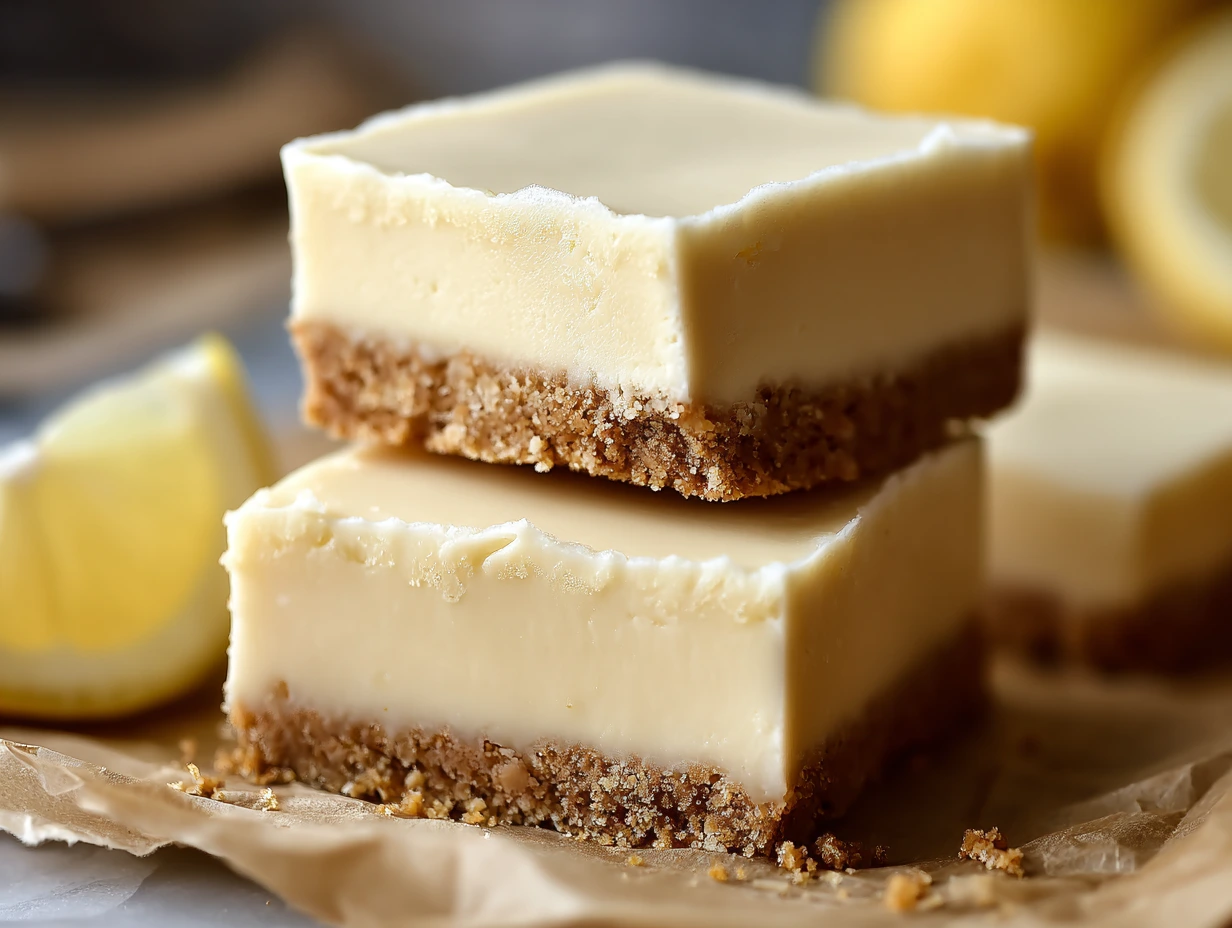
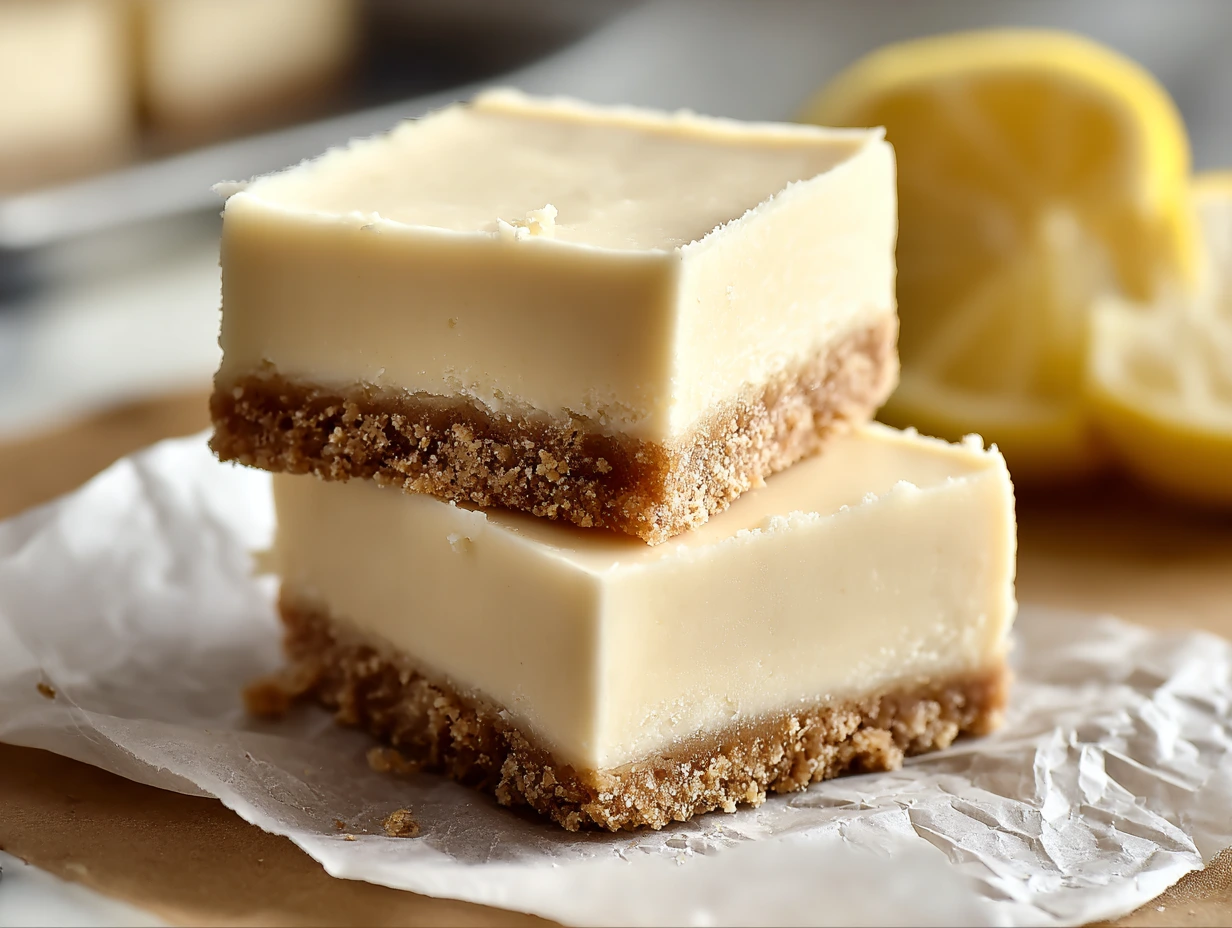
Once your fudge base is fully mixed, pour it into the prepared 8×8-inch pan. Use a spatula to spread it out evenly and smooth the top. The texture should be thick but spreadable—like a very soft frosting.
Now comes the fun part: toppings! If you’re going for that classic cheesecake vibe, a sprinkle of graham cracker crumbs adds the perfect touch. Want a fruity twist? Try dolloping small spoonfuls of raspberry, strawberry, or blueberry preserves over the top, then gently swirl them into the surface with a toothpick or knife.
You don’t need much—just a few swirls go a long way in adding flavor and visual appeal.

Step 6: Chill Until Set
Place the pan in the refrigerator and let the fudge chill for at least 3 hours—though overnight is even better if you have the time. This is when the magic happens. The fudge firms up to that perfect, sliceable texture without losing any of its soft, creamy bite.
Once set, use the parchment paper overhang to lift the fudge out of the pan and onto a cutting board. Slice into small squares—this recipe makes about 36 pieces, which is perfect for gifting, sharing, or snacking throughout the week.
Pro Tip: Run a knife under warm water and wipe it clean between cuts for extra neat edges.
Tips and Customization Ideas
This recipe is already amazing as-is, but here are a few fun ways to switch things up or make it your own:
Add Texture: Stir in mini white chocolate chips, chopped nuts, or even crushed cookies before pouring into the pan.
Change the Base Flavor: Use almond or lemon extract instead of vanilla for a totally different twist.
Make It Swirled: Raspberry and strawberry preserves are both fantastic for swirling on top. Blueberry and even lemon curd also work beautifully.
Use Different Chocolates: While white chocolate keeps things light and creamy, you can experiment with a blend of white and milk chocolate for a richer bite.
Note: Just keep in mind that using darker chocolate will change the flavor from cheesecake-forward to more fudge-forward, which can still be delicious!
FAQ and Final Thoughts
We’ve melted, mixed, chilled, and sliced our way to one of the easiest—and most indulgent—desserts out there. If you’ve followed along from the beginning, you now have a pan full of rich, creamy cheesecake fudge that’s ready to impress just about anyone who gets a taste. But before we wrap things up, let’s go over a few common questions I often hear about this recipe.
Because while the steps are simple, I know firsthand that sometimes you just want a few more details to get things just right. So let’s jump into the FAQ!
FREQUENTLY ASKED QUESTIONS
1. Can I freeze cheesecake fudge?
Yes! Cheesecake fudge freezes beautifully. Just make sure it’s fully set first, then cut it into squares and place them in an airtight container with parchment paper between layers. It’ll keep in the freezer for up to 2 months. When you’re ready to enjoy, let it thaw in the fridge overnight.
2. Can I use low-fat cream cheese?
Technically, yes—but I wouldn’t recommend it. Full-fat cream cheese gives this fudge its rich, creamy texture. Low-fat versions tend to have more water, which can lead to a softer or even slightly grainy texture once the fudge sets.
3. What if I don’t have white chocolate chips?
No problem! You can substitute white chocolate baking bars, just make sure to chop them into small pieces so they melt evenly. You’ll still get that smooth, sweet base that blends perfectly with the cream cheese.
4. Can I make this ahead of time for an event?
Absolutely. This fudge is actually better when made a day ahead because it has time to fully chill and set. Just keep it covered in the fridge and slice it shortly before serving.
5. Why is my fudge not setting properly?
If your fudge is too soft, it’s likely one of two things: either the mixture wasn’t cooked long enough to fully melt and combine, or the cream cheese was too soft and added extra moisture. Make sure to mix until smooth and chill it for the full 3 hours (or more) to help it firm up.
6. Can I double the recipe?
Yes! This recipe doubles beautifully. Use a 9×13-inch pan instead of an 8×8-inch, and follow the same steps. You may need to add a little extra time to the chilling process to make sure it sets completely.
7. Do I have to use powdered sugar?
Powdered sugar is ideal because it dissolves easily into the cream cheese, creating a smooth texture. If you try using granulated sugar, you’ll end up with a grainy consistency—not what we want in this fudge!
Final Thoughts: Your New Favorite No-Bake Treat
Whether you’re making this cheesecake fudge for the holidays, a potluck, or just to satisfy a late-night craving, it’s one of those treats that always gets rave reviews. It’s rich, creamy, and customizable—plus, it looks beautiful with just a simple swirl or sprinkle on top.
What I love most is how quickly it comes together. No baking. No fuss. Just a few simple ingredients and a little bit of fridge time. And the best part? It keeps well in the fridge or freezer, so you can always have a batch ready to go when that sweet tooth hits.
Print
Rich and Creamy Cheesecake Fudge
- Author: David
Description
Rich and Creamy Cheesecake Fudge is a decadent treat that melts in your mouth, combining the tangy smoothness of cheesecake with the sweetness of white chocolate. With a soft, creamy texture and simple prep, it’s perfect for holidays, gifting, or whenever you’re craving a bite of indulgence.
Ingredients
2 ½ cups white chocolate chips
1 cup sweetened condensed milk
½ cup cream cheese, softened
1 teaspoon vanilla extract
¼ cup powdered sugar
Optional: graham cracker crumbs or fruit swirl for topping
Instructions
1 Line an 8×8-inch baking dish with parchment paper or foil, leaving an overhang for easy removal.
2 In a saucepan over low heat, combine white chocolate chips and sweetened condensed milk. Stir constantly until fully melted and smooth.
3 In a separate bowl, beat the softened cream cheese until smooth. Add the powdered sugar and vanilla extract, mixing until well blended.
4 Stir the cream cheese mixture into the melted chocolate until fully incorporated and silky.
5 Pour the fudge mixture into the prepared pan and smooth the top. Optionally, sprinkle graham cracker crumbs or gently swirl in fruit preserves on top for extra flavor.
6 Refrigerate for at least 3 hours or until firm. Once set, lift the fudge from the pan and cut into small squares.
Notes
For a tangier flavor, use a bit more cream cheese. You can customize this fudge by folding in chopped berries, chocolate chips, or cookie crumbles. Store in an airtight container in the fridge for up to one week.


")

")


")
