

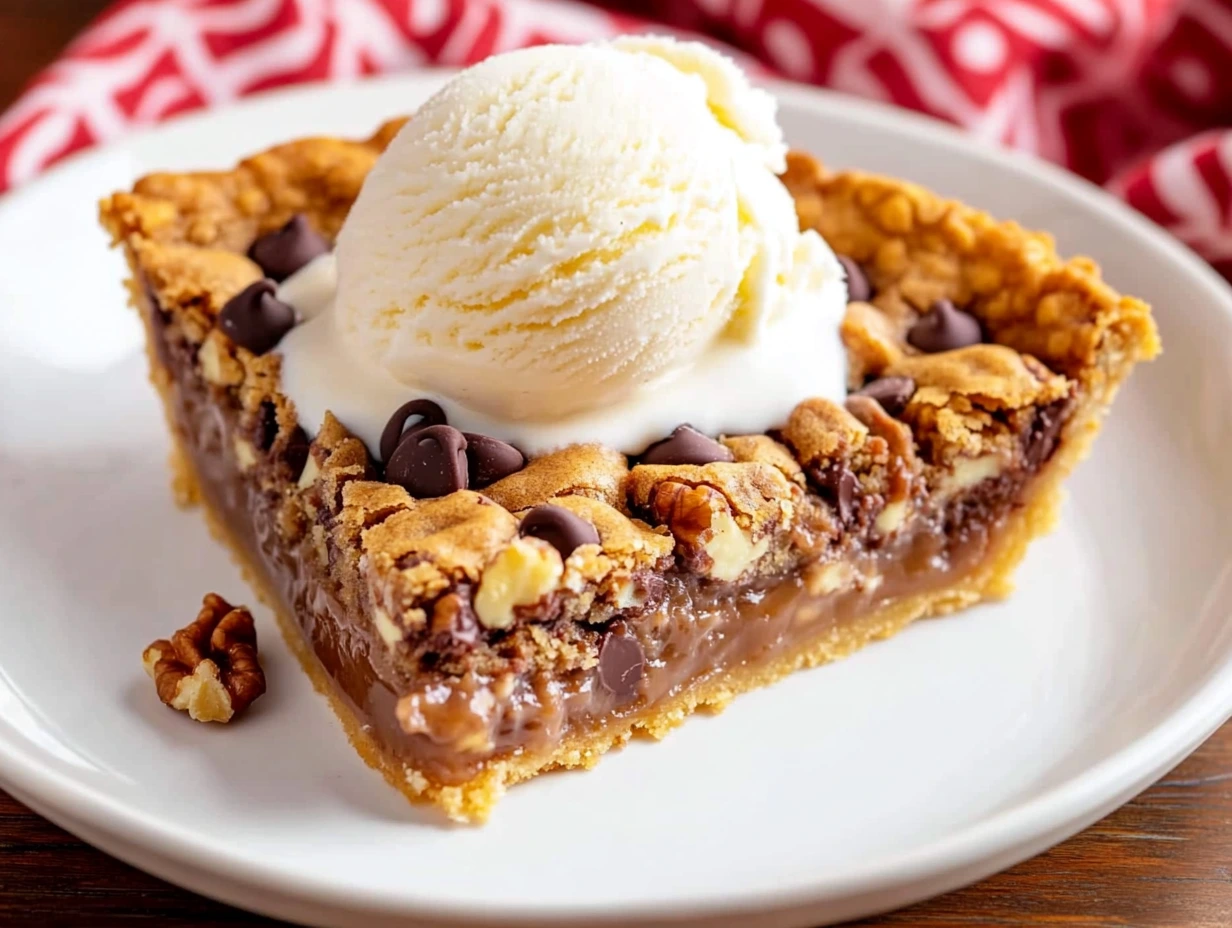
If you’ve ever wondered what would happen if your favorite chocolate chip cookie and a pie had a delicious, gooey baby—this Tollhouse Cookie Pie is it. Imagine all the buttery, sweet, chocolate-studded goodness of a classic Nestlé Tollhouse cookie, but with a soft, slightly molten center baked into a flaky pie crust. Yeah… it’s as amazing as it sounds.
This recipe is one of those that feels nostalgic and indulgent all at once. It’s like biting into childhood with a grown-up twist. Whether you’re baking it for a casual Sunday dessert, a holiday treat, or to totally impress guests at your next dinner party, this pie has a way of stealing the spotlight.
The best part? It’s super easy to throw together with just a few pantry staples and one store-bought pie crust. You don’t even need to chill the dough or pull out any fancy tools. One bowl, one pie dish, and a few happy taste testers are all you need.
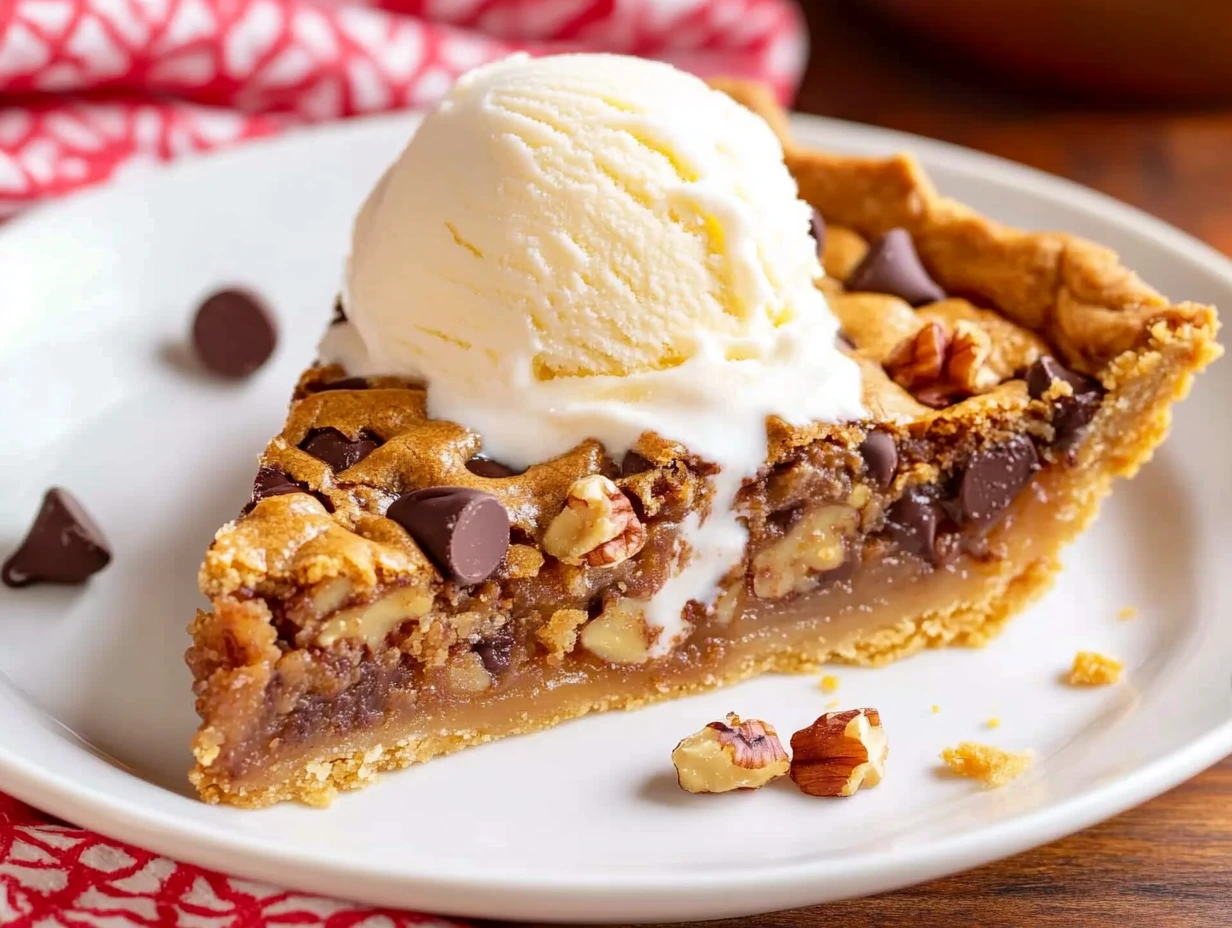
Before we dive into the steps, let me just say—don’t skip out on the gooey center. If you’re a fan of warm, melty chocolate, you’ll want to slice this pie while it’s still just a little warm. Top it with a scoop of vanilla ice cream if you’re feeling extra fancy (or just extra hungry). Let’s get into it!

Ingredients You’ll Need:
1 refrigerated 9″ pie crust, thawed
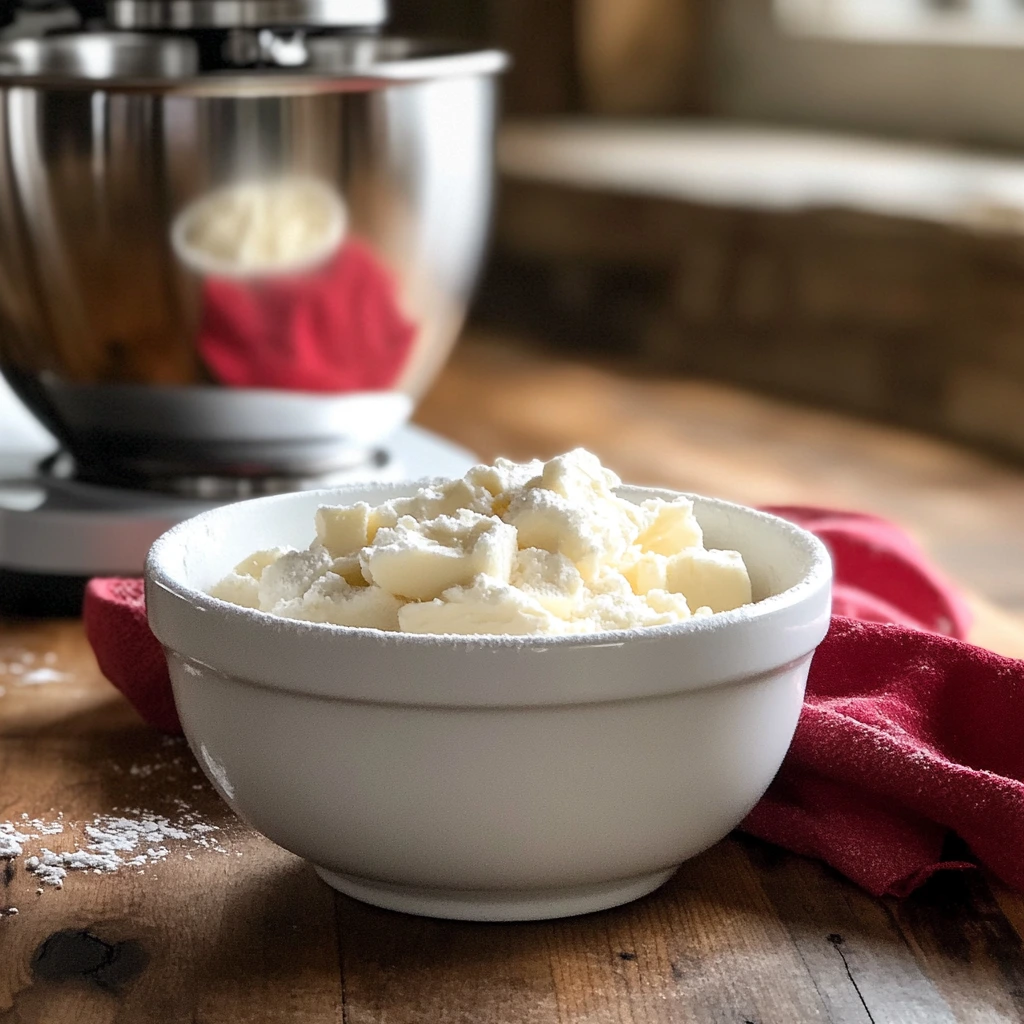
¾ cup (1½ sticks) salted butter, softened
½ cup granulated sugar
½ cup packed light brown sugar
2 large eggs
1 tsp vanilla extract
½ cup all-purpose flour
1½ cups Tollhouse semi-sweet chocolate chips
¾ cup chopped walnuts (optional)
STEP 1: Preheat and Prep Your Crust
First things first—preheat your oven to 325°F. While that’s heating, go ahead and unroll your thawed pie crust into a 9-inch pie plate. Press it gently into the bottom and up the sides. You don’t have to be perfect here, just make sure there are no air pockets under the crust.
If you’re feeling a little extra, crimp the edges for a decorative touch. This just gives it that classic pie-shop look. Once that’s done, set it aside and let it wait for its buttery, chocolatey filling.
STEP 2: Cream the Butter and Sugars
In a large bowl (or the bowl of your stand mixer if you’re going that route), beat together the softened butter, granulated sugar, and brown sugar. Mix on medium speed for about 2 minutes, or until everything looks fluffy and light. This step is key—it adds air to the batter and helps the pie rise a bit while baking.
STEP 3: Add the Eggs and Vanilla
Next, add your eggs one at a time, beating after each addition. This helps keep the mixture smooth and evenly combined. Once both eggs are in, add in the vanilla extract and give it one more mix until everything’s nice and blended.
STEP 4: Add the Flour
Now it’s time to add the flour. Drop the mixer speed down to low, and slowly add the flour to the bowl. Mix just until the flour is no longer visible—don’t overmix, or the texture of your pie will end up a little tougher than you want. Be sure to scrape down the sides of the bowl so nothing gets left behind.
STEP 5: Fold in the Chocolate Chips and Walnuts
Now for the fun part—fold in the Tollhouse semi-sweet chocolate chips and chopped walnuts (if using). Use a spatula to gently fold them into the dough, making sure they’re evenly distributed. The goal is for every bite to have a good mix of gooey chocolate and that soft, cookie texture. If you’re going nut-free, just skip the walnuts or try a fun swap like pecans or even toffee bits.
Bake, Cool, and Serve
Now that we’ve got our rich, buttery cookie filling ready to go, it’s time to bring it all together and get that pie into the oven. This is where the magic happens: the crust gets beautifully golden, the edges crisp up, and the center turns into this soft, chocolate-studded dream that’s basically impossible to resist.
One thing I love about this Tollhouse Cookie Pie is how forgiving it is. You don’t need to fuss over any tricky layers or special timing. Once it’s in the oven, the hardest part is just waiting for it to be ready (and resisting the urge to slice into it while it’s still piping hot).
Ready to finish this pie up? Let’s bake!
STEP 6: Fill the Pie Crust
Take that glorious cookie dough and scoop it into your prepared pie crust. Use a spatula or the back of a spoon to smooth it out evenly, pressing it gently all the way to the edges. You want a nice, even surface so it bakes up beautifully.
If you’ve got an offset spatula, this is the perfect time to pull it out—it makes smoothing the dough quick and easy. If not, don’t worry; any spoon or spatula will do the trick.
STEP 7: Bake the Pie
Pop the pie into your preheated 325°F oven and bake it for 55 to 65 minutes. Now, here’s an important tip: after about 20 minutes of baking, lightly tent the crust with foil. This just means loosely placing a sheet of foil over the outer edges of the crust to keep them from getting too dark while the center finishes baking.
The pie is done when a toothpick inserted about 2 inches from the edge comes out mostly clean. You’re looking for a few moist crumbs, not raw batter. The center will continue to set as the pie cools, so don’t stress if it still looks a little soft when it comes out—it’s supposed to!
STEP 8: Let it Cool (If You Can Wait)
As tempting as it is to dig right in, letting the pie cool for at least 20–30 minutes is key. This resting time lets the gooey center firm up just a bit, so your slices hold together better. If you love that ultra-gooey, molten center, go ahead and cut into it while it’s still warm. Just expect a little (delicious) mess.
Want cleaner slices? Wait until the pie is closer to room temperature. The filling will firm up, making it easier to cut neat wedges.
STEP 9: Optional – Add Extra Chocolate on Top
Here’s a fun finishing touch: as soon as the pie comes out of the oven, gently press a handful of extra chocolate chips into the top. They’ll melt just slightly and create that picture-perfect, bakery-style finish.
It’s totally optional, but highly recommended if you’re serving this to guests (or just want an excuse to sneak in more chocolate).
STEP 10: Serve and Store
You can serve this pie warm or at room temperature—either way, it’s a hit. I like to pair it with a scoop of vanilla ice cream for that hot-and-cold combo that just never fails.
If you’ve got leftovers (lucky you!), store them covered at room temperature for up to 2 days, or in the fridge for up to 5 days. A quick 10–15 seconds in the microwave brings the gooey texture right back if it’s been chilled.
Helpful Tips and Variations
Texture Tip: If you prefer a firmer, more cookie-like center, let the pie cool completely before slicing. For that signature soft, gooey middle, serve warm or reheat just slightly.
Nut-Free Version: Skip the walnuts entirely, or try a different add-in like chopped pecans or even crushed pretzels for a salty-sweet twist.
Make-Ahead Friendly: You can assemble the cookie filling and press it into the crust the night before. Just cover the unbaked pie tightly with plastic wrap and refrigerate it overnight. When you’re ready to bake, just pop it straight into the oven.
Dress It Up: For a more elegant presentation, dust the top with powdered sugar or drizzle with melted chocolate just before serving.
Crust Upgrade: For an extra golden, glossy finish on the pie crust edges, brush them with a simple egg wash (1 beaten egg + 1 tablespoon water) before baking.
FAQs & Final Thoughts
By now, your kitchen probably smells like a warm bakery, and your Tollhouse Cookie Pie is either cooling on the counter or already being devoured. Before we wrap things up, let’s go over a few commonly asked questions to help you feel completely confident making (and tweaking) this recipe in your own kitchen.
Frequently Asked Questions
1. Can I use a homemade pie crust instead of refrigerated?
Absolutely! If you have a go-to homemade pie crust recipe, feel free to use it here. Just be sure it’s rolled out to fit a 9-inch pie plate and prepped the same way (pressed into the dish and crimped around the edges). A buttery, flaky homemade crust adds a beautiful touch.
2. Can I use a different type of chocolate?
Yes! While the classic version uses semi-sweet Tollhouse chips, you can substitute with dark chocolate, milk chocolate, or even a mix of chips and chunks. White chocolate or peanut butter chips also work if you want to mix things up.
3. What if I don’t have a stand mixer?
No problem—you can use a hand mixer or even a sturdy wooden spoon and some elbow grease. The key is to cream the butter and sugars well and make sure everything is mixed thoroughly, especially once you add the eggs.
4. Can I freeze the pie?
Yes, this pie freezes quite well. Once it’s fully cooled, wrap it tightly in plastic wrap and then in foil. It can be frozen for up to 2 months. Thaw overnight in the fridge and warm slices in the microwave or oven before serving.
5. Is it okay to leave the pie out overnight?
Yes. You can leave it covered at room temperature for up to 2 days. If your kitchen runs warm or you’re storing it longer, it’s best to keep it in the fridge.
6. Can I make this gluten-free?
You can try using a 1:1 gluten-free flour blend. The texture may be slightly different, but it should still bake up nicely. Just make sure your pie crust is also gluten-free.
7. How do I know when the pie is fully baked?
The edges will look set and golden, and the center should have a slight jiggle, but not look liquid. Insert a toothpick about 2 inches from the edge—it should come out with a few moist crumbs but no wet batter. Don’t wait for a totally clean toothpick or the center may overbake.
Final Thoughts: A Classic Dessert Worth Making Again and Again
There’s just something about this Tollhouse Cookie Pie that hits all the right notes. It’s nostalgic and comforting, but still feels special enough to serve at any gathering. That soft, gooey center with melty chocolate chips? Absolute heaven. And the fact that it comes together so easily with ingredients you probably already have on hand makes it a total win.
It’s the kind of dessert that draws people to the kitchen before dinner is even done. I’ve made this pie for birthdays, holidays, bake sales, and quiet Sunday afternoons—and every single time, it disappears fast.
Whether you’re serving it warm with ice cream, letting it cool for neat slices, or sneaking a piece straight from the pan (no judgment), this recipe is a keepe
Print
Tollhouse Cookie Pie
- Author: David
Description
A decadent twist on the classic chocolate chip cookie, baked right in a flaky pie crust. This indulgent dessert delivers crisp edges, a gooey center studded with semi-sweet chips (and optional walnuts), and all the nostalgia of Grandma’s cookie jar in every slice.
Ingredients
1 refrigerated 9″ pie crust, thawed
¾ cup (1½ sticks) salted butter, softened
½ cup granulated sugar
½ cup packed light brown sugar
2 large eggs
1 tsp vanilla extract
½ cup all-purpose flour
1½ cups Tollhouse semi-sweet chocolate chips
¾ cup chopped walnuts (optional)
Instructions
1️⃣ Preheat the oven to 325 °F. Unroll the thawed pie crust into a 9-inch pie plate, pressing it gently into the bottom and sides. Crimp the edges and set aside.
2️⃣ In a large bowl or the bowl of a stand mixer fitted with the paddle attachment, cream together the softened butter, granulated sugar, and brown sugar on medium speed for 2 minutes, until light and fluffy.
3️⃣ Add the eggs one at a time, mixing until each is fully incorporated. Pour in the vanilla extract and mix until combined.
4️⃣ Reduce the mixer speed to low and add the flour. Mix just until no streaks of flour remain, scraping down the sides of the bowl as needed.
5️⃣ Fold in the chocolate chips and, if using, the chopped walnuts, ensuring an even distribution without overmixing.
6️⃣ Spread the cookie dough evenly into the prepared pie crust, smoothing the top to the edges with an offset spatula.
7️⃣ Bake for 55–65 minutes, tenting the crust with foil after the first 20 minutes to prevent over-browning. The pie is done when a toothpick inserted about 2″ from the edge comes out mostly clean (a few moist crumbs are ideal).
8️⃣ Remove from the oven and let cool in the pan for at least 20–30 minutes. Slicing it sooner yields an extra-gooey center; waiting longer gives a cleaner slice.
9️⃣ (Optional) For a decorative finish, press a handful of extra chocolate chips into the warm top as soon as it comes out of the oven.
🔟 Serve warm or at room temperature. Store leftovers covered at room temperature for up to 2 days or in the fridge for up to 5 days.
Notes
• Gooey vs. Set: Cutting into the pie while still warm produces a luscious, molten center; cooling fully yields a more cake-like texture.
• Nut-Free Version: Simply omit the walnuts or substitute with chopped pecans or toffee bits for extra crunch.
• Crust Options: For a buttery upgrade, brush the crust edges with an egg wash (1 beaten egg + 1 Tbsp water) before baking.
• Make-Ahead Tip: Assemble the dough and press into crust the night before; cover and refrigerate, then bake fresh when guests arrive.


")

")


")
